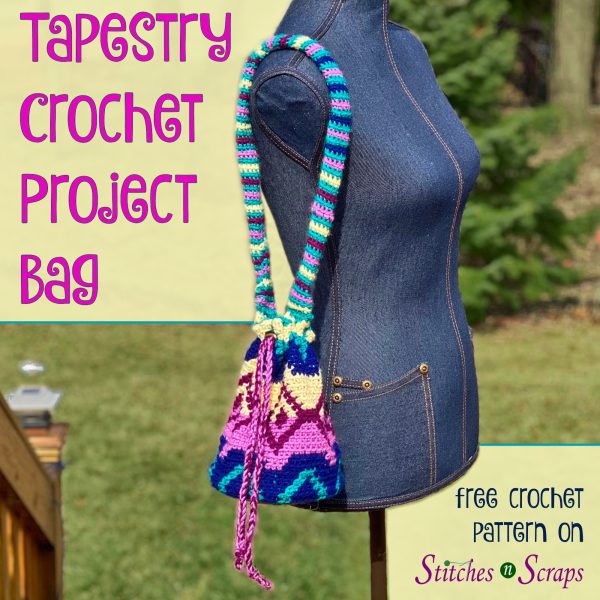
Tapestry Crochet Project Bag Pattern
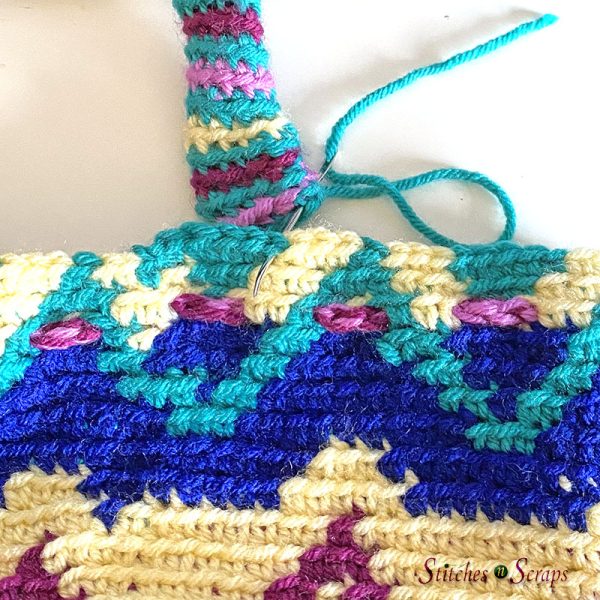
Crochet out loud with bright, bold colors and geometric patterns! This tapestry crochet project bag is just the right size for smaller projects and all the tools you’ll need. Dress it up with a cord lock and sturdy bottom, or keep it simple and slouchy. It makes a great purse too!
This content is protected by copyright. See this Terms of Use / Copyright page for more information.
This post contains sponsored content and/or affiliate links. If you click an affiliate link and make a purchase, I may get a commission.
2022 Bag Along CAL
This tapestry crochet project bag is the second pattern in the 2022 Bag Along CAL. Crochet along through 6 different bag patterns, with multiple technique tutorials for each. See the main CAL post for the full schedule.

Enter the Giveaway
With each new bag pattern, there will be a new giveaway as well! All the giveaway details and entry forms will be in the first post for each bag, which will also list all the materials needed for that bag. Here is the materials list and giveaway info for bag number 2.

The giveaway prizes for the CAL are all sponsored by WeCrochet. This second giveaway ends on April 29th, 2022 at 11:59pm, central time, so be sure to get your entries in!
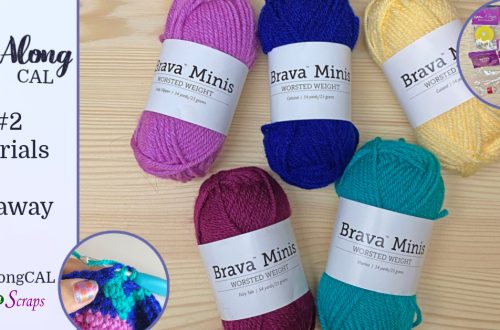
Knit Picks Brava Minis
WeCrochet also provided all of the Knit Picks yarns for the bag designs. For this pattern, I chose Brava Minis. This is the same Brava yarn we know and love, but in mini skeins of only 25g each. Such small skeins are wonderful for making multi-colored projects, without leaving a lot of leftovers or waste. There are loads of colors to choose from too!
Bag Along CAL Tutorials
For each bag in the crochet along, I will be posting several technique tutorials. You can find these tutorials in the Recommended Resources section of the pattern. See the main CAL post for the full schedule of patterns and tutorials.
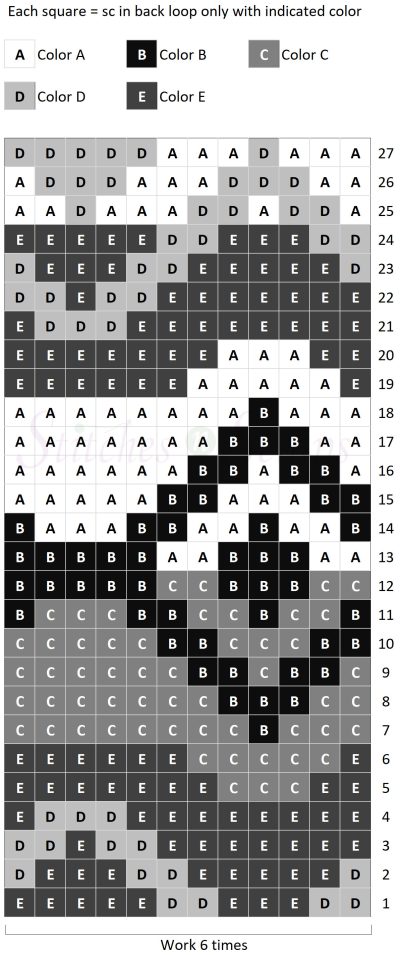
Accessible Charts
For each of the charts in this pattern, I have included both a full color and a grayscale version. They are both the same chart. The grayscale version is intended for printing on black and white printers, and for those who find it easier to read.


Materials
- Yarn: Knit Picks Brava Minis 100% acrylic, worsted weight yarn (54 yds / 25 g per skein), 1 skein each of:
- #29409 Custard
- #29414 Fairy Tale
- #29419 Lady Slipper
- #29420 Marina
- #29401 Celestial
- Hook: Size H / 5mm hook or size needed to match gauge
- Notions:
- Yarn needle
- Stitch marker or scrap of yarn to use as a running stitch marker
- Cord lock for drawstring (optional)
- 6-inch flat circle of stiff plastic or cardboard – something like plastic mesh, a plastic container lid, or a circle cut out of a cardboard box. (optional)
If your gauge is a bit off, you may run out of yarn (see Gauge section for more info). You may want to get an extra skein of Celestial to be safe, and of Marina if you want a longer handle.
Project Level
Intermediate: Tapestry crochet in the round, with multiple color changes. Easy construction and all sc stitches.
Size
6 inches bottom circle diameter, 8 inches height (not including handle).
Gauge
17 sc x 16 rnds = 4 inches.
Use the pattern as a gauge swatch – bottom circle should measure approximately 6 inches in diameter.
Important! This pattern uses almost every bit of the yarn listed, so err on the side of being too tight when measuring gauge. If your gauge is even a little bit too loose, you will likely run out of yarn (particularly the Celestial color). If your gauge matches, or is a bit too tight, you’ll be fine.
Abbreviations used
(Pattern is written in US terms)
ch = chain
sc = single crochet
sc(color) = single crochet with indicated color (e.g. sc(A) = single crochet with color A)
sl st = slip stitch
st(s) = stitch(es)
Special Technique
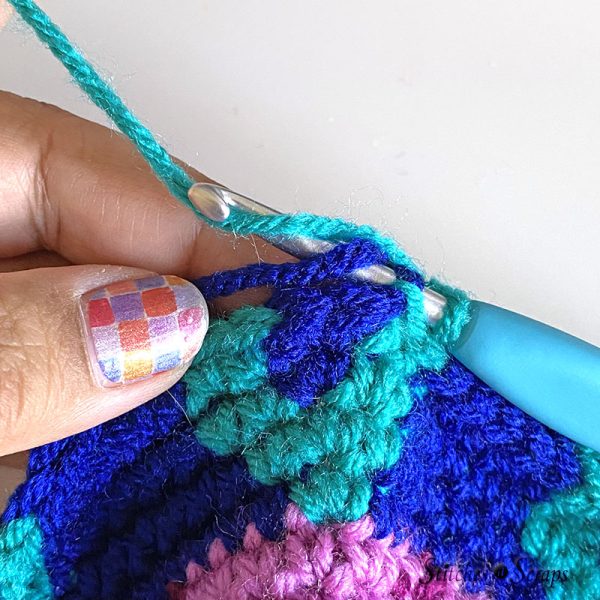
Neater join: To join rounds, remove your hook from the working loop, insert your hook into the first stitch of the round, and pull the working loop through the stitch. This replaces the normal slip stitch join. See this tutorial for a closer look.

Instructions
Entire bag is worked on the right side, do not turn. Join rounds as indicated using either the neater join method (see Special Technique) or with a sl st into the first st of the rnd.
For clean color changes, always change colors in the last step of the previous stitch – use the new color to finish the last stitch of the old color. See this Changing Colors tutorial for a closer look.
Bottom Circle
(Scroll down for charts)
See the video tutorial for this section.
With A, ch 2 or make a magic circle
Rnd 1: 6 sc in 2nd ch from hook or in magic circle, join. Tighten magic circle if applicable. (6 sc)
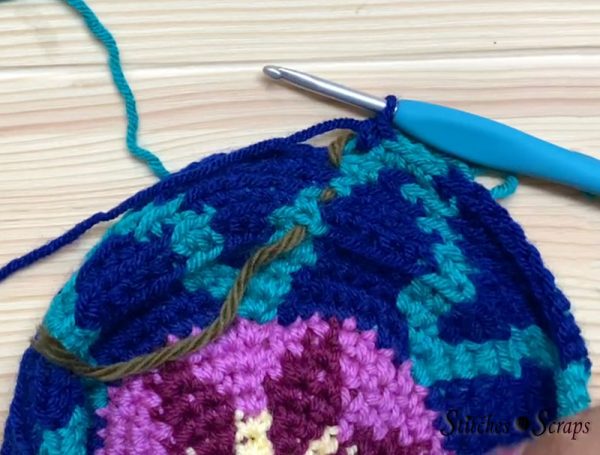
For the remainder of the bottom, each rnd has 2 colors. Work each stitch over the yarn of the unused color so that it is hidden inside your stitch. Do this even for the very first stitch of the rnd, even if you haven’t used the other color yet.

Section 1 – Colors A & B
Rnd 2: Ch 1, sc(A) in first st, sc(B) in same st, (sc(A), sc(B)) in each of next 5 sts, join. (12 sc)
Rnd 3: Ch 1, sc(A) in first st, 2 sc(B) in next st, [sc(A) in next st with A, 2 sc(B) in next st] 5 times, join. (18 sc)
Rnd 4: Ch 1, sc(A) in first st, sc(B) in next st, 2 sc(B) in next st, [sc(A)in next st, sc(B) in next st, 2 sc(B) in next st] 5 times, change to color C in last st, join. (24 sc)
Drop color A.

Section 2 – Colors C & B
Rnd 5: Ch 1, sc(C) in first st, sc(B) in each of next 2 sts, 2 sc(B) in next st, [sc(C) in next st, sc(B) in each of next 2 sts, 2 sc(B) in next st] 5 times, join. (30 sc)
Rnd 6: Ch 1, sc(C) in each of first 2 sts, sc(B) in next st, 2 sc(B) in next st, [sc(C) in each of next 3 sts, sc(B)in next st, 2 sc(B)in next st] 5 times, sc(C) in last st, join. (36 sc)
Rnd 7: Ch 1, sc(C) in each of first 3 sts, 2 sc(B) in next st, [sc(C) in each of next 5 sts, 2 sc(B) in next st] 5 times, sc(C) in each of last 2 sts, join. (42 sc)
Rnd 8: Ch 1, sc(C) in each of first 3 sts, sc(C) in next st, sc(B) in same st, [sc(C) in each of next 6 sts, sc(C) in next st, sc(B) in same st] 5 times, sc(C) in each of last 3 sts, change to color D in last st, join. (48 sc)
Drop both B and C, and begin working over color E in next rnd.

Section 3 – Colors D & E
Rnd 9: Ch 1, 2 sc(D) in first st, sc(E) in each of next 7 sts, [2 sc(D) in next st, sc(E) in each of next 7 sts] 5 times, join. (54 sc)
Rnd 10: Ch 1, sc(D) in first st, 2 sc(D) in next st, sc(D) in next st, sc(E) in each of next 6 sts, [sc(D) in next st, 2 sc(D) in next st, sc(D) in next st, sc(E) in each of next 6 sts] 5 times, join. (60 sc)
Rnd 11: Ch 1, sc(D) in each of first 2 sts, 2 sc(E) in next st, sc(D) in each of next 2 sts, sc(E) in each of next 5 sts, [sc(D) in each of next 2 sts, 2 sc(E) in next st, sc(D) in each of next 2 sts, sc(E) in each of next 5 sts] 5 times, join. (66 sc)
Rnd 12: Ch 1, sc(D) in each of first 2 sts, sc(E) in next st, 2 sc(E) in next st, sc(D) in each of next 2 sts, sc(E) in each of next 5 sts, [sc(D) in each of next 2 sts, sc(E) in next st, 2 sc(E) in next st, sc(D) in each of next 2 sts, sc(E) in each of next 5 sts] 5 times, join. (72 sc)

Bottom Circle Charts:


Bag
(Scroll down for charts)
See the video tutorial for this section.
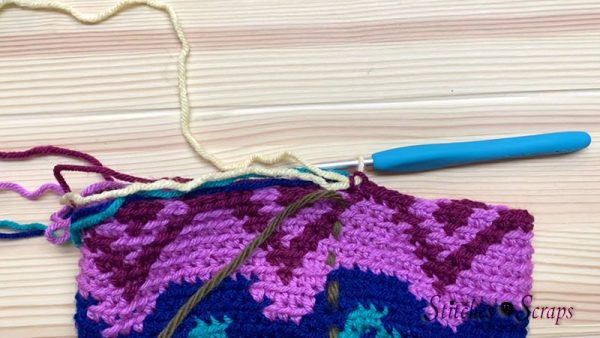
Continuing from bag bottom, work all stitches in back loops only for remainder of bag.
Bag is worked in continuous rounds, do not join unless indicated. Use a stitch marker to mark the first stitch of each rnd. See this Running Stitch Marker tutorial for a closer look.
Each rnd has 2 colors. For each stitch, work over the yarn of the unused color so that it is hidden inside your stitch. Do this even for the very first stitch of the rnd, even if you haven’t used the other color yet.
Section 1 – Colors D & E
Rnd 1: Sc(D) in each of first 2 sts, sc(E) in each of next 3 sts, sc(D) in each of next 2 sts, sc(E) in each of next 5 sts, [sc(D) in each of next 2 sts, sc(E) in each of next 3 sts, sc(D) in each of next 2 sts, sc(E) in each of next 5 sts] 5 times.
Rnd 2: [Sc(D) in next st, sc(E) in each of next 5 sts, sc(D) in each of next 2 sts, sc(E) in each of next 3 sts, sc(D) in next st] 6 times.
Rnd 3: [Sc(E) in each of next 7 sts, sc(D) in each of next 2 sts, sc(E) in next st, sc(D) in each of next 2 sts] 6 times.
Rnd 4: [Sc(E) in each of next 8 sts, sc(D) in each of next 3 sts, sc(E) in next st] 6 times.
Colors E and C
Rnd 5: [Sc(E) in next 2 sts, sc(C) in each of next 3 sts, sc(E) in each of next 7 sts] 6 times.
Rnd 6: [Sc(E) in next st, sc(C) in each of next 5 sts, sc(E) in each of next 6 sts] 6 times.
Colors C and B
Rnd 7: [Sc(C) in each of next 3 sts, sc(B) in next st, sc(C) in each of next 8 sts] 6 times
Rnd 8: [Sc(C) in each of next 2 sts, sc(B) in each of next 3 sts, sc(C) in each of next 7 sts] 6 times
Rnd 9: [{Sc(C) in next st, sc(B) in each of next 2 sts} twice, sc(C) in each of next 6 sts] 6 times
Rnd 10: [Sc(B) in each of next 2 sts, sc(C) in each of next 3 sts, sc(B) in each of next 2 sts, sc(C) in each of next 5 sts] 6 times
Rnd 11: [{Sc(B) in next st, sc(C) in each of next 2 sts} twice, sc(B) in each of next 2 sts, sc(C) in each of next 3 sts, sc(B) in next st] 6 times
Rnd 12: [Sc(C) in each of next 2 sts, sc(B) in each of next 3 sts, sc(C) in each of next 2 sts, sc(B) in each of next 5 sts] 6 times
Colors A and B
Rnd 13: [Sc(A) in each of next 2 sts, sc(B) in each of next 3 sts, sc(A) in each of next 2 sts, sc(B) in each of next 5 sts] 6 times
Rnd 14: [{Sc(B) in next st, sc(A) in each of next 2 sts} twice, sc(B) in each of next 2 sts, sc(A) in each of next 3 sts, sc(B) in next st] 6 times
Rnd 15: [Sc(B) in each of next 2 sts, sc(A) in each of next 3 sts, sc(B) in each of next 2 sts, sc(A) in each of next 5 sts] 6 times
Rnd 16: [{Sc(A) in next st, sc(B) in each of next 2 sts} twice, sc(A) in each of next 6 sts] 6 times
Rnd 17: [Sc(A) in each of next 2 sts, sc(B) in each of next 3 sts, sc(A) in each of next 7 sts] 6 times
Rnd 18: [Sc(A) in each of next 3 sts, sc(B) in next st, sc(A) in each of next 8 sts] 6 times

Colors E and A
Rnd 19: [Sc(E) in next st, sc(A) in each of next 5 sts, sc(E) in each of next 6 sts] 6 times.
Rnd 20: [Sc(E) in each of next 2 sts, sc(A) in each of next 3 sts, sc(E) in each of next 7 sts] 6 times
Colors E and D
Rnd 21: [Sc(E) in each of next 8 sts, sc(D) in each of next 3 sts, sc(E) in next st] 6 times.
Rnd 22: [Sc(E) in each of next 7 sts, sc(D) in each of next 2 sts, sc(E) in next st, sc(D) in each of next 2 sts] 6 times.
Rnd 23: [Sc(D) in next st, sc(E) in each of next 5 sts, sc(D) in each of next 2 sts, sc(E) in each of next 3 sts, sc(D) in next st] 6 times.
Rnd 24: [Sc(D) in each of next 2 sts, sc(E) in each of next 3 sts, sc(D) in each of next 2 sts, sc(E) in each of next 5 sts] 6 times.
Colors A and D
Rnd 25: [{Sc(A) in next st, sc(D) in each of next 2 sts} twice, sc(A) in each of next 3 sts, sc(D) in next st, sc(A) in each of next 2 sts] 6 times.
Rnd 26: [Sc(A) in each of next 2 sts, sc(D) in each of next 3 sts, sc(A) in each of next 3 sts, sc(D) in each of next 3 sts, sc(A) in next st] 6 times.
Rnd 27: [Sc(A) in each of next 3 sts, sc(D) in next st, sc(A) in each of next 3 sts, sc(D) in each of next 5 sts] 6 times.

Fasten off and weave in ends.
Bag Charts:

Drawstring:
Holding 1 strand each of B and C together, ch 120 or to desired length.
Fasten off and weave in ends.
Thread drawstring through rnd 25 of bag, by weaving it in and out between the stitches, in 3 stitch intervals: [Go in, skip 3 stitches, come out, skip 3 stitches] around. This should leave the ends of your drawstring 3 stitches apart at the front of the bag.
Optional: Feed drawstring ends through cord lock.

Tie a knot in each end of the drawstring to secure it.
Handle
With E, ch 10, join with sl st to form a circle. Leave a long starting tail for sewing.
Rnd 1: Ch 1, sc in each st around, change to any color other than E (10 sc)
Work remaining rounds in back loop only, do not join. You should not need to mark the first stitch of each round because of the color changes. Do not work over unused colors.
Get creative switching up the even rnd colors to use up the last bits of your yarn, or choose them randomly. The color progression I used for my handle was [A, C, B] 3 times, A, [C, E] 4 times, C, [A, B, C] 8 times.
Carry unused colors up at the end of each round until they are needed again.

Rnd 2: With any color other than E, sc in each st around, change to E.
Rnd 3: With E, sc in each st around, change to any color other than E.
Repeat rnds 2 and 3 until you run out of color E yarn, or until you have the length you would like. Weave in ends as you go, other than the long starting tail, so that you don’t have to turn the tube inside out to do it later.
Fasten off, leaving a long tail for sewing.
Flatten one end of the handle and sew it to the inside of one side of the bag.
Flatten the other end and sew it to the inside of the other side of the bag. Make sure not to twist the handle as you do this.
Weave in any remaining ends.
Optional: Insert cardboard or plastic circle into bottom of bag.

Rate this Tapestry Crochet Project Bag Pattern!
I hope you enjoyed this tapestry crochet project bag pattern.
A downloadable pdf of this pattern is available on Ravelry for a small fee. The fee for the pdf format is to offset the advertising revenue lost when you print or download the pattern rather than viewing it online.
Do you want the best of Stitches n Scraps delivered right to your inbox? Don’t miss a stitch – Subscribe now!


3 Comments
Kelly Stamper
I really like this project bag pattern. Seems that I’m drawn to colorful, patterned and/or textured patterns! I look forward to making this! I plan to use my stash for this project as I have A LOT of yarn that should be used before I can justify buying more! I look forward to that day!
Alexandra
Wow! What a gorgeous bag!
Pia Thadani
Thanks! 🙂