How to Start a Crochet Circle – 3 Ways
Learn how to start a crochet circle with a ring of chains, a magic circle, or by working into a chain. All of these three methods work out to be more similar than you might think!

This content is protected by copyright. See this Terms of Use / Copyright page for more information.
This post contains sponsored content and/or affiliate links. If you click an affiliate link and make a purchase, I may get a commission.
Ring of Chains Method
This is the first way most people learn to start a crochet circle, and is by far the easiest for most new crocheters.
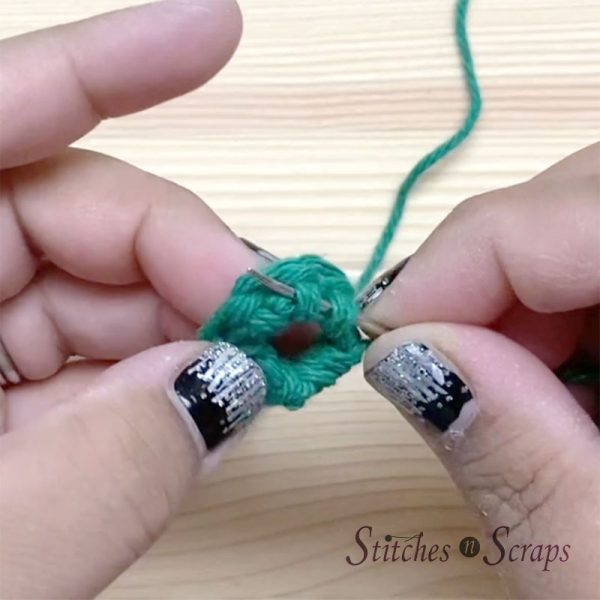
Start by chaining 4 (or 6, depending on your pattern) and joining with a slip stitch to form a ring.

Now chain as many as you need for your stitches (1 for sc, 2 for hdc, 3 for dc, etc) and work your first round into that circle.
This method leaves an open circle at the center, which you can close with the tail. After you finish your project, sew the starting tail through the “legs” of each stitch in a circle.
Sewing your tail in this way basically creates a magic ring. Pull on the tail to tighten the center of the circle, and then weave in your end as normal. It is the same effect as if those stitches had been worked into a magic ring to begin with, except that you have a ring of chains embedded in the stitches as well.
Pros of the ring of chains method:
- Easiest to do.
- Stronger because of the extra chains.
Cons of the ring of chains method:
- Leaves an open center until sewn closed with the tail.
- Bulkier because of the extra chains.
When to use the ring of chains method:
- If you want an open circle at the center as a design element
- If extra strength is desired, such as for a basket bottom.
Magic Circle Method
Most crocheters either love magic circles or hate them, and I sometimes think it depends on how they were taught. At its essence, a magic circle is nothing more than a loose slip knot. Yes, really!
Make a LOOSE slip knot such that the knot part can be tightened by pulling on the tail. The working loop will be tightened by pulling on the working yarn. If you’re not sure how to do that, here is a tutorial for making a slip knot that will work this way.
Keep this knot loose, do not tighten it all the way.

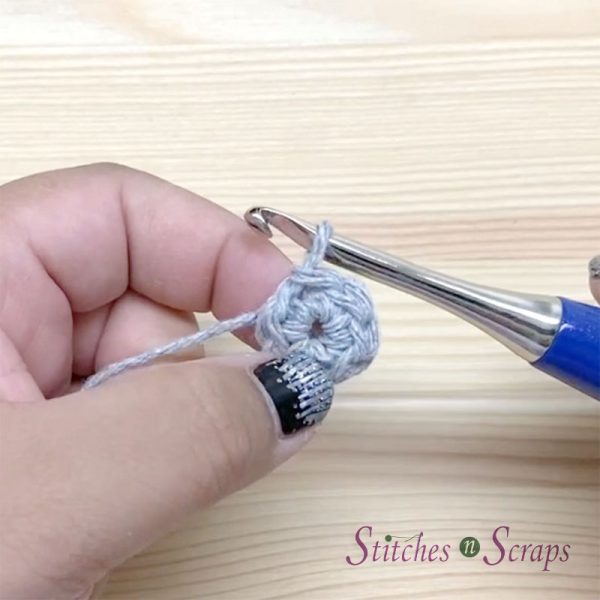
Now holding this ring open, chain up to the height of your stitches (1 for sc, 2 for hdc, 3 for dc, etc) and work the first round of your circle into the open ring.
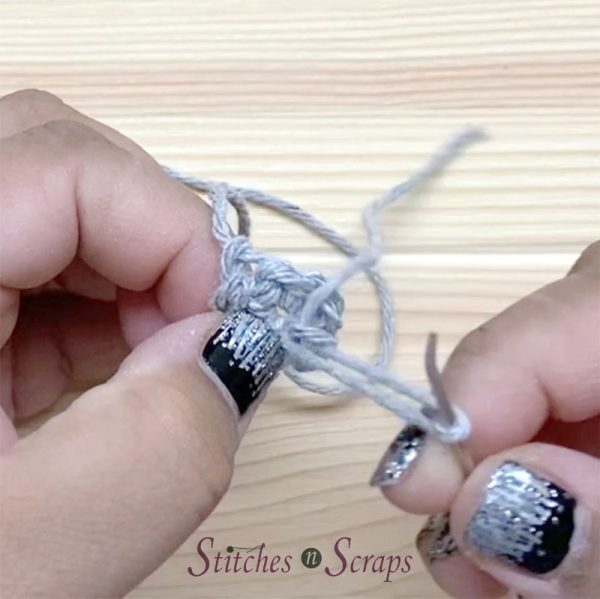
When you finish your round, pull on the tail to tighten the ring (the knot part of the slip knot).

Pros of the magic circle method:
- Closed circle without sewing
- Many methods for making the circle / slip knot so you can find the one you like best.
Cons of the magic circle method:
- Only 1 strand of yarn holding center together
- Open circle can be floppy and hard to manage when working into it.
When to use the magic circle method:
- When you want less bulk in your starting circle.
- Great for most garments such as hats and socks.
Working Into a Chain Method
Another common way to start a crochet circle is by working into a chain. Start by chaining however many chains you need for your stitch, plus one. So for a single crochet that would be 2 chains, for a double crochet it would be 4 chains. Here we are going to make a single crochet circle.

Now work the first round of your circle into the furthest chain from your hook.
This method has a slip knot at the end where you started your chain, and leaves a bit of a hole because you can’t pull it closed.
But Wait!
A slip knot is, in essence, a tight chain that isn’t connected to anything. Which means, if you remove the slip knot, the next chain after it becomes the new slip knot. in this method, all your stitches were worked into that very same chain that is now the new slip knot. And we know that working into a slip knot is the same as the magic loop.
So that all boils down to this – if you remove the slip knot after finishing your round, you end up with the exact same effect as the magic loop method. There’s no more bump, and you can now pull the ring closed by pulling on the tail!
Pros of the working into a chain method:
- Can tighten center if you remove the slip knot.
- Less floppy to work into than a magic loop.
Cons of the working into a chain method:
- Needs one extra step of removing the slip knot to get the same effect as a magic loop.
When to use the working into a chain method:
- If you find the magic loop too floppy or hard to work with
- Everywhere you would otherwise use a magic loop!
How to Start a Crochet Circle Video Tutorial
Watch This Video on YouTube

Rate this How to Start a Crochet Circle tutorial!
Do you want the best of Stitches n Scraps delivered right to your inbox? Don’t miss a stitch – Subscribe now!


6 Comments
Akasha Pratt
Can you please go step by step please I’m a visual learner and I would like to make something for me mom
Pia Thadani
Did you take a look at the video? It’s right at the end of the post.
Akasha Pratt
It won’t work for me
Pia Thadani
Ok, If you mean the embedded video won’t play, that’s likely a problem on your end (usually an ad blocker issue). Did you click the link just below the video that takes you to YouTube to watch it instead?
Here’s the direct link: https://youtu.be/kRqPnxg5hYU
Akasha
I mean I need the step by step instructions for the Magic Circle Method
Pia Thadani
yes, that is in the video. 2 minutes and 37 seconds in.
https://youtu.be/kRqPnxg5hYU?t=157