Tutorial – Continuous rounds and running stitch markers
What are continuous rounds?
Continuous rounds are a way to work in the round without ever joining or turning your work. When you finish one round, you simply continue working around again. There’s no slip stitch and no chain to start the next round, so there is no visible “seam”. Also, since you never turn, you will always be working on the right side of the fabric. These two characteristics make this an ideal technique for amigurumi, and it’s often used for things like hats and socks as well.

Without a visible joining, it’s extremely important to mark the first stitch of each round. You can use a normal stitch marker and move it with each round, but you will only be marking the round you are currently on. If you make a mistake and need to rip out more than 1 round, you could still easily lose your place. You could try using a separate stitch marker for each round, but that’s a lot of stitch markers!
Running stitch markers:
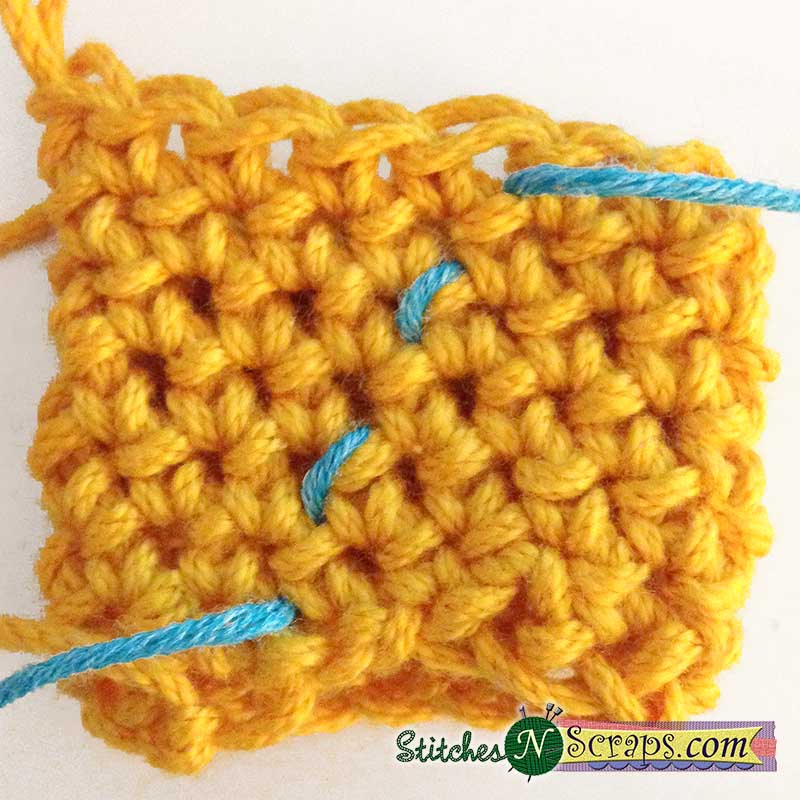
A better option is to use a running stitch marker. This is simply a scrap piece of yarn that is woven back and forth between the rounds. A running stitch marker can also be a great help in counting rounds, as you can count how many times the marker moves back and forth.
For your marker, use a contrasting piece of yarn, preferably something slippery and a lighter weight than your current yarn. This way you will be able to pull it out easily later, and it won’t leave gaps or affect your gauge. When you complete your first round, lay your marker yarn over your work before starting the next round. When you work the first stitch of the next round, the yarn will be trapped between the stitches.
 At the end of each following round, bring the marker yarn back over your work – if it’s in the back, bring it to the front, if it’s in the front, flip it to the back. This way the yarn is passed back and forth, between the last stitch of each round and the first stitch of the next round.

To keep from accidentally pulling out your stitch marker as you work, you may want to secure it at the bottom. I usually tie the tail from the stitch marker to the starting tail of my project. I keep the knot near the end of the tail. That way if it gets too tight and I can’t take it out later, I can just cut it off.
 You may notice as you go, that the marker shifts slightly to the right with each round, or to the left if you’re left handed. Why does this happen? Read this tutorial to find out!


5 Comments
Donna Osgood
No wonder I’m always losing myself and adding stitches…I’m starting the next round in the wrong stitch! Thanks. I’ll be back tomorrow for the next post.
Pia Thadani
I totally used to do that too! Hated amigurumi until I figured it out 🙂
Donna Osgood
Julie
Came across this pattern & thought this would be great for Xmas gifts. Can’t wait to try it. Thank you!
Pia Thadani
That’s awesome! But which pattern do you mean? (You left this comment on the running stitch markers tutorial, so it could be one of several patterns that use this 🙂 )