Crochet Tutorials
Ready for a new crochet stitch, technique, or pattern? You’re in the right place! Browse all the crochet tutorials, or select a category from the dropdown menu. What will you learn today?

Visible seams can make or break the overall look of a project, particularly if multiple colors are involved. In this ...More
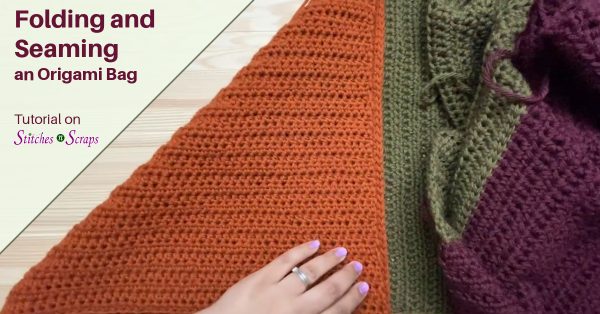
With some simple folding and seaming, you can turn a plain rectangle into an origami bag! This tutorial is designed ...More
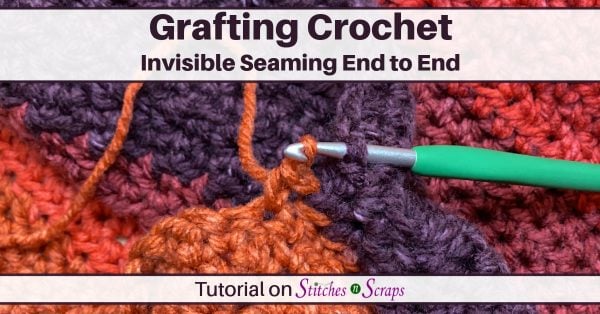
Have you ever wanted to invisibly join two pieces of crochet, end to end? Do you want to add length ...More

Do you like crisp, clean stripes? Want a smooth transition from one color to the next? Try working slip stitch ...More

Steampunk Cyanide is a 12-inch square full of cogs, doodads, and other thingamajigs. This crochet blanket square video tutorial will ...More

Learn how to crochet the flower stitch! Make 3-dimensional flowers that pop up off your fabric, and see some ways ...More
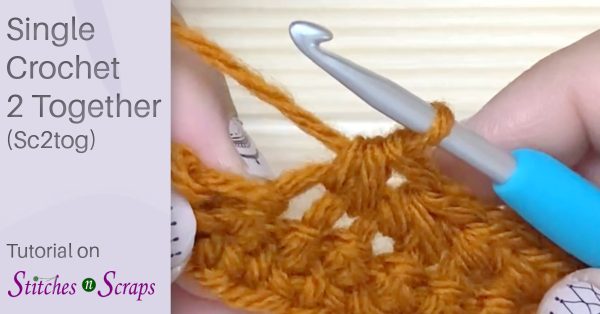
Decreases create shaping and curves in your crochet projects. Learn how to decrease from 2 stitches to 1, with a ...More

Make your final round flawless! Joining your last round to finish a crochet project can leave an unsightly bump. The ...More

Straighten your double crochet rows with the chainless starting double crochet (csdc) stitch. Eliminate those floppy edges and gaps by ...More
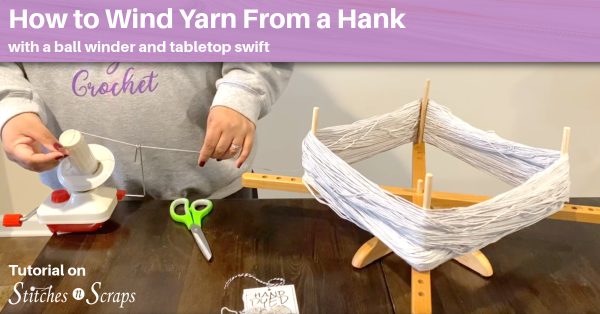
Some yarns, particularly hand dyed or artisan yarns, come in hank format. These yarns need to be wound into a ...More