Invisible Join for Crocheting in the Round
Make your final round flawless! Using a slip stitch to join the last round of your crochet project can leave an unsightly bump. The invisible join technique eliminates the bump for a smooth, seamless finish.

This content is protected by copyright. See this Terms of Use / Copyright page for more information.
This post contains sponsored content and/or affiliate links. If you click an affiliate link and make a purchase, I may get a commission.
The slip stitch join
The traditional way to finish working in the round is to join your last round with a slip stich. Unfortunately, this creates a visible bump at the join.
The invisible join
Instead of the slip stitch, we can sew our final round closed for a more seamless finish. This method creates a loop that mimics the tops of the other stitches, and eliminates the unsightly bump.

The shape of a stitch
Notice how the top of a stitch is formed. The yarn comes out of the center of the previous stitch, goes under both legs of the next stitch, and then goes back down through the center of the previous stitch again. This is the path we are going to follow.
Fasten off
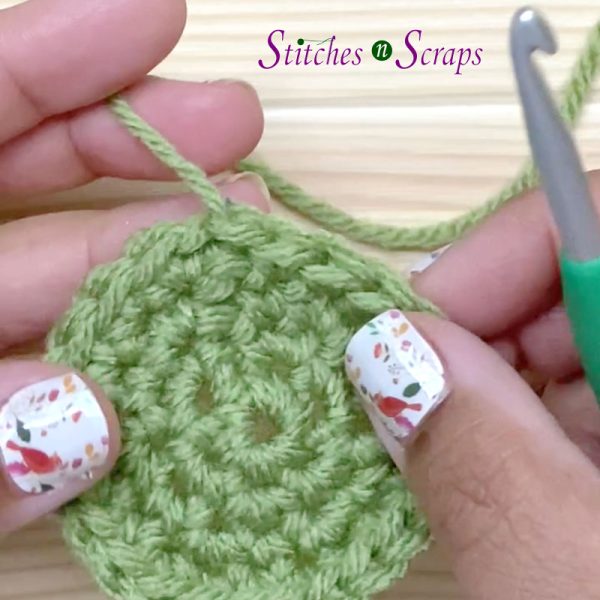
Fasten off first. Note that you do not need to draw the yarn through your working loop to fasten off. This creates an extra chain that you don’t need. Just pull your working loop up big until the yarn end comes out. Place your tail on a yarn needle, and we’re ready to join.
Under the next stitch
The yarn is already coming out of the center of our last stitch. Since we’re working in the round, our next stitch is the first stitch of the round. Insert your needle under the entire top of that stitch. It should go under both legs.

For this technique, it does not matter if you go under from back to front, or from front to back. Either way will work.
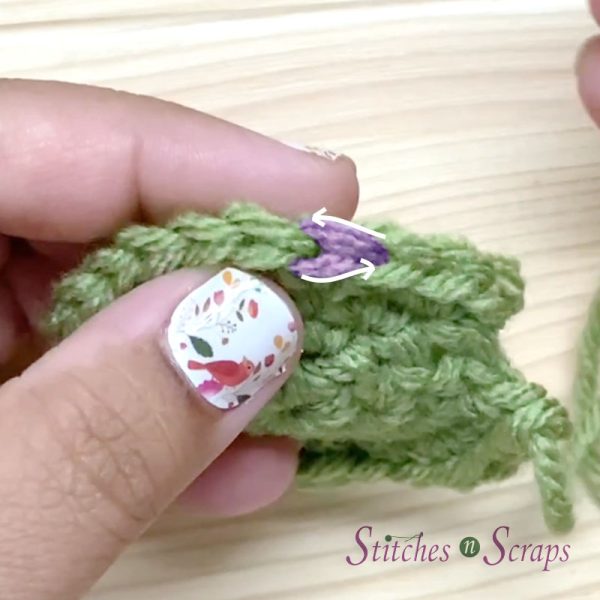
Down through the middle
After going under the first stitch, it’s time to go back down through the middle of the last stitch. This finishes the V shape we’re looking for. Insert your needle down through the middle of the stitch and out the back.

While you could go under just the one back loop, I prefer to catch at least 2 loops. This helps to secure the yarn and keep your tension steady. You have now created a new stitch top and joined your final round.

Tighten the join
Pull on the tail to tighten the join, but don’t pull too hard. You want your new stitch to be the same size and tension as the rest of the stitches.

Invisible Join Video Tutorial
Watch This Video on YouTube

Rate this Invisible Join tutorial!
Do you want the best of Stitches n Scraps delivered right to your inbox? Don’t miss a stitch – Subscribe now!


2 Comments
BRENDA DUFOUR
I love the invisible join for crocheting in the round. The directions are extremely well written and easy to understand. It looks good. Thanks
Pia Thadani
Thank you!