Folding and Seaming an Origami Bag
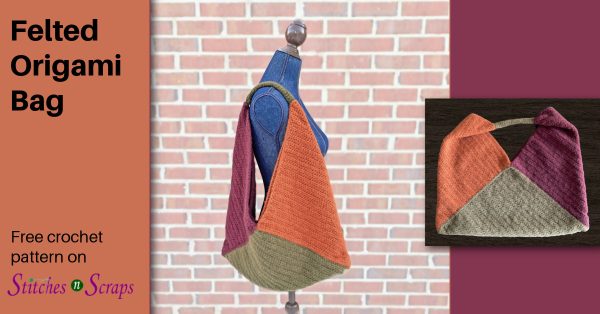
With some simple folding and seaming, you can turn a plain rectangle into an origami bag! This tutorial is designed to go along with my Felted Origami Bag pattern, but the same techniques can be used with any knit or crochet rectangle.

This content is protected by copyright. See this Terms of Use / Copyright page for more information.
This post contains sponsored content and/or affiliate links. If you click an affiliate link and make a purchase, I may get a commission.
Bag Along CAL
The sample shown in this video is the Felted Origami Bag. This is the first pattern in the 2022 Bag Along CAL. See the full schedule and learn how to join in the fun, in the main Bag Along CAL post.
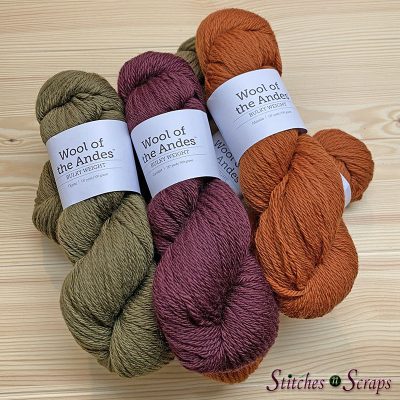
Featured in this tutorial – Knit Picks Wool of the Andes Bulky yarn
WeCrochet provided the Wool of the Andes Bulky yarn that I used for the origami bag design. In the video you will see the colors Masala, Thyme, and Currant.
Starting Rectangle
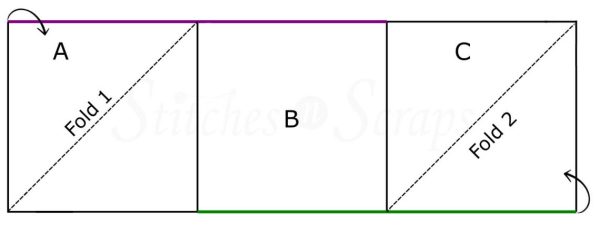
In order for this folding and seaming technique to work out, it’s very important that the rectangle be 3 times as long as it is wide. If your rectangle is not the correct 1:3 ratio, the sides won’t meet up like they should when you fold it.

For the bag in the video, I divided the rectangle into 3 squares of different colors. This makes it super easy to see where the folds should start and end. If your rectangle does not have these color changes, you may want to divide the long edge into 3 sections with stitch markers.
Folding and seaming steps
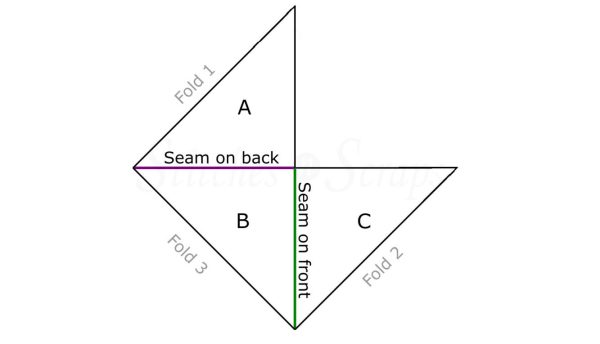
Following this diagram, fold two opposite corners in to create a parallelogram shape. The top left corner folds down, and the bottom right corner folds up. The short side edges should each cover 1/3 of the longer side edges.
Then fold that parallelogram in half across the middle.
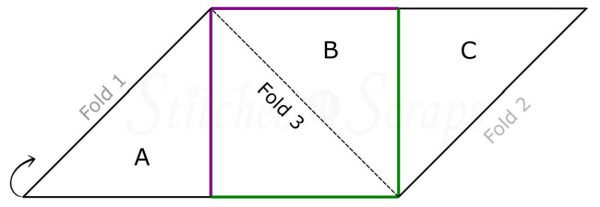
Finally, seam the edges indicated on the diagram. You will have one seam on each side of the bag.
Clipped corners and the handle
The sample bag in the video has unique, “clipped” corners. I attached these to a small crochet tube to create the look I wanted for the handle.

You can connect your corners with any type of handle you like, and they don’t need to be clipped to make the bag work. In fact, you can skip the handle altogether and just sew the corners together with nothing in between!
Folding and seaming video tutorial
Share this tutorial on Pinterest! Here’s an image perfect for pinning:

Rate this folding and seaming video!
Do you want the best of Stitches n Scraps delivered right to your inbox? Don’t miss a stitch – Subscribe now!


You May Also Like

Box Bottom Bag Lining Tutorial

Split Single Crochet Stitch in Rounds and Rows
