Free Crochet Patterns
Find the perfect, free crochet pattern for your next project! Browse them all, or select a category from the dropdown menu. Where will your creativity take you today?

Wavelets Baby Romper Crochet Pattern
Dress baby for fun in this adorable baby romper crochet pattern! Easy wavelets flow gently across the main portion of the body. Breezy straps and a generous fit allow for all the wiggles and giggles that come with playtime!

This content is protected by copyright. See this Terms of Use / Copyright page for more information.
This post contains sponsored content and/or affiliate links. If you click an affiliate link and make a purchase, I may get a commission.
King Cole Cottonsoft DK yarn
As part of their ambassador program, King Cole sent me lots of yarns to try out. For this baby romper crochet pattern, I chose the Cottonsoft DK yarn. The colors they sent me were #3460 Opal and #3462 Candy Floss.

Cotton yarns can sometimes be stiff, but this one has great drape to it. It’s silky smooth with a pretty shine as well. Use the “Find a Stockist” tool on the King Cole website to find this yarn at a store near you! You can also buy it online at Lovecrafts.
Sizing Adjustments
Babies come in all sorts of shapes and sizes, and sometimes don’t fit perfectly into one size or another. This baby romper crochet pattern can easily be adjusted to fit just right! The pattern includes 5 different sizes from 3 months to 24 months. First, choose a size to follow based on the baby’s measurement at their widest point. That might be the hips, waist, or chest.
Then, when you get to the “body” portion, you can adjust the length by working more or fewer repeats of the wavelet pattern. If the baby is long and lanky, you may need to add a few rows. If the baby is more on the pudgy side, you may want to remove a few rows.
Finally, when working on the “finishing” portion, you can make slight adjustments to the fit by placing the buttons and snaps a little further in or closer to the edge as needed.
Materials
- Yarn: King Cole Cottonsoft DK weight yarn
- 95 [115, 140, 175, 205] yds #3460 Opal Jade (A)
- 20 [25, 30, 40, 45] yds #2758 Candy Floss (B)
- Hook: US size 7 (4.5 mm) crochet hook or size needed to match gauge
- Notions:
- Yarn needle
- 3/4″ buttons (2)
- Size 0 snaps (3)
- Stitch marker
Project Level
Intermediate – shaping, edging, multiple sections, crocheting in rows and rounds.
Sizes
3mo [6mo, 12mo, 18mo, 24mo]
- Circumference at widest point (chest/waist/hips): 15 [16.5, 18, 19.5, 21] inches.
- Total length, not including straps: 9 [9.5, 11.5, 12.5, 14.25] inches.
- Length from underarm to top of leg opening: 4 [4.5, 5, 5.75, 6.25] inches.
Gauge
16 hdc x 12 rows = 4 inches
Abbreviations used
ch = chain
hdc = half double crochet
dc = double crochet
rnd = round
RS = right side
sk = skip
sl st = slip stitch
sp = space
st(s) = stitch(es)
WS = wrong side
Instructions:
Front Crotch
With A, ch 13 [14, 15, 16, 17].
Row 1: Sc in 2nd ch from hook and in each ch across. (12 [13, 14, 15, 16] sc)
Row 2: Ch 1, turn, sc in each st across.
Sizes 18mo, 24mo only: Repeat row 2 once more.
All Sizes:
Next Row: Ch 1, turn, 2 sc in first st, sc in each st across to last st, 2 sc in last st. (14 [15, 16, 17, 18] sts)
Repeat last row an additional 6 [5, 6, 5, 6] times. (26 [25, 28, 27, 30] sts)
Next Row: Ch 1, turn, (hdc, 2 sc) in first st, sc in each st across to last st, (2 sc, hdc) in last st. (30 [29, 32, 31, 34] sts)
Sizes 6mo, 12mo, 18mo, 24mo only: Repeat last row an additional [1, 1, 2, 2] times. ([33, 36, 39, 42] sts)
The last row worked is a WS row.
All sizes: Fasten off.

Back bottom:
With A, ch 13 [14, 15, 16, 17].
Row 1: Hdc in 2nd ch from hook and in each ch across. (12 [13, 14, 15, 16] hdc)
Row 2: Ch 1, turn, hdc in each st across.
Repeat row 2 an additional 4 [4, 6, 6, 8] times.
Next Row: Ch 1, turn, 2 hdc in first st, hdc in each st across to last st, 2 hdc in last st. (14 [15, 16, 17, 18] sts)
Repeat last row an additional 8 [7, 8, 9, 10] times. (30 [29, 32, 35, 38] sts)
Sizes 6mo, 12mo, 18mo, 24mo only: Next Row: Ch 1, turn, (dc, 2 hdc) in first st, hdc in each st across to last st, (2 hdc, dc) in last st. ([33, 36, 39, 42] sts)
The last row worked is a WS row.

All sizes: Change to B, do not fasten off A
Body
Join rounds where indicated with a sl st in the first st of the round. Carry unused color up in the first or last stitch of each round.
With B, and continuing from back bottom
Rnd 1 (RS): Ch 1, turn, sc in each st across back bottom, with RS of front crotch facing, sc in each st across front crotch, join. (60 [66, 72, 78, 84] sts)

Rnd 2: With B, ch 1, turn, hdc in first st, dc in each of next 2 sts, hdc in next st, sc in each of next 2 sts, [hdc in next st, dc in each of next 2 sts, hdc in next st, sc in each of next 2 sts] around, join with sl st to first st, change to A. (10 [11, 12, 13, 14] wavelets for a total of 60 [66, 72, 78, 84] sts)
Rnd 3: With A, ch 1, turn, sc in each st around, join.
Rnd 4: With A, ch 1, turn, hdc in first st, sc in each of next 2 sts, hdc in next st, dc in each of next 2 sts, [hdc in next st, sc in each of next 2 sts, hdc in next st, dc in each of next 2 sts] around, join with sl st to first st, change to B. (10 [11, 12, 13, 14] wavelets for a total of 60 [66, 72, 78, 84] sts)
Rnd 5: With B, ch 1, turn, sc in each st around, join.
Repeat rnds 2-5 an additional 2 [2, 3, 3, 4] time(s), then repeat rnd 2 once more, fasten off B.
Sizes 6 mo and 18mo only: Repeat rnds 3-4 once more but do not change colors at the end of the last rnd.
Back Yoke:
Row 1 (RS): Sl st in each of first 3 [4, 4, 5, 5] sts, ch 1, hdc in each of next 24 [25, 28, 31, 34] sts, leaving remaining sts unworked.
Sizes 12 mo, 18 mo, 24 mo only: Repeat last row an additional [2, 2, 5] times.
All Sizes:
Decrease Row: Ch 1, turn, hdc2tog, hdc in each st across to last 2 sts, hdc2tog. (22 [23, 26, 29, 32] sts)
Repeat decrease row an additional 3 [3, 3, 3, 4] times. (16 [17, 18, 21, 24] sts)
Last row: Ch 1, turn, hdc in each st across.
Do not fasten off.
First strap:
Row 1 (RS [RS, WS, WS, RS]): Ch 1, turn, hdc in each of first 3 [3, 3, 5, 5] sts, leaving remaining sts unworked. (3 [3, 3, 5, 5] sts)
Row 2: Ch 1, turn, hdc in each st across.
Repeat row 2 an additional 5 [6, 8, 10, 12] times
Buttonhole row: Ch 1, turn, hdc in first 1 [1, 1, 2, 2] st(s), ch 1, sk next st, hdc in last 1 [1, 1, 2, 2] st(s). (2 [2, 2, 4, 4] sts, 1 ch-1 sp)
Last row: Ch 1, turn, hdc in each st across to ch-1 sp, hdc in ch-1 sp, hdc in each st across to end. (3 [3, 3, 5, 5] sts)
Fasten off.
Second strap:
With (RS [RS, WS, WS, RS]) facing and continuing in unworked sts on back yoke after first strap, sk next 10 [11, 12, 11, 14] sts, join A with sl st in next st.
Row 1: Ch 1, turn, hdc in each of remaining 3 [3, 3, 5, 5] sts. (3 [3, 5, 5, 5] sts)
Continue as for right strap.

Front Yoke:
With RS facing and continuing in unworked sts on body after back yoke, sk next 6 [8, 8, 8, 8] sts, join A with sl st in next st.
Row 1 (RS): Ch 1, hdc in each of first 24 [25, 28, 31, 34] sts, leaving remaining sts unworked.
Sizes 12 mo, 18 mo, 24 mo only: Repeat last row an additional [1, 1, 3] times.
All Sizes:
Decrease Row: Ch 1, turn, hdc2tog, hdc in each st across to last 2 sts, hdc2tog. (22 [23, 26, 29, 32] sts)
Repeat decrease row an additional 3 [3, 3, 3, 4] times. (16 [17, 18, 21, 24] sts)
Fasten off.

Edging
The idea of the edging is to work evenly around all the exposed edges. The actual stitch count isn’t important, as long as the fabric doesn’t pucker or ruffle.
Bottom edging:
With RS facing and working into the bottom of the first row of the front crotch, join A with a sl st in first st.
- Ch 1, sc in each st across bottom of front crotch
- Ch 1, sc in side of each row around leg opening
- Ch 1, sc in each st across back bottom
- Ch 1, sc in side of each row around leg opening
- Ch 1, join with a sl st to first st, fasten off. (76 [78, 88, 94, 104] sts)
Top edging:
With RS facing, join A with a sl st in first st of last row of front yoke.
- Ch 1, sc in each st across top of front yoke,
- Ch 1, sc in side of each row across side edge of front yoke.
- Sc in each skipped st at underarm.
- Sc in side of each row across side edge of back yoke and strap.
- Ch 1, sc in each st across end of strap.
- Ch 1, sc in side of each row across side edge of strap.
- Sc in each skipped st on back yoke.
- Sc in side of each row across side edge of second strap.
- Ch 1, sc in each st across end of second strap.
- Ch 1, sc in side of each row across side edge of strap and side of back yoke.
- Sc in each skipped st at underarm.
- Sc in side of each row across side edge of front yoke.
- Ch 1, join with a sl st to first st, fasten off. (102 [112, 132, 146, 170] sts)
Finishing
Weave in ends, wash, and block.
Lay flat and fold up back bottom so that it overlaps front crotch by about 1/2 inch. Attach 3 snaps where the layers overlap.

Fold straps over so that they overlap front yoke by about 1/2 inch. Sew buttons to yoke in line with button holes.

You can adjust the fit slightly as needed by sewing the buttons higher or lower. For an adjustable fit, try sewing 2 buttons on each strap, one above the other.
Share this pattern on Pinterest! Here’s an image perfect for pinning:

Rate this baby romper crochet pattern!
I hope you enjoyed this baby romper crochet pattern. A downloadable pdf of this pattern is available on Ravelry for a small fee.
Do you want the best of Stitches n Scraps delivered right to your inbox? Don’t miss a stitch – Subscribe now!

Easy Adult Bib Crochet Pattern
Sloppy shaving, messy meals, or makeup mishaps – protect your clothes with an easy adult bib! This beginner-friendly crochet pattern is fast and fun in easy-to-wash cotton yarn. Make a bunch so you always have a clean one on hand.

This content is protected by copyright. See this Terms of Use / Copyright page for more information.
This post contains sponsored content and/or affiliate links. If you click an affiliate link and make a purchase, I may get a commission.
Summer Quickies Crochet Along
The Easy Adult Bib is my pattern in the CAL Central 2022 Summer Quickies Crochet Along. Check out the full schedule in the main CAL post. While you’re there, you can enter the giveaway too!

Join in the fun on the CAL Central Crochet Facebook group, and be sure to use the hashtag #CALCentralCrochet when you share your projects.
Adaptive Design
I designed this easy adult bib for myself, after dropping a makeup brush one too many times when I was in a hurry. The wrap-around, buttoned design can be put on and removed quickly, without messing up your hair.

The bib could also be useful for adults who have physical challenges that make eating or drinking messier. If the button might be a struggle for the user, consider replacing it with a snap, hook and loop closure, or other closure instead.
Lion Brand 24/7 Cotton Yarn
Lion Brand generously provided the 24/7 cotton yarn for this design. It’s a soft and sturdy, 100% mercerized cotton yarn that holds up well to repeated washing. For my bib I chose colors 108G Denim and 107I Sky.

Materials
- Yarn: Lion Brand 24/7 Cotton worsted weight yarn
- 175 yds 108G Denim
- 10 yds 107I Sky
- Hook: US size H (5 mm) crochet hook or size needed to match gauge
- Notions:
- Yarn needle
- 1″ button, or another type of closure (e.g. snaps or hook and loop)
- Stitch marker
Project Level
Easy – Mostly double crochet, some shaping and edging.
Size
Width: 11 inches
Length from neck to bottom edge: 13 inches
Neck opening circumference: 20 inches

Gauge
11 dc x 6.5 rows = 4 inches.
Abbreviations used
ch = chain
dc = double crochet
rnd = round
sk = skip
sl st = slip stitch
sp = space
st(s) = stitch(es)
RS = right side
Instructions:
Foundation Chain: Ch 70.
Yoke
Row 1 (RS): Dc in 4th ch from hook (skipped chs count as first dc), dc in each of next 8 chs, (dc, ch 1, dc) in next ch, dc in each of next 16 chs, (dc, ch 1, dc) in next ch, dc in each of next 12 chs, (dc, ch 1, dc) in next ch, dc in each of next 16 chs, (dc, ch 1, dc) in next ch, dc in each of last 10 chs. (72 dc, 4 ch-1 sps)
Row 2: Ch 3 (counts as dc throughout), turn, [dc in each st across to next ch-1 sp, (dc, ch 1, dc) in next ch-1 sp] 4 times, dc in each remaining st across. (80 dc, 4 ch-1 sps)
If using a button as shown in the sample, work the buttonhole version of row 3. If using some other kind of closure that does not require a hole, work the “other closures” version of row 3.
Row 3 (buttonhole): Ch 3, turn, [dc in each st across to next ch-1 sp, (dc, ch 1, dc) in next ch-1 sp] 4 times, dc in each st across to last 5 sts, 2 dc in next st, sk next st, dc in each of last 3 sts. (88 dc, 4 ch-1 sps)
OR Row 3 (for other closures): Repeat row 2. (88 dc, 4 ch-1 sps)
Rows 4-6: Repeat row 2. (104 dc, 4 ch-1 sps)
Do not fasten off.

Front
Row 7 (RS): Turn, sl st in each st across to first ch-1 sp, sl st in first ch-1 sp, ch 3, dc in each st across to next ch-1 sp, dc in ch-1 sp, sk all remaining sts. (30 dc)
Rows 8-19: Ch 3, turn, dc in each st across. (30 dc)
Row 20: Ch 2 (does not count as a st), turn, sk first dc, dc in each st across to last 2 dc, dc2tog. (28 dc)
Rows 21-22: Repeat row 20. (24 dc)
Do not fasten off.
Edging
The purpose of rnd 1 of edging is to sc evenly around the entire edge of the bib, putting a ch-1 sp in each corner. The exact number of stitches is not important as long as the fabric does not pucker or ruffle.
Rnd 1: (Total of 257 sc, 8 ch-1 sps)
- Ch 1, turn, sc in each st across, ch 1. (24 sc, 1 ch-1 sp)
- Working in sides of rows: Work 30 sc evenly spaced across front panel, ending in the first ch-1 sp on the yoke. (30 sc)
- Working into the yoke sts: [Sc in each st across to next ch-1 sp, (sc, ch-1, sc) in ch-1 sp] twice, sc in each st across to end of row, ch 1. (73 sc, 3 ch-1 sps)
- Working into sides of rows along end of yoke: Work 8 sc evenly spaced across, ch 1. (8 sc, 1 ch-1 sp)
- Working into bottom of foundation chain: Sc in each ch across, ch 1. (68 sc, 1 ch-1 sp)
- Working into sides of rows along end of yoke: Work 8 sc evenly spaced across, ch 1. (8 sc, 1 ch-1 sp)
- Working into the yoke sts: Sc in each st across to the ch-1 sp where the front panel starts. (16 sc)
- Starting in the ch-1 sp and working in sides of rows: Work 30 sc evenly spaced across front panel, ch 1, join with sl st to first st. (30 sc, 1 ch-1 sp)

Fasten off.
With RS facing, join Sky in any ch-1 sp.
Rnd 2 (RS): Ch 1, 3 sc in same ch-1 sp, (sc in each st across to next ch-1 sp, 3 sc in ch-1 sp) 7 times, sc in each st across to end. (281 sc)
Fasten off.
Finishing
Weave in all ends.
If you are using a different type of closure, attach that closure instead of button.
Attach button: Lay bib flat, right side up, so that yoke forms a square with the open edges overlapping and the buttonhole on top. Mark the spot underneath the buttonhole and sew the button onto this spot.

Share this pattern on Pinterest! Here’s an image perfect for pinning:

Rate this easy adult bib crochet pattern!
I hope you enjoyed this easy adult bib crochet pattern. A downloadable pdf of this pattern is available on Ravelry for a small fee.
Do you want the best of Stitches n Scraps delivered right to your inbox? Don’t miss a stitch – Subscribe now!

Shells and Cables Market Bag Crochet Pattern
Shop in style this summer with the Shells and Cables crochet market bag! Shells give the bag a delicate, lacy feel. The twisty cables and solid bottom give it the structure to hold up to your farmers’ market finds. Add trendy round handles and a button closure, and you may have the perfect summer bag!

This content is protected by copyright. See this Terms of Use / Copyright page for more information.
This post contains sponsored content and/or affiliate links. If you click an affiliate link and make a purchase, I may get a commission.
2022 Bag Along CAL
This shells and cables crochet market bag is the fourth pattern in the 2022 Bag Along CAL. Crochet along through 6 different bag patterns, with multiple technique tutorials for each. See the main CAL post for the full schedule.
Enter the Giveaway
With each new bag pattern, there will be a new giveaway as well! All the giveaway details and entry forms will be in the first post for each bag, which will also list all the materials needed for that bag. Here is the materials list and giveaway info for bag number 4.
The giveaway prizes for the CAL are all sponsored by WeCrochet. This fourth giveaway ends on August 26th, 2022 at 11:59pm, central time, so be sure to get your entries in!
Knit Picks Dishie Twist
WeCrochet also provided all of the Knit Picks yarns for the bag designs. For this shells and cables crochet market bag pattern, I chose Dishie Twist. It’s a soft and strong, worsted weight, cotton yarn with a twist.
Two colors are twisted together in each skein! In spinning, this effect is called “barberpole”, and it creates a unique texture when you crochet with it.

Dishie also comes in solid colors. If you’re feeling adventurous, try mixing solid and twisted colors! Use one color for the bottom of the bag (1 skein) and 1 color for the rest of the bag (2 skeins).
Bag Along CAL Tutorials
For each bag in the crochet along, I will be posting 2 or more technique tutorials. These tutorials will be available over the next several weeks. As soon as they are posted, I will add the links here.
See the main CAL post for the full schedule of patterns and tutorials.
Materials
- Yarn: 3 skeins of Knit Picks Dishie Twist – 100% cotton, worsted weight yarn (190 yds / 100g per skein). Shown in color #28247 – Conch.
- Hook: US size H/5mm hook or size needed to match gauge
- Notions:
- Scissors
- Yarn needle
- Circular bag handles (see note below)
- 1-2″ button (optional)
- Stitch marker
Circular bag handles come in a variety of sizes, materials, and colors. Any size between about 4″ and 8″ in diameter should be fine. The bag may sit a little differently depending on the diameter. Any color or material you like is fine as well. I used brown, wood handles that are about 5.4″ in diameter.
Project Level
Intermediate: Crossed post stitch cables, working in the round, working around a circular handle.
Size
14 inches x 14 inches, not including handles.
Gauge
15 ldc x 9 rounds = 4 inches.
Use the pattern as a gauge swatch: Bottom should measure 14 inches wide x 2.25 inches tall.

Abbreviations used
(Pattern is written in US terms)
ch = chain
dc = double crochet
dc cross = double crochet cross (see Special Stitches)
hdc = half double crochet
fptr = front post treble crochet
fptr cross = front post treble crochet cross (see Special Stitches)
rnd = round
sc = single crochet
shell = shell stitch (see Special Stitches)
sk = skip
sl st = slip stitch
st(s) = stitch(es)
Recommended Resources
- Shells and Cables stitch pattern (coming soon)
- How to attach circular handles to a crochet bag (coming soon)
- Linked Double Crochet (ldc)
Special Stitches
Linked Double Crochet (ldc):
1st ldc: Ch 3 at the beginning of the row counts as first ldc.
2nd ldc: Insert hook into 2nd ch of starting ch 3 and pull up a loop, insert hook in indicated st or sp and pull up a loop, (yo and pull through 2 loops on hook) twice.


Remaining ldc: Insert hook into the diagonal bar in the middle of the previous ldc and pull up a loop, insert hook in next indicated st or sp and pull up a loop, (yo and pull through 2 loops on hook) twice.


Shell Stitch (shell): (2 dc, ch 1, 2 dc) in indicated st.
When working into a shell, work into the ch-1 sp at the center.
Double Crochet Cross (dc cross): Sk next ch-1 sp, sk next sc, dc in next ch-1 sp, ch 1, working in front of dc just made, dc in skipped ch-1 sp.


When working into the cross on the next row, work into the ch-1 sp at the center.
Front Post Treble Crochet Cross (fptr cross): Fptr around the 2nd st of the cross two rows below your hook, ch 1, working in front of the fptr just made, fptr around the first st of the same cross.


On the current row, skip the sc and 2 ch-1 sps behind the cross. When working into the cross on the next row, work into the ch-1 sp at the center.
Instructions
Entire bag is crocheted on the right side of the work. Do not turn at the end of rounds.
Bottom
Ch 46
Rnd 1: Ldc in 4th ch from hook (skipped chs count as first ldc), ldc in each ch across to last ch, 5 ldc in last ch, working in opposite side of chs, ldc in each ch across to last ch, 4 ldc in last ch, join with sl st to first st. (94 ldc)
You should have 42 ldc across each side, and 5 on each end.
Rnd 2: Ch 3 (counts as first ldc throughout), ldc in each of next 42 sts, 2 ldc in each of next 2 sts, ldc in next st, 2 ldc in each of next 2 sts, ldc in each of next 42 sts, 2 ldc in each of next 2 sts, ldc in last st, ldc in same st as beginning of rnd, join with sl st to first st. (102 ldc)
Rnds 3-5: Ch 3, ldc in next st and in each st around, join with sl st to first st. (102 ldc)
Work should now measure about 14 inches wide x 2.25 inches tall.

Shells and Cables
Video tutorial for this section coming soon!
Scroll down for chart
Rnd 6: Ch 4 (counts as dc and ch-1), 2 dc in first st, ch 1, sk next 2 sts, sc in next st, ch 1, sk next 2 sts, [shell in next st, ch 1, sk next 2 sts, sc in next st, ch 1, sk next 2 sts] around, dc in same st as beginning of rnd to complete first shell, join with sl st to first dc. (17 shells, 17 sc, 34 ch-1 sps)
Rnd 7: Sl st in first ch-1 sp, ch 1, sc in same sp, ch 2, sk next 2 dc, dc cross, ch 2, [sc in next shell, ch 2, dc cross, ch 2] around to last 2 dc, sk last 2 dc, join with sl st to first sc. (17 dc crosses, 17 sc, 34 ch-2 sps)
Rnd 8: Ch 4, 2 dc in first sc, ch 1, sk next ch-2 sp, sc in next cross, ch 1, sk next ch-2 sp, [shell in next sc, ch 1, sk next ch-2 sp, sc in next cross, ch 1, sk next ch-2 sp] around, dc in same st as beginning of rnd to complete first shell, join with sl st to first dc. (17 shells, 17 sc, 34 ch-1 sps)
Rnd 9: Sl st in first ch-1 sp, ch 1, sc in same sp, ch 2, sk next 2 dc, fptr cross, ch 2, [sc in next shell, ch 2, fptr cross, ch 2] around to last 2 dc, sk last 2 dc, join with sl st to first sc. (17 fptr crosses, 17 sc, 34 ch-2 sps)

Rnds 10-35: Repeat rnds 8-9 an additional 13 times. Do not fasten off.
Shells and Cables Chart
Work only the black stitches on the chart. The greyed-out symbols show stitches from the previous section, and connecting stitches at the beginning/end of the round.
Handle
Video tutorial for this section coming soon!
Rnd 36: Sl st in first ch-2 sp, ch 3, ldc in same sp, 2 ldc in next cross, 2 ldc in next ch-2 sp, sk next sc, [2 ldc in next ch-2 sp, 2 ldc in next cross, 2 ldc in next ch-2 sp, sk next sc] around, join with sl st to first st. (102 ldc)
Rnd 37: Ch 3, ldc in each of next 10 sts, place the edge of the first handle against the edge of your work, working around the handle sc in each of next 23 sts, drop handle, ldc in each of next 28 sts, place the edge of the next handle against the edge of your work, working around the handle, sc in each of next 23 sts, drop handle, ldc in each of last 17 sts, join with sl st to first st. (56 ldc, 46 sc)


Fasten off, weave in ends.
Button Closure (optional)
Ch 30, fasten off.
Determine which side of the bag you want to be the back, and find the center stitch, directly under the handle. With right side facing, sew both tails from the chain into that center stitch. Weave each end in separately on the inside of the bag. This should form a long loop.

Turn bag over. Bring the loop through both handles and to the front of the bag. Hold it taught but not stretched, centered along the front of the bag. Mark the furthest point it reaches and sew the button onto that point.

The loop should now comfortably fit around the button, holding the bag closed.

Rate this Shells and Cables Crochet Market Bag Pattern!
I hope you enjoyed this crochet mandala bag pattern.
A downloadable pdf of this pattern is available on Ravelry for a small fee. The fee for the pdf format is to offset the advertising revenue lost when you print or download the pattern rather than viewing it online.
Do you want the best of Stitches n Scraps delivered right to your inbox? Don’t miss a stitch – Subscribe now!

Shell Stitch Crochet Scarf Pattern
Get cozy in the Layered Shells Scarf! This shell stitch crochet scarf pattern is fluffy and warm enough for the coldest winter days. Blending solid and variegated or self-striping yarns creates the lovely marled effect. Have fun experimenting with different combinations on this relaxed, easy project!

This content is protected by copyright. See this Terms of Use / Copyright page for more information.
This post contains sponsored content and/or affiliate links. If you click an affiliate link and make a purchase, I may get a commission.
Christmas in July Crochet Along
The Layered Shells Scarf is my pattern in the 2022 Christmas in July Make Along hosted by Underground Crafter. Check out the full schedule of crochet, knitting, and even sewing patterns in the main MAL post. While you’re there, be sure to scroll down and enter the giveaway too!

Join in the fun on the Facebook group, and be sure to use the hashtag #CALCentralCrochet when you share your projects!
Blending Yarns
The unique look of this pattern comes from using 2 different weights of yarn held together as one. A worsted weight, solid color sets a background.
Neutral or muted colors are a great option for the background. I used Red Heart With Love yarn in Pewter. This was leftover from the yarn that Yarnspirations had given me for the Twists and Turns blanket square.

A lighter weight, self striping or variegated yarn dances in and out of this background, creating a colorful, marled effect. For this yarn, I chose Willow Yarns Wheels in the Eden colorway. I got this in a goodie bag at a conference a few years ago, and it was just waiting for the right project.

I love this combination because one of the colors in the Eden colorway matches the grey of the With Love yarn almost perfectly. So at parts of the striping pattern, the color difference disappears and then re-appears later.
Materials
- Yarn:
- 370 yds worsted weight yarn (shown in Red Heart With Love, color 1401 Pewter)
- 370 yds sport or fingering weight yarn (shown in Willow Yarns Wheels, color 0006 Eden)
- Hook: US size M/N (9 mm) crochet hook or size needed to match gauge
- Notions: Yarn needle
The scarf can be made to any length. Normally I pad the yardage a bit to account for gauge variations, but this time I did not. For this length I used 1 full skein of each of the yarns. If your gauge or yardage varies slightly, you can stop when you run out of yarn.
Project Level
Easy – Repetitive stitch pattern, working into the row below, holding 2 yarns together as 1.
Size
8.5 inches x 64 inches
Gauge
9 hdc x 8 rows = 4 inches.
Use pattern as gauge swatch – rows 1-8 should measure 8 inches x 4 inches. Exact gauge is not critical for this pattern.

Abbreviations used
ch = chain
dc = double crochet
hdc = half double crochet
shell = shell stitch (see Special Stitch)
st(s) = stitch(es)
Special Stitch
Shell Stitch (shell): On the row below, under the next ch-1 sp, there are 3 unworked sts.

Working around the chain so that it is encapsulated within your stitches, 3 dc in the 2nd (center) stitch of the 3 unworked sts on the row below.

Instructions:
Scroll down for chart.
Work entire pattern with 2 strands of yarn (1 of each weight) held together as one.
Ch 20.
Row 1: Hdc in 2nd ch from hook and in each ch across. (19 hdc)
Row 2: Ch 1, turn, hdc in first st, sk next st, (3 hdc in next st, ch 1, sk next 3 sts) across to last st, 2 hdc in last st. (15 hdc, 4 ch-1 sps)

Row 3: Ch 1, turn, hdc in first st, (shell, ch 1, sk next 3 sts) across to last st, 2 hdc in last st. (3 hdc, 4 shells, 4 ch-1 sps).
Repeat row 3 an additional 123 times, or to about 1 inch shorter than desired length.

Next row: Ch 1, turn, hdc in first st, working around the chain, 3 hdc into the 2nd unworked st below the next ch-1 sp, sk next dc, hdc in next dc] across to last 2 sts, sk next dc, 2 hdc in last hdc. (19 hdc)

Last Row: Ch 1, turn, hdc in each st across. (19 hdc)
Fasten off.
Weave in ends, weaving each strand in separately.
Layered Shells Scarf Chart:
Work entire pattern with 2 strands of yarn (1 of each weight) held together as one.

Share this pattern on Pinterest! Here’s an image perfect for pinning:

Rate this shell stitch crochet scarf pattern!
I hope you enjoyed this layered shells crochet scarf pattern. A downloadable pdf of this pattern is available on Ravelry for a small fee.
Do you want the best of Stitches n Scraps delivered right to your inbox? Don’t miss a stitch – Subscribe now!

Lemon Amigurumi Crochet Pattern
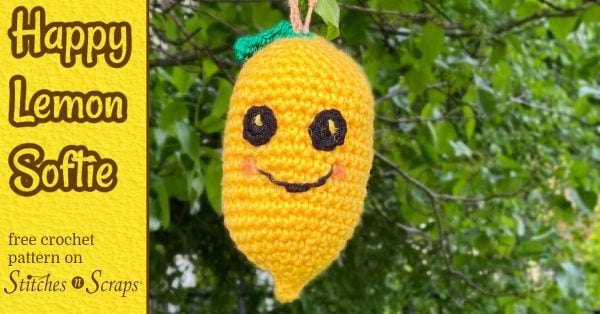
Nothing says summer like a bright, sunny lemon! Bring a smile to your summer with this quick and easy, happy lemon amigurumi pattern. Toss it in a fruit bowl or hang it in a tree. What will you do with your squishy new friend?

This content is protected by copyright. See this Terms of Use / Copyright page for more information.
This post contains sponsored content and/or affiliate links. If you click an affiliate link and make a purchase, I may get a commission.
CAL Central Softie Crochet Along
This happy lemon amigurumi is my pattern in the CAL Central 2022 Softie Crochet Along. Check out all the other patterns in the main CAL post. While you’re there, be sure to enter the giveaway too!
Join in the fun on the Facebook group, and be sure to use the hashtag #CALCentralCrochet when you share your projects!
Fairfield PolyFil Ultra Plush
Fairfield provided all the stuffing materials for this CAL. They’re so generous that I actually have lots left over from previous events!
For this lemon amigurumi pattern, I used some of their Ultra Plush Poly Fil. It’s very soft, but also has a really smooth finish.
Fairfield Poly Pellets
I also used just a tiny bit (about a tablespoon) of Poly Pellets. This is a totally optional addition, but I had some on hand and I love what they do for amigurumi projects.
Tying the pellets up in the toe of a nylon stocking creates a small weighted bundle. You can use this bundle to add weight wherever you want it! In my happy lemon, the weight is right at the bottom, which helps it to hang beautifully straight and still.
Materials
- Yarn: Worsted weight yarn
- 60 yds yellow
- 10 yds each green and black
- 5 yds brown
- Hook: US size 7 (4.5 mm) crochet hook or size needed to match gauge
- Notions:
- Yarn needle
- Stitch marker or scrap of yarn to use as a running stitch marker
Project Level
Easy – Basic amigurumi, working in rounds, some embroidery.
Size
- Circumference: 9 inches at widest point
- Height: 6 inches
Gauge
13 sc x 14 rnds = 4 inches.
Exact gauge is not critical for this pattern, but will affect yardage needed.
Abbreviations used
ch = chain
dc = double crochet
dec = decrease (see Special Stitches)
hdc = half double crochet
inc = increase (see Special Stitches)
sc = single crochet
sl st = slip stitch
st(s) = stitch(es)
rnd = round
Recommended Resources
- Happy Lemon Softie tutorial (coming soon!)
- How to Start a Crochet Circle – 3 Ways
- Continuous rounds and running stitch markers
- Almost Invisible Single Crochet Increase
Special Stitches
Decrease (dec): Insert hook into front loop only of next st, and then into the front loop only of the following stitch, yarn over and pull up a loop, yarn over and pull through both loops on hook.

This counts as 1 sc in the end of round stitch counts.
Increase (inc): Sc in back loop only of indicated st, then sc in both loops of same st. This counts as two sc in the end of round stitch counts.
See this tutorial for a more detailed look.
Instructions:
Lemon is worked in continuous rounds, do not join or turn. Mark the first stitch of each round.
Bottom
With yellow, ch 2.
Rnd 1: 4 sc in 2nd ch from hook. (4 sc)
Rnd 2: Sc in each st around.
Rnd 3: Inc in each st around. (8 sc)
Rnd 4: [Sc in next st, inc in next st] around. (12 sc)
Rnd 5: [Inc in next st, sc in each of next 2 sts] around. (16 sc)
Rnd 6: [Sc in each of next 3 sts, inc in next st] around. (20 sc)
Rnd 7: [Inc in next st, sc in each of next 4 sts] around. (24 sc)
Rnd 8: [Sc in each of next 7 sts, inc in next st] around. (27 sc)
Rnd 9: [Inc in next st, sc in each of next 8 sts] around. (30 sc).

Middle
Rnds 10-19: Sc in each st around.
Weave in beginning tail.
Poly Pellets (optional): Pour about a tablespoon of Poly Pellets into the toe of a nylon stocking. Tie a knot in the stocking above pellets. Trim off top of stocking about 1-2 inches above knot.
Fold trimmed ends over so they wrap around the beads. Place the bundle of beads in the very bottom point of the lemon.

Top
Begin stuffing lemon with Poly-Fil.
Rnd 20: [Sc in each of next 8 sts, dec] around. (27 sc)
Rnd 21: [Sc in each of next 7 sts, dec] around. (24 sc)
Rnd 22: [Sc in each of next 4 sts, dec] around. (20 sc)
Rnd 23: [Sc in each of next 3 sts, dec] around. (16 sc)
Rnd 24: [Sc in each of next 2 sts, dec] around. (12 sc)
Finish stuffing lemon firmly.

Rnd 25: Dec around, change to green. (6 sc)
Rnd 26: With green, sc in each st around.
Fasten off, leaving a long tail.
Use tail to sew top of lemon closed. Weave in ends. Remove stitch marker.

Leaf
With green, ch 6, leaving a long tail.
Row 1: Sl st in 2nd ch from hook, hdc in next ch, 2 dc in next ch, hdc in next ch, 3 sc in next ch, working across opposite side of ch, hdc in next ch, 2 dc in next ch, sl st in next ch, ch 2, sl st in same ch. (2 hdc, 4 dc, 3 sc, 1 ch-2 sp)

Fasten off. Use starting tail to sew leaf to top of lemon. weave in ends.
Eyes (make 2)
With black, ch 2.
Rnd 1: 6 sc in 2nd ch from hook. (6 sc)
Fasten off. On one eye only, leave a 36-inch tail for sewing and embroidery. Weave in all tails except the long one.

Face
Using the images as a guide, position eyes just slightly less than halfway down the lemon. Use the long tail to sew in place.

Continuing with tail, embroider a smiling mouth. Weave in end.
With yellow, make a small highlight stitch on each eye. Weave in all ends.

Apply a small amount of blush to the cheeks, using a cotton swab.
Stem
With brown, ch 15, leaving a long tail.
Fasten off leaving a long tail. Weave both tails securely into top of lemon so that the chains form a hanging loop / stem.

Share this pattern on Pinterest! Here’s an image perfect for pinning:

Rate this Happy Lemon Amigurumi crochet pattern!
I hope you enjoyed this happy lemon amigurumi crochet pattern. A downloadable pdf of this pattern is available on Ravelry for a small fee.
Do you want the best of Stitches n Scraps delivered right to your inbox? Don’t miss a stitch – Subscribe now!

Drawstring Basket Crochet Pattern
Need a sturdy, stylish storage solution? Make this drawstring basket! Tight stitches in a unique combination of yarns makes it stand up tall even when empty. Once you’ve filled it, secure your treasures with the drawstring cover!

This content is protected by copyright. See this Terms of Use / Copyright page for more information.
This post contains sponsored content and/or affiliate links. If you click an affiliate link and make a purchase, I may get a commission.
Raffia and Cotton
The unique texture of this drawstring basket comes from using two yarns together as one, with a tight stitch gauge. King Cole Raffia yarn gives it the stiffness and stability to stand up straight, even when empty.

Buy King Cole Raffia yarn in the Stitches n Scraps yarn shop. Then combine that with your favorite, worsted weight cotton for added strength, and a tweedy blend of colors! For my basket, I used the Raffia in natural, along with a muted green cotton blend yarn.
Drawstring Cover
My favorite feature of this drawstring basket is the cover. Roll it down when the basket is open, for a soft rolled edge. When you’re ready to close it up again, just cinch the drawstring.

If you don’t want to use the cover at all, fold it in and it becomes a lining on the sides of the basket!
Handy Handles
Every basket needs good handles! The wide, side handles on this basket make it easy to pick up and carry wherever you need it.

Materials:
- Yarn:
- 200 yds King Cole Raffia 100% Cellulose Rayon, worsted weight yarn
- 350 yds worsted weight cotton yarn
- Hook: Size H/5 mm crochet hook or size needed to match gauge
- Notions:
- Yarn needle
- Stitch marker or scrap of yarn to use as a running stitch marker
Project Level:
Intermediate – Working in rounds and rows, tighter than usual gauge, post stitches.
Size:
- Diameter: 10″
- Height: 5″ not counting cover
Gauge:
11 hdc x 8 rnds = 4 inches.
Use pattern as gauge swatch – After rnd 4, base should measure 4 inches in diameter.
Abbreviations used:
RS = right side
sc = single crochet
sl st = slip stitch
st(s) = stitch(es)
WS = wrong side
ch = chain
bpdc = back post double crochet
bphdc = back post half double crochet
dc = double crochet
fpdc = front post double crochet
fphdc = front post half double crochet
hdc = half double crochet
rnd = round
Instructions:
Base is worked in continuous rounds. Do not join unless indicated. Use a stitch marker to mark the first stitch of the round.
Base
Holding 1 strand of raffia and 1 strand of cotton yarn together, ch 2.
Rnd 1: 8 hdc in 2nd ch from hook. (8 hdc)

Rnd 2: [Hdc in next st, fpdc around same st] around. (8 hdc, 8 fpdc)
For rnds 3-9, the stitch count will increase by 8 hdc on each rnd.
Rnd 3-9: [Hdc in each st across to next fpdc, hdc in fpdc, fpdc around same fpdc] around. (64 hdc, 8 fpdc)

Rnd 10: [Hdc in each st across to next fpdc, hdc in fpdc, fpdc around same fpdc] 7 times, hdc in each st across to last fpdc, hdc in last fpdc, fphdc around same fpdc. (72 hdc, 7 fpdc, 1 fphdc)
Do not fasten off.

Sides
Join rounds where indicated with a sl st in the first st of the rnd. Use a stitch marker to mark the first stitch of the round.
Rnd 11: [Bpdc in each of next 9 hdc, hdc in next fpdc] 7 times, bpdc in each of next 9 hdc, hdc in last fphdc, join. (72 bpdc, 8 hdc)

Rnds 12-13: Ch 1, [bpdc in each of next 4 sts, fpdc in each of next 4 sts] 10 times, join. (40 bpdc, 40 fpdc)

Rnds 14-15: Ch 1, [fpdc in each of next 4 sts, bpdc in each of next 4 sts] 10 times, join. (40 bpdc, 40 fpdc)
Rnds 16-19: Repeat rnds 12-15.

Fasten off Raffia yarn only. Continue to work with cotton yarn only.
Top
Top is worked in continuous rounds. Do not join unless indicated. Use a stitch marker to mark the first stitch of the round.
Rnd 20: Ch 1, bphdc in first st, bpdc in each st around. (80 sts)

Rnds 21-25: Dc in each st around.
Rnd 26: Dc in each st around to last 2 sts, hdc in next st, sc in next st, join. (78 dc, 1 hdc, 1 sc)
Fasten off. Weave in all ends.
Handles (Make 2)
With cotton, ch 7.
Row 1 (WS): Sc in 2nd ch from hook and in each ch across. (6 sc)
Rows 2-4: Ch 1, turn, sc in each st across.
Do not turn at the end of row 4. Instead, begin working in continuous rounds, starting by working into the first stitch of row 4. Do not join. Use a stitch marker to mark the first stitch of the round.
Rnds 5-20 (RS): Sc in each st around.
Now go back to working in rows.
Rows 21-23: Ch 1, turn, sc in each st across.

Drawstring
With cotton, ch 120, or until chain measures about 42 inches long.
Do not fasten off. Remove hook and secure working loop with stitch marker. This way you can add or remove chains later if needed.

Assembly
Attach Handles
Flatten one end of one handle, and position it along rnds 16 and 17, anywhere along the side of the basket. Use tail to sew in place, then weave in the end.

Flatten the other end of the handle, and position it about 16 stitches away from the first end. Use tail to sew into place, then weave in the end.

Repeat for the 2nd handle, placing it directly opposite the first one. Make sure there is the same number of stitches between the handles on each side of the basket.
Attach Drawstring
Weave drawstring through rnd 27 of top, so that the ends come out centered between the handles as follows: Use the starting tail of the drawstring (opposite the working loop). Start 2 stitches to the right of center, and weave in and out again every 4 stitches. This should bring you back around to about 2 stitches left of center, 4 stitches away from where you started.

Adjust drawstring length by adding or removing stitches as desired. You should have at least 4 inches free on each end, when bag is fully open.

Fasten off and weave in ends on drawstring. Attach a cord lock if desired. Tie a knot in the end of each drawstring to keep it from slipping back through the stitches.
Share this pattern on Pinterest! Here’s an image perfect for pinning:

Rate this drawstring basket crochet pattern!
I hope you enjoyed this drawstring basket crochet pattern. A downloadable pdf of this pattern is available on Ravelry for a small fee.
Do you want the best of Stitches n Scraps delivered right to your inbox? Don’t miss a stitch – Subscribe now!

Crochet Mandala Bag Pattern
This crochet mandala bag pattern includes two options for the front and back panels: a layered flower, or circular stripes. Mix them or match them for a bag that’s uniquely yours! Then finish it off with a zipper and optional fabric lining.

This content is protected by copyright. See this Terms of Use / Copyright page for more information.
This post contains sponsored content and/or affiliate links. If you click an affiliate link and make a purchase, I may get a commission.
2022 Bag Along CAL
This crochet mandala bag is the third pattern in the 2022 Bag Along CAL. Crochet along through 6 different bag patterns, with multiple technique tutorials for each. See the main CAL post for the full schedule.
Enter the Giveaway
With each new bag pattern, there will be a new giveaway as well! All the giveaway details and entry forms will be in the first post for each bag, which will also list all the materials needed for that bag. Here is the materials list and giveaway info for bag number 3.

The giveaway prizes for the CAL are all sponsored by WeCrochet. This third giveaway ends on June 24th, 2022 at 11:59pm, central time, so be sure to get your entries in!
Knit Picks Brava Bulky
WeCrochet also provided all of the Knit Picks yarns for the bag designs. For this pattern, I chose Brava Bulky. This is the same Brava yarn we’ve worked with before, but this time in a thick and squishy, bulky weight! In these blue and brown shades, the bag pairs wonderfully with jeans for a casual summer look.

Bag Along CAL Tutorials
For each bag in the crochet along, I will be posting several technique tutorials. Here are the two tutorials for this bag:
See the main CAL post for the full schedule of patterns and tutorials.
Sewing the Lining
You CAN make this bag without the sewn lining, but it will be much stronger and hold its shape better with the lining. I’ve kept the lining simple because my sewing skills are mediocre at best. I promise, if I can do it, you can too!
Feel free to sew by hand or use a machine, whichever is most comfortable for you. Also, if your seams get a bit messed up, remember no one will see them anyway because they will be inside the bag!
Materials
- Yarn: Knit Picks Brava Bulky 100% acrylic, bulky weight yarn (136 yds / 100 g per skein), 1 skein each of:
- #28336 Brindle (A)
- #28358 Solstice Heather (B)
- #28342 Denim (C)
- Hook: US size K / 6.5mm hook or size needed to match gauge
- Notions:
- Scissors
- Yarn needle
- 12 stitch markers or scraps of yarn to use as stitch markers
- 12-inch zipper (see note below)
- 1/2 yard fabric for lining (optional)
- Sewing thread, needle, and pins or clips for lining (optional)
Any zipper length between 9 & 12 inches will be ok, but 12 is recommended. The width of the zipper (including the zipper tape on the sides) should be about 1.25 to 1.5 inches.
Project Level
Intermediate – Complex: Project level depends on which options you choose.
The layered flower mandala is complex – multiple layers, working into rounds below, post stitches, and working into back loops and third loops.
The rest of the pattern is intermediate – working in the round, working in third loops, and attaching a zipper.
The sewn lining is fairly easy sewing and is optional.
Size
Circle is 11 inches in diameter. Bag is 1.5 inches deep.
Gauge
11 hdc x 8 rnds = 4 inches.
Use the pattern as a gauge swatch:
- Rnds 1-5 of layered flower mandala should measure approximately 4 inches in diameter at widest point.
- Rnds 1-7 of striped mandala should measure approximately 6 inches in diameter.
Abbreviations used
(Pattern is written in US terms)
blo = back loop only
ch = chain
dc = double crochet
hdc = half double crochet
fptr = front post treble crochet
rnd = round
sc = single crochet
sk = skip
sl st = slip stitch
st(s) = stitch(es)
tr = treble crochet
tlo = third loop only
Instructions
Entire bag is worked on the right side, do not turn. Join rounds as indicated with a sl st into the first st of the rnd.
For clean color changes, always change colors in the last step of the previous stitch – use the new color to finish the last stitch of the old color. See this Changing Colors tutorial for a closer look.
Choose Mandala Options:
There are 2 options for the front and back of the bag: The layered flower mandala and the striped mandala.

You need two mandalas to make your bag. Both can be the same, or you can use one of each.
Layered Flower Mandala
Video Tutorial coming soon!
Center
Rnd 1: With A, ch 2, 6 hdc in 2nd ch from hook, join, fasten off A. (6 hdc)
Rnd 2: Join B with sl st in tlo of any st, 2 hdc in tlo of same st, 2 hdc in tlo of each st around, join. (12 hdc)
In rnd 3 you will be placing a marker in each chain space. You can do this as you make each chain space, or you can mark them all once you are done with the round.
Rnd 3: Ch 1, sc in tlo of first st, ch 1, (sc, ch 1) in tlo of each remaining st around, join, place marker in each ch-1 sp. (12 sc, 12 marked ch-1 sps)

Top Layer Petals
Since rnd 3 was worked into the tlo, the front and back loops of the sts on rnd 2 are still unworked. For rnd 4, when working into “the st below”, work into these remaining front and back loops.
Rnd 4: Sl st in first ch-1 sp, ch 3 (counts as dc throughout), 6 dc in same sp, sc in the st below the next ch-1 sp, [sk the ch-1 sp behind the sc just made, 7 dc in next ch-1 sp and remove marker from that sp, sk next st on the rnd below, sc in the next st on the rnd below] around, sk last ch-1 sp, join, fasten off B. (6 petals with 7 dc each, 6 sc).

There should be 6 ch-1 sps from rnd 2 that are still unworked and still have stitch markers in them.
Join C with sl st in blo of 4th (center) dc of any 7-dc petal.
Rnd 5: Ch 1 (counts as ch-1 sp), sk first dc, sc in blo of each of next 3 dc, sk next sc, sc in blo of each of next 3 dc, [ch 1, sk next dc, sc in blo of each of next 3 dc, sk next sc, sc in blo of each of next 3 dc] around, join with sl st to starting ch-1 sp. (36 sc, 6 ch-1 sps)
Remove hook from working loop of C and secure the loop with a stitch marker. Let loop and working yarn hang at the front of the work while you make the next section.
Bottom Layer Petals
Working behind the top layer of petals, join B with sl st in any unused (marked) ch-1 sp from rnd 2.

Rnd 6: Ch 3, 3 dc in same sp, ch 1, [7 dc in next unused (marked) ch-1 sp from rnd 2, ch 1] around, 3 dc in same sp as beginning of rnd, join. (6 petals with 7 dc each, 6 ch-1 sps)

Rnd 7: Ch 5 (counts as tr and ch-1 throughout), tr in same st, dc in each of next 2 sts, sk next st, sc in next ch-1 sp, sk next st, dc in each of next 2 sts, [(tr, ch 1, tr) in next st, dc in each of next 2 sts, sk next st, sc in next ch-1 sp, sk next st, dc in each of next 2 sts] around, join. (12 tr, 24 dc, 6 sc, 6 ch-1 sps)

Rnd 8: Sl st in first ch-1 sp, ch 5, (tr, dc) in same sp, dc in next tr, dc in next dc, sk next dc, sl st in next sc, sk next dc, dc in next dc, dc in next tr, [(dc, tr, ch 1, tr, dc) in next ch-1 sp, dc in next tr, dc in next dc, sk next dc, sl st in next sc, sk next dc, dc in next dc, dc in next tr] around, dc in same sp as beginning of rnd, join with sl st. (12 tr, 36 dc, 6 ch-1 sps)

Remove hook from working loop of B and secure working loop with a stitch marker. Let the loop and yarn hang at the front of the work.
Top layer Fans
The ch-7 loops in rnd 9 will eventually end up behind the back layer petals. For now it’s easier to work in front of them, and pull the petals through later.
But when you get to the petal with the working yarn of B still attached, be sure to move that working yarn to the front of your work so that it comes up underneath the ch-7 loop. Because it’s attached to the ball, we can’t pull that through as easily later.

Remove marker from working loop of C and place the loop back on the hook.
Rnd 9: Ch 3, 2 dc in same sp, ch 7, [5 dc in next ch-1 sp of rnd 5, ch 7] around, 2 dc in same sp as beginning of rnd, join with A, drop C. (6 fans with 5 dc each, 6 ch-7 sps).
Rnd 10: With A, ch 1, 2 hdc in first st, hdc in each of the next 2 sts, 3 hdc in next ch-7 sp, hdc in each of the next 2 sts, [3 hdc in next st, hdc in each of the next 2 sts, 3 hdc in next ch-7 sp, hdc in each of the next 2 sts] around, hdc in same st as beginning of rnd, join with C, fasten off A. (60 hdc)
When working an fpdc into rnd 9, sk the st on the current row behind that fpdc.
Rnd 11: With C, ch 1, sc in first st (middle st of 3-hdc group), fptr around third (center) dc of 5-dc group of rnd 9, [sc in next st, fptr around next dc on rnd 9] twice, *(sc, ch 1, sc) in next st, fptr around next dc on rnd 9, [sc in next st, fptr around next dc on rnd 9] 4 times, repeat from * around, join. (30 fptr, 36 sc, 6 ch-1 sps)

Remove hook from working loop of C and secure the loop with a stitch marker. Let loop and working yarn hang at the front of the work while you make the next section.
Border
Pull all of the bottom layer petals up through the ch-7 loops of the top layer so that they rest on top of the work, between the fans.

Remove marker from working loop of B and place the loop back on the hook.
If your working yarn of B is on the back side of the work, fasten off B and re-attach it in the same place with the working yarn in front.
Rnd 12: With B, (sl st, ch 3, sl st) in first ch-1 sp on rnd 8 (back layer petal), sk the ch-1 sp on rnd 11 behind the petal, sc in each st on rnd 11 across to next ch-1 sp, [(sl st, ch 3, sl st) in next ch-1 sp on rnd 8, sk the next ch-1 sp on rnd 11, sc in each st on rnd 11 across to next ch-1 sp] around, join, fasten off B. (66 sc, 6 ch-3 picots)

Remove marker from working loop of C and place the loop back on the hook.
Rnd 13: Ch 2 (does not count as a st), hdc in the sc from rnd 12 that’s directly in front of the working loop of C, [hdc in each sc across to 1 sc before next ch-3 picot, 2 hdc in next sc, sk next ch-3 picot, 2 hdc in next sc] around, hdc in each remaining sc around to first st, fasten off B. (78 hdc)
Join A with sl st in any st.
Rnd 14: 2 sc in first st, sc in each of next 12 sts, [2 sc in next st, sc in each of next 12 sts] around, join, fasten off. (84 sc)

Simple Striped Mandala
When changing colors, drop unused colors at the back of the work and pick them up again as needed. If you’re using a lining, the loose “floats” at the back will be hidden inside the lining.
If you are not using a lining, leave longer tails and use them to tack down any loose strands as you weave them in. That way nothing can snag on them inside the bag.

Rnd 1: With A, ch 2, 8 hdc in 2nd ch from hook, join, change to B. (8 hdc)
Rnd 2: With B, ch 1, 2 hdc in tlo of each st around, join. (16 hdc)
Rnd 3: Ch 1, 2 hdc in first st, hdc in next st, [2 hdc in next st, hdc in next st] around, join, change to C. (24 hdc)
Rnd 4: With C, ch 1, 2 sc in tlo of first st, sc in tlo of each of next 3 sts, [2 sc in tlo of next st, sc in tlo of each of next 3 sts] around, join. (30 sc)
Rnd 5: Ch 1, 2 hdc in first st, hdc in each of next 4 sts, [2 hdc in next st, hdc in each of next 4 sts] around, join, change to B. (36 hdc)
Rnd 6: With B, ch 1, 2 hdc in tlo of first st, hdc in tlo of each of next 5 sts, [2 hdc in tlo of next st, hdc in tlo of each of next 5 sts] around, join, change to A. (42 hdc)
Rnd 7: With A, ch 1, 2 hdc in tlo of first st, hdc in tlo of each of next 6 sts, [2 hdc in tlo of next st, hdc in tlo of each of next 6 sts] around, join, change to B. (48 hdc)
Rnd 8: With B, ch 1, 2 hdc in tlo of first st, hdc in tlo of each of next 7 sts, [2 hdc in tlo of next st, hdc in tlo of each of next 7 sts] around, join, change to C. (54 hdc)
Rnd 9: With C, ch 1, 2 hdc in tlo of first st, hdc in tlo of each of next 8 sts, [2 hdc in tlo of next st, hdc in tlo of each of next 8 sts] around, join, change to B. (60 hdc)
Rnd 10: With B, ch 3 (counts as dc), dc in tlo of same (first) st, dc in tlo of each of next 3 sts, [2 dc in tlo of next st, dc in tlo of each of next 3 sts] around, join. (72 dc)
Rnd 11: Ch 1, 2 sc in first st, sc in each of next 12 sts, [2 sc in next st, sc in each of next 12 sts] around, join, change to A. (78 sc)
Rnd 12: With A, 2 sc in first st, sc in each of next 13 sts, [2 sc in next st, sc in each of next 13 sts] around, join, fasten off. (84 sc)

Weave in ends. Wash and block.
Strap
You can leave very long (36-inch) starting and ending tails for sewing later, or you can use separate pieces of yarn for sewing, whichever is easier for you.
With A, ch 6.
Row 1: Hdc in 2nd ch from hook and each ch across. (5 hdc)
Row 2: Ch 1, hdc in tlo of each st across.
Repeat row 2 until strap measures about 60 inches or desired length (about 141 rows total). End after an odd number of rows.
This piece wraps around the sides and bottom of the bag, with the extra length as the shoulder strap.
Secure working loop with a stitch marker and remove hook.

Wash and block strap.
Lining (optional but recommended)
Video tutorial coming soon!
Cut fabric pieces
Fold fabric in half with right sides together. Place one crochet mandala on top of fabric. Use a pencil or fabric marking chalk to trace around mandala, leaving about a 1/4 inch seam allowance all the way around. Cut out the marked circle, cutting through both layers. You should now have 2 circles of fabric.

Cut a strip of fabric 1 1/2 x 34 inches long. If needed, you can sew 2 strips of fabric together to get the appropriate length. I did not cut mine long enough, and ended up having to add additional length later.

Sew zipper to side strip
Fold over one inch on one end of the fabric strip (it doesn’t really matter which way you fold it). Pin or clip in place.
Place this folded end on top of the back end of the zipper so that it overlaps the zipper end by about 1/2 inch. This creates a small flap. The zipper should be right side up and the fabric should be wrong side up.

Sew the zipper and flap together along the side and bottom edges only. Do not sew across the teeth of the zipper, as the zipper still needs to be able to open under the flap.

Sew zipper to first circle
Line up the zipper and side strip along the edge of one of the fabric circles. The wrong side of the zipper should be touching the right side of the circle.
You can clip or pin this seam in place first if you find it helpful, but you may find it easier to sew it without pinning. I clipped it at first, but ended up removing the clips because I had stretched the fabric a bit too tightly.

Starting at the front end of the zipper, sew around the edge of the circle and side strip with a 1/4 inch seam allowance. Sew slowly and keep adjusting your positioning so that the edge of the zipper or side strip lines up with the edge of your fabric circle without any pleats or gathering. Stop about 1 inch from the end of the circle.

When you come almost all the way back around, stop and remove your work from the machine. Fold the free end of the side strip over so that it creates another tab, covering most of the zipper pull. Clip in place and trim any extra fabric, leaving about 1 inch folded over for the tab. Finish sewing around the circle so that the end tab rests on top of the zipper.

Sew Zipper to 2nd Circle
Pin or clip the 2nd circle in place along the other side of the side strip. Once again, the right side of the zipper should be touching the wrong side of the fabric circle. This time pins or clips are important to keep the spacing even.

Sew side strip to 2nd circle all the way around.

Assembly
Mark opening
Center zipper across where you would like the top opening of the bag to be. Mark the edges of the top opening on the mandala with stitch markers. Place the markers just inside the edge of the zipper (or fabric tabs if you made the lining), so that the tabs and zipper ends will be hidden when the bag is completed.

Place matching markers on the 2nd mandala, making sure you have the same number of stitches between the markers on both pieces.

Attach strap to first mandala
Line up starting end of strap with one marker on one of the mandalas, so that right sides are together. Sew strap and mandala edges together around the bottom of the mandala, to the opposite marker.
You can use any seam you prefer. I sewed from the right side and used a combination of a mattress stitch and whipstitch seam – I went from top to bottom through the edge of the side strip and around the posts of the edge stitches on the circle.

Pin or clip the other end of the strap to the beginning of this seam and check the length. You can add or remove rows to the strap in sets of two rows as desired. Fasten off. Sew the strap ends together.
Attach strap to 2nd mandala
Pin or clip the opposite edge of the strap to the edge of the other mandala, with right sides together.

Turn bag right side out. If you made a lining, insert it now and check for fit. Adjust strap seams if needed, then remove lining.
Sew remaining strap into a tube
Fold the remaining strap lengthwise. Starting about 1 inch from the edge of the bag, sew the sides of the strap together. This forms a tubular handle.

Weave in all ends. Insert lining again if you made one.
Attach Zipper
Pin zipper in place along top opening.
To get the alignment even, I first pinned through all layers with the zipper closed, then slowly opened the zipper, removing the pins one by one, and clipping each side separately.

Sew the zipper to the open edge of each mandala. Go a bit past the opening on each side, and sew across the strap below the ends of the zipper.

This way the zipper can open and close fully, and the pull will be hidden under the strap.

Rate this Crochet Mandala Bag!
I hope you enjoyed this crochet mandala bag pattern.
A downloadable pdf of this pattern is available on Ravelry for a small fee. The fee for the pdf format is to offset the advertising revenue lost when you print or download the pattern rather than viewing it online.
Do you want the best of Stitches n Scraps delivered right to your inbox? Don’t miss a stitch – Subscribe now!

Uterus Drawstring Bag Crochet Pattern
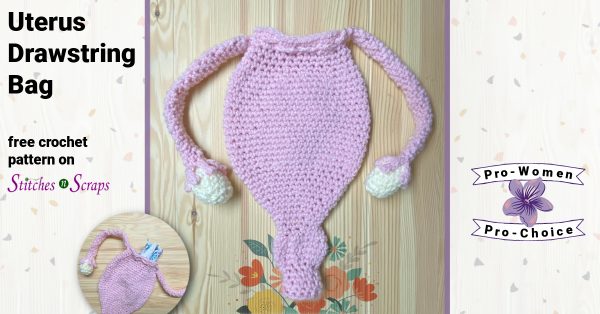
What you put into it and when you take it out are nobody else’s business. Store whatever you like in your uterus drawstring bag, and for as long as you like.

This content is protected by copyright. See this Terms of Use / Copyright page for more information.
This post contains sponsored content and/or affiliate links. If you click an affiliate link and make a purchase, I may get a commission.
Planned Parenthood Donation
No one can be forced to let another person use their blood, bone marrow, or other organs, even if it’s the only way to keep that person alive. Our wombs should not be treated any differently.
A paid, printable, pdf version of this pattern is available on Ravelry. Through the end of 2022, I will donate any profits from those Ravelry sales to the Planned Parenthood Action Fund. All people, including those with a uterus, deserve safe, legal access to all their healthcare needs.
I will likely continue these donations beyond 2022 as well. I’m just putting an arbitrary end date on it for now because I don’t like to make open-ended promises. I’ll update the date each time I extend it.
Version Française disponible! (French version available!)
Ma bonne amie d’Accrochet a traduit ce patron en français ! Obtenez la version française gratuite ici. Si vous achetez le pdf sur Ravelry, vous obtiendrez les versions française et anglaise.

(My good friend at Accrochet has translated this pattern into French! Get the free French version here. If you buy the pdf on Ravelry, you will get both the French and English versions.)
Stuff It!
If you don’t like this crochet uterus as a bag, feel free to stuff it! You can fill it with fiberfill and sew the top closed for a cute uterus softie. You could even add some personality with an embroidered face. It’s your uterus – do whatever you like with it!

Uterus Drawstring Bag Anatomy
This diagram shows the names I used in the pattern for the various sections. I’m not a medical professional of any kind, so I don’t claim this to be an anatomically correct model. It just helps to use the anatomical names to refer to the sections of the pattern.

The pattern starts with a small section of the vagina, which is folded in on itself and closed at the top. This way it still looks like an open tube, but stuff won’t fall out of your bag.
Next comes the cervix, followed by the uterus. The fallopian tubes on each side double as drawstrings for the bag. On the end of each fallopian tube, there are 6 dangling fingers called fimbriae (singular is fimbria). These cradle the white ovaries at the end.
Materials:
- Yarn: Worsted weight yarn
- 150 yds pink
- 25 yds white
- Hook: Size H/5 mm crochet hook or size needed to obtain gauge
- Notions:
- Yarn needle
- Stitch marker or scrap of yarn to use as a running stitch marker
- Small amount of fiberfill stuffing
Project Level:
Intermediate – Amigurumi with intermediate shaping and multiple pieces.
Size:
When laid flat and not counting tubes or ovaries – 6.75″ wide at widest point, 11.5″ tall.
Gauge:
14 sc x 12 rnds = 4″. Exact gauge is not critical.
Abbreviations used:
blo = back loop only
ch = chain
dec = decrease (see Special Stitches)
inc = increase (see Special Stitches)
rnd = round
sc = single crochet
sl st = slip stitch
st(s) = stitch(es)
Special Stitches
Decrease (dec): Insert hook into front loop only of next st, and then into the front loop only of the following stitch, yarn over and pull up a loop, yarn over and pull through both loops on hook.


Increase (inc): Sc in back loop only of indicated st, then sc in both loops of same st. This counts as two stitches in the end of round stitch counts.
See this tutorial for a more detailed look.

Instructions:
Entire pattern is worked in continuous rounds. Do not join or turn unless indicated. Use a stitch marker to mark the first stitch of the round.
Vagina
With pink, ch 2, leaving a 6-inch starting tail.
Rnd 1: 6 sc in 2nd ch from hook. (6 sts)
Rnd 2: Inc in each st around. (12 sts)
Rnds 3-5: Sc in each st around.
Rnd 6: Sc in blo of each st around.
Rnds 7-10: Sc in each st around.
Do not fasten off.

Push bottom of vagina in so that it folds at rnd 6. You now have a double-layered tube, with the unused loops from rnd 5 around the bottom opening.

To secure this fold in place, use the starting tail to sew a couple of loose stitches connecting rnd 1 to the posts of rnd 10. Weave in the end.

Cervix
Rnd 11: [Inc in next st, sc in next st] 6 times. (18 sts)
Rnd 12: [Inc in next st, sc in each of next 5 sts] 3 times. (21 sts)
Rnds 13-15: Sc in each st around.
Rnd 16: [Dec, sc in next st] 7 times. (14 sts)
Rnd 17: [Dec, sc in each of next 5 sts] twice. (12 sts)

Uterus
Rnd 18: Sc in next st, inc in next st, [sc in each of next 2 sts, inc in next st] 3 times, sc in last st. (16 sts)
Rnd 19: Sc in each st around.
Rnd 20: [Inc in next st, sc in each of next 3 sts] 4 times. (20 sts)
Rnd 21: Sc in each st around.
Rnd 22: Sc in each of next 2 sts, inc in next st, [sc in each of next 4 sts, inc in next st] 3 times, sc in each of last 2 sts. (24 sts)
Rnd 23: Sc in each st around.
Rnd 24: [Inc in next st, sc in each of next 3 sts] 6 times. (30 sts)
Rnd 25: [Inc in next st, sc in each of next 9 sts] 3 times. (33 sts)
Rnd 26: Sc in each of next 5 sts, inc in next st, [sc in each of the next 10 sts, inc in next st] twice, sc in each of the last 5 sts. (36 sts)
Rnd 27: [Inc in next st, sc in each of next 5 sts] 6 times. (42 sts)
Rnd 28: Sc in each of next 3 sts, inc in next st, [sc in each of next 6 sts, inc in next st] 5 times, sc in each of last 3 sts. (48 sts)
Rnds 29-43: Sc in each st around.
Rnd 44: Sc in each of next 3 sts, dec, [sc in each of next 6 sts, dec] 5 times, sc in each of last 3 sts. (42 sts)
Rnd 45: [Dec, sc in each of next 5 sts] 6 times. (36 sts)
Rnd 46: Sc in each of next 2 sts, dec, [sc in each of next 4 sts, dec] 5 times, sc in each of last 2 sts. (30 sts)
Rnds 47-50: Sc in each st around.
Fasten off.

First Fallopian Tube
With pink, ch 35. Do not fasten off.
Weave this chain through the stitches on rnd 49 of the uterus, going over and under 3 stitches at a time. The ends should come out 3 stitches away from where you started.

Pull the working loop through the first ch to join the 2 ends.

Rnd 1: Ch 1, working through both layers together, 6 sc in the joined end chains. (6 sc)

Rnds 2-30: Sc in each st around.

Rnd 31 (Fimbriae): [sl st in next st, ch 6, sl st in 2nd ch from hook and in each of the next 4 chs] 6 times, sl st in same st as beginning of rnd.

Fasten off leaving a 12-inch tail for sewing.
Second Fallopian Tube
With pink, ch 35. Do not fasten off.
Starting directly opposite the first fallopian tube, weave this chain through the stitches on rnd 49 of the uterus, going over and under 3 stitches at a time. These stitches will be offset from the first tube – where you went down, you will now go up, and where you went up, you will now go down.

Pull the working loop through the first ch to join the 2 ends as you did before.
Repeat rnds 1-31 of first fallopian tube.
Fasten off leaving a 12-inch tail for sewing.
Ovary (Make 2)
With white, ch 2.
Rnd 1: 6 sc in 2nd ch from hook. (6 sts)
Rnd 2: Inc in each st around. (12 sts)
Rnds 3-7: Sc in each st around.
Rnd 8: Dec around. (6 sts).

Fasten off.
Stuff ovary with fiberfill. Sew the last round closed with the tail, then weave in ends.

Assembly:
Place an ovary at the end of a fallopian tube, between the fimbriae. Use the long tail from the fallopian tube to sew the end in place.

Arrange the fimbriae evenly spaced around the ovary. Continuing with the same end, carefully tack each fimbria to the ovary, just below the tip.

As you travel from one fimbria to the next, be sure to hide the pink yarn inside the ovary so it doesn’t show on the white.
Repeat for the 2nd ovary and fallopian tube.
Weave in all ends.

Rate this uterus drawstring bag pattern!
I hope you enjoyed this uterus drawstring bag pattern.
A downloadable pdf of this pattern is available on Ravelry for a small fee. Through the end of 2022, I will donate any profits from those Ravelry sales to the Planned Parenthood Action Fund.
Do you want the best of Stitches n Scraps delivered right to your inbox? Don’t miss a stitch – Subscribe now!

Reusable Sweeper Cover Crochet Pattern
I love this style of sweeper/mop, but the disposable cloths get expensive over time. A reusable sweeper cover is so much more cost-effective and more environmentally friendly too!

This content is protected by copyright. See this Terms of Use / Copyright page for more information.
This post contains sponsored content and/or affiliate links. If you click an affiliate link and make a purchase, I may get a commission.
Using the reusable sweeper cover
This reusable cloth has pockets at each end, which are meant to slide up over the ends of the sweeper head. The fabric is thinner on top of the pockets, with all the bumpy bits on the bottom. So if your sweeper has the little grips on top like mine does, you can push the fabric into those for an even more secure fit.
Perfect for stash busting!
Use up your worsted-weight cotton yarn scraps for this pattern, changing colors wherever you want to. Just be sure that the colors you use don’t bleed in hot water.
Cotton yarn is ideal, but a cotton/acrylic blend will work too. I used up some Lion Brand Cotton Ease that’s been in my stash for years. The color is #132 Cactus, but this yarn has long since been discontinued.

Reversible design
This sweeper cover has no right or wrong side – the pattern is the same on both sides, and can be used either way!
Size adjustments
This reusable sweeper cloth fits sweeper heads that are about 10″ long by 4.5″ wide. You can adjust the pattern fairly easily to fit any size you like.
To adjust width:
Add or remove starting chains in groups of two, so that you have an even number of chains.
On row 20, add or remove the same number of extra/fewer chains. So if you start with 14 chains instead of 12 (2 extra), then on row 20, add 11 chains instead of 9. You should end up with the same number of stitches in section 3 as you have in section 1.
To adjust length:
Work each section to about 1/3 of the desired length, adding or removing repeats in group of 2 rows as necessary. Pay attention to whether you need to end on an odd or even numbered row to match the pattern.
Materials:
- Yarn: 85 yds worsted weight, cotton or cotton/acrylic blend yarn
- Hook: Size H/5 mm crochet hook or size needed to obtain gauge
- Notions:
- Yarn needle
- Stitch marker
Project Level:
Easy – Worked in the round and in rows, with combinations of basic stitches.
Size:
4.5 inches x 10 inches
Gauge:
Use pattern as gauge swatch. After rnd 11, work should measure 4.5 inches x 3.5 inches.
Abbreviations used:
ch = chain
hdc = half double crochet
sc = single crochet
sk = skip
sl st = slip stitch
sp = space
st(s) = stitch(es)
tr = treble crochet
Instructions:
Join rounds where indicated with a sl st in the first st of the rnd.
Section 1
Ch 12 (multiple of 2)
Rnd 1: Sc in 2nd ch from hook and in each ch across, place marker in last st worked, working on opposite side of chain, sc in each ch across. (22 sc)
Move marker up in each round or row when you come to it.
Rnd 2: Ch 1, turn, sc in first st, [tr in next st, sc in next st] to marker, hdc in marked st, hdc in each remaining st around, join. (6 sc, 11 hdc, 5 tr)
Rnd 3: Ch 1, turn, hdc in each hdc across to marker, hdc in marked hdc, tr in next sc, [sc in next tr, tr in next sc] around, join. (5 sc, 11 hdc, 6 tr)
Rnd 4: Ch 1, turn, sc in first tr, [tr in next sc, sc in next tr] to marker, hdc in marked hdc, hdc in each remaining hdc around, join. (6 sc, 11 hdc, 5 tr)
Rnds 5-10: Repeat rnds 3-4 an additional 3 times.
Rnd 11: Ch 1, turn, hdc in each hdc across to marker, hdc in marked hdc, tr in next sc, [sc in next tr, tr in next sc] around, join, sl st in next hdc. (5 sc, 11 hdc, 6 tr)
Work should now measure about 3.5 inches long.

Section 2
Row 12: Ch 1, turn, hdc in first hdc, sc in next tr, [tr in next sc, sc in next tr] across to marked st, hdc in marked hdc, leave remaining hdc unworked. (6 sc, 2 hdc, 5 tr)
Row 13: Ch 1, turn, hdc in marked hdc, tr in next sc, [sc in next tr, tr in next sc] across to last st, hdc in last hdc. (5 sc, 2 hdc, 6 tr)
Row 14: Ch 1, turn, hdc in first hdc, sc in next tr, [tr in next sc, sc in next tr] across to last st, hdc in last hdc. (6 sc, 2 hdc, 5 tr)
Rows 15-19: Repeat rows 13-14 twice, then repeat row 13 once more.
Rnd 20: Ch 1, turn, hdc in first hdc, sc in next tr, [tr in next sc, sc in next tr] across to marked st, hdc in marked hdc, ch 9, join, sl st in next st. (6 sc, 2 hdc, 5 tr, 9 chs)

Section 3
Rnd 21: Ch 1, turn, hdc in first hdc, hdc in each ch across to marked st, hdc in marked hdc, tr in next sc, [sc in next tr, tr in next sc] around, join. (5 sc, 11 hdc, 6 tr)
Rnds 22-30: Repeat rnds 2-3 an additional 4 times, then repeat rnd 2 once more.

Finishing
Fasten off, leaving a long tail for sewing.
Flatten rnd 30 and sew end closed using tail.
Remove marker and weave in all ends.

Rate this reusable sweeper cover pattern!
I hope you enjoyed this crochet cowl and scarf pattern.
A downloadable pdf of this pattern is available on Ravelry for a small fee. The fee for the pdf format is to offset the advertising revenue lost when you print or download the pattern rather than viewing it online.
Do you want the best of Stitches n Scraps delivered right to your inbox? Don’t miss a stitch – Subscribe now!

Tapestry Crochet Project Bag Pattern
Crochet out loud with bright, bold colors and geometric patterns! This tapestry crochet project bag is just the right size for smaller projects and all the tools you’ll need. Dress it up with a cord lock and sturdy bottom, or keep it simple and slouchy. It makes a great purse too!

This content is protected by copyright. See this Terms of Use / Copyright page for more information.
This post contains sponsored content and/or affiliate links. If you click an affiliate link and make a purchase, I may get a commission.
2022 Bag Along CAL
This tapestry crochet project bag is the second pattern in the 2022 Bag Along CAL. Crochet along through 6 different bag patterns, with multiple technique tutorials for each. See the main CAL post for the full schedule.
Enter the Giveaway
With each new bag pattern, there will be a new giveaway as well! All the giveaway details and entry forms will be in the first post for each bag, which will also list all the materials needed for that bag. Here is the materials list and giveaway info for bag number 2.

The giveaway prizes for the CAL are all sponsored by WeCrochet. This second giveaway ends on April 29th, 2022 at 11:59pm, central time, so be sure to get your entries in!
Knit Picks Brava Minis
WeCrochet also provided all of the Knit Picks yarns for the bag designs. For this pattern, I chose Brava Minis. This is the same Brava yarn we know and love, but in mini skeins of only 25g each. Such small skeins are wonderful for making multi-colored projects, without leaving a lot of leftovers or waste. There are loads of colors to choose from too!
Bag Along CAL Tutorials
For each bag in the crochet along, I will be posting several technique tutorials. You can find these tutorials in the Recommended Resources section of the pattern. See the main CAL post for the full schedule of patterns and tutorials.
Accessible Charts
For each of the charts in this pattern, I have included both a full color and a grayscale version. They are both the same chart. The grayscale version is intended for printing on black and white printers, and for those who find it easier to read.
Materials
- Yarn: Knit Picks Brava Minis 100% acrylic, worsted weight yarn (54 yds / 25 g per skein), 1 skein each of:
- #29409 Custard
- #29414 Fairy Tale
- #29419 Lady Slipper
- #29420 Marina
- #29401 Celestial
- Hook: Size H / 5mm hook or size needed to match gauge
- Notions:
- Yarn needle
- Stitch marker or scrap of yarn to use as a running stitch marker
- Cord lock for drawstring (optional)
- 6-inch flat circle of stiff plastic or cardboard – something like plastic mesh, a plastic container lid, or a circle cut out of a cardboard box. (optional)
If your gauge is a bit off, you may run out of yarn (see Gauge section for more info). You may want to get an extra skein of Celestial to be safe, and of Marina if you want a longer handle.
Project Level
Intermediate: Tapestry crochet in the round, with multiple color changes. Easy construction and all sc stitches.
Size
6 inches bottom circle diameter, 8 inches height (not including handle).
Gauge
17 sc x 16 rnds = 4 inches.
Use the pattern as a gauge swatch – bottom circle should measure approximately 6 inches in diameter.
Important! This pattern uses almost every bit of the yarn listed, so err on the side of being too tight when measuring gauge. If your gauge is even a little bit too loose, you will likely run out of yarn (particularly the Celestial color). If your gauge matches, or is a bit too tight, you’ll be fine.
Abbreviations used
(Pattern is written in US terms)
ch = chain
sc = single crochet
sc(color) = single crochet with indicated color (e.g. sc(A) = single crochet with color A)
sl st = slip stitch
st(s) = stitch(es)
Special Technique
Neater join: To join rounds, remove your hook from the working loop, insert your hook into the first stitch of the round, and pull the working loop through the stitch. This replaces the normal slip stitch join. See this tutorial for a closer look.

Instructions
Entire bag is worked on the right side, do not turn. Join rounds as indicated using either the neater join method (see Special Technique) or with a sl st into the first st of the rnd.
For clean color changes, always change colors in the last step of the previous stitch – use the new color to finish the last stitch of the old color. See this Changing Colors tutorial for a closer look.
Bottom Circle
(Scroll down for charts)
See the video tutorial for this section.
With A, ch 2 or make a magic circle
Rnd 1: 6 sc in 2nd ch from hook or in magic circle, join. Tighten magic circle if applicable. (6 sc)
For the remainder of the bottom, each rnd has 2 colors. Work each stitch over the yarn of the unused color so that it is hidden inside your stitch. Do this even for the very first stitch of the rnd, even if you haven’t used the other color yet.

Section 1 – Colors A & B
Rnd 2: Ch 1, sc(A) in first st, sc(B) in same st, (sc(A), sc(B)) in each of next 5 sts, join. (12 sc)
Rnd 3: Ch 1, sc(A) in first st, 2 sc(B) in next st, [sc(A) in next st with A, 2 sc(B) in next st] 5 times, join. (18 sc)
Rnd 4: Ch 1, sc(A) in first st, sc(B) in next st, 2 sc(B) in next st, [sc(A)in next st, sc(B) in next st, 2 sc(B) in next st] 5 times, change to color C in last st, join. (24 sc)
Drop color A.

Section 2 – Colors C & B
Rnd 5: Ch 1, sc(C) in first st, sc(B) in each of next 2 sts, 2 sc(B) in next st, [sc(C) in next st, sc(B) in each of next 2 sts, 2 sc(B) in next st] 5 times, join. (30 sc)
Rnd 6: Ch 1, sc(C) in each of first 2 sts, sc(B) in next st, 2 sc(B) in next st, [sc(C) in each of next 3 sts, sc(B)in next st, 2 sc(B)in next st] 5 times, sc(C) in last st, join. (36 sc)
Rnd 7: Ch 1, sc(C) in each of first 3 sts, 2 sc(B) in next st, [sc(C) in each of next 5 sts, 2 sc(B) in next st] 5 times, sc(C) in each of last 2 sts, join. (42 sc)
Rnd 8: Ch 1, sc(C) in each of first 3 sts, sc(C) in next st, sc(B) in same st, [sc(C) in each of next 6 sts, sc(C) in next st, sc(B) in same st] 5 times, sc(C) in each of last 3 sts, change to color D in last st, join. (48 sc)
Drop both B and C, and begin working over color E in next rnd.

Section 3 – Colors D & E
Rnd 9: Ch 1, 2 sc(D) in first st, sc(E) in each of next 7 sts, [2 sc(D) in next st, sc(E) in each of next 7 sts] 5 times, join. (54 sc)
Rnd 10: Ch 1, sc(D) in first st, 2 sc(D) in next st, sc(D) in next st, sc(E) in each of next 6 sts, [sc(D) in next st, 2 sc(D) in next st, sc(D) in next st, sc(E) in each of next 6 sts] 5 times, join. (60 sc)
Rnd 11: Ch 1, sc(D) in each of first 2 sts, 2 sc(E) in next st, sc(D) in each of next 2 sts, sc(E) in each of next 5 sts, [sc(D) in each of next 2 sts, 2 sc(E) in next st, sc(D) in each of next 2 sts, sc(E) in each of next 5 sts] 5 times, join. (66 sc)
Rnd 12: Ch 1, sc(D) in each of first 2 sts, sc(E) in next st, 2 sc(E) in next st, sc(D) in each of next 2 sts, sc(E) in each of next 5 sts, [sc(D) in each of next 2 sts, sc(E) in next st, 2 sc(E) in next st, sc(D) in each of next 2 sts, sc(E) in each of next 5 sts] 5 times, join. (72 sc)

Bag
(Scroll down for charts)
See the video tutorial for this section.
Continuing from bag bottom, work all stitches in back loops only for remainder of bag.
Bag is worked in continuous rounds, do not join unless indicated. Use a stitch marker to mark the first stitch of each rnd. See this Running Stitch Marker tutorial for a closer look.
Each rnd has 2 colors. For each stitch, work over the yarn of the unused color so that it is hidden inside your stitch. Do this even for the very first stitch of the rnd, even if you haven’t used the other color yet.

Section 1 – Colors D & E
Rnd 1: Sc(D) in each of first 2 sts, sc(E) in each of next 3 sts, sc(D) in each of next 2 sts, sc(E) in each of next 5 sts, [sc(D) in each of next 2 sts, sc(E) in each of next 3 sts, sc(D) in each of next 2 sts, sc(E) in each of next 5 sts] 5 times.
Rnd 2: [Sc(D) in next st, sc(E) in each of next 5 sts, sc(D) in each of next 2 sts, sc(E) in each of next 3 sts, sc(D) in next st] 6 times.
Rnd 3: [Sc(E) in each of next 7 sts, sc(D) in each of next 2 sts, sc(E) in next st, sc(D) in each of next 2 sts] 6 times.
Rnd 4: [Sc(E) in each of next 8 sts, sc(D) in each of next 3 sts, sc(E) in next st] 6 times.

Colors E and C
Rnd 5: [Sc(E) in next 2 sts, sc(C) in each of next 3 sts, sc(E) in each of next 7 sts] 6 times.
Rnd 6: [Sc(E) in next st, sc(C) in each of next 5 sts, sc(E) in each of next 6 sts] 6 times.
Colors C and B
Rnd 7: [Sc(C) in each of next 3 sts, sc(B) in next st, sc(C) in each of next 8 sts] 6 times
Rnd 8: [Sc(C) in each of next 2 sts, sc(B) in each of next 3 sts, sc(C) in each of next 7 sts] 6 times
Rnd 9: [{Sc(C) in next st, sc(B) in each of next 2 sts} twice, sc(C) in each of next 6 sts] 6 times
Rnd 10: [Sc(B) in each of next 2 sts, sc(C) in each of next 3 sts, sc(B) in each of next 2 sts, sc(C) in each of next 5 sts] 6 times
Rnd 11: [{Sc(B) in next st, sc(C) in each of next 2 sts} twice, sc(B) in each of next 2 sts, sc(C) in each of next 3 sts, sc(B) in next st] 6 times
Rnd 12: [Sc(C) in each of next 2 sts, sc(B) in each of next 3 sts, sc(C) in each of next 2 sts, sc(B) in each of next 5 sts] 6 times

Colors A and B
Rnd 13: [Sc(A) in each of next 2 sts, sc(B) in each of next 3 sts, sc(A) in each of next 2 sts, sc(B) in each of next 5 sts] 6 times
Rnd 14: [{Sc(B) in next st, sc(A) in each of next 2 sts} twice, sc(B) in each of next 2 sts, sc(A) in each of next 3 sts, sc(B) in next st] 6 times
Rnd 15: [Sc(B) in each of next 2 sts, sc(A) in each of next 3 sts, sc(B) in each of next 2 sts, sc(A) in each of next 5 sts] 6 times
Rnd 16: [{Sc(A) in next st, sc(B) in each of next 2 sts} twice, sc(A) in each of next 6 sts] 6 times
Rnd 17: [Sc(A) in each of next 2 sts, sc(B) in each of next 3 sts, sc(A) in each of next 7 sts] 6 times
Rnd 18: [Sc(A) in each of next 3 sts, sc(B) in next st, sc(A) in each of next 8 sts] 6 times

Colors E and A
Rnd 19: [Sc(E) in next st, sc(A) in each of next 5 sts, sc(E) in each of next 6 sts] 6 times.
Rnd 20: [Sc(E) in each of next 2 sts, sc(A) in each of next 3 sts, sc(E) in each of next 7 sts] 6 times
Colors E and D
Rnd 21: [Sc(E) in each of next 8 sts, sc(D) in each of next 3 sts, sc(E) in next st] 6 times.
Rnd 22: [Sc(E) in each of next 7 sts, sc(D) in each of next 2 sts, sc(E) in next st, sc(D) in each of next 2 sts] 6 times.
Rnd 23: [Sc(D) in next st, sc(E) in each of next 5 sts, sc(D) in each of next 2 sts, sc(E) in each of next 3 sts, sc(D) in next st] 6 times.
Rnd 24: [Sc(D) in each of next 2 sts, sc(E) in each of next 3 sts, sc(D) in each of next 2 sts, sc(E) in each of next 5 sts] 6 times.
Colors A and D
Rnd 25: [{Sc(A) in next st, sc(D) in each of next 2 sts} twice, sc(A) in each of next 3 sts, sc(D) in next st, sc(A) in each of next 2 sts] 6 times.
Rnd 26: [Sc(A) in each of next 2 sts, sc(D) in each of next 3 sts, sc(A) in each of next 3 sts, sc(D) in each of next 3 sts, sc(A) in next st] 6 times.
Rnd 27: [Sc(A) in each of next 3 sts, sc(D) in next st, sc(A) in each of next 3 sts, sc(D) in each of next 5 sts] 6 times.

Fasten off and weave in ends.
Bag Charts:


Drawstring:
Holding 1 strand each of B and C together, ch 120 or to desired length.
Fasten off and weave in ends.
Thread drawstring through rnd 25 of bag, by weaving it in and out between the stitches, in 3 stitch intervals: [Go in, skip 3 stitches, come out, skip 3 stitches] around. This should leave the ends of your drawstring 3 stitches apart at the front of the bag.
Optional: Feed drawstring ends through cord lock.

Tie a knot in each end of the drawstring to secure it.
Handle
With E, ch 10, join with sl st to form a circle. Leave a long starting tail for sewing.
Rnd 1: Ch 1, sc in each st around, change to any color other than E (10 sc)
Work remaining rounds in back loop only, do not join. You should not need to mark the first stitch of each round because of the color changes. Do not work over unused colors.
Get creative switching up the even rnd colors to use up the last bits of your yarn, or choose them randomly. The color progression I used for my handle was [A, C, B] 3 times, A, [C, E] 4 times, C, [A, B, C] 8 times.
Carry unused colors up at the end of each round until they are needed again.

Rnd 2: With any color other than E, sc in each st around, change to E.
Rnd 3: With E, sc in each st around, change to any color other than E.
Repeat rnds 2 and 3 until you run out of color E yarn, or until you have the length you would like. Weave in ends as you go, other than the long starting tail, so that you don’t have to turn the tube inside out to do it later.
Fasten off, leaving a long tail for sewing.
Flatten one end of the handle and sew it to the inside of one side of the bag.

Flatten the other end and sew it to the inside of the other side of the bag. Make sure not to twist the handle as you do this.
Weave in any remaining ends.
Optional: Insert cardboard or plastic circle into bottom of bag.

Rate this Tapestry Crochet Project Bag Pattern!
I hope you enjoyed this tapestry crochet project bag pattern.
A downloadable pdf of this pattern is available on Ravelry for a small fee. The fee for the pdf format is to offset the advertising revenue lost when you print or download the pattern rather than viewing it online.
Do you want the best of Stitches n Scraps delivered right to your inbox? Don’t miss a stitch – Subscribe now!


