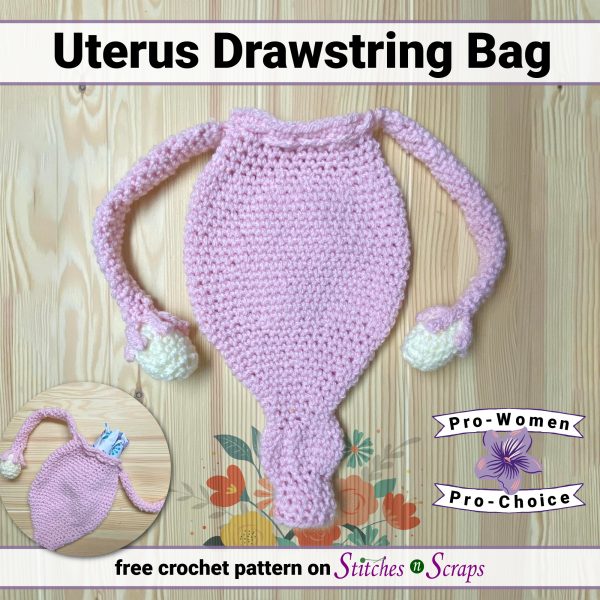
Uterus Drawstring Bag Crochet Pattern
What you put into it and when you take it out are nobody else’s business. Store whatever you like in your uterus drawstring bag, and for as long as you like.
This content is protected by copyright. See this Terms of Use / Copyright page for more information.
This post contains sponsored content and/or affiliate links. If you click an affiliate link and make a purchase, I may get a commission.
Planned Parenthood Donation
No one can be forced to let another person use their blood, bone marrow, or other organs, even if it’s the only way to keep that person alive. Our wombs should not be treated any differently.
A paid, printable, pdf version of this pattern is available on Ravelry. Through the end of 2026, I will donate any profits from those Ravelry sales to the Planned Parenthood Action Fund. All people, including those with a uterus, deserve safe, legal access to all their healthcare needs.
I will likely continue these donations beyond 2026 as well. I’m just putting an arbitrary end date on it for now because I don’t like to make open-ended promises. I’ll update the date each time I extend it.
Version Française disponible! (French version available!)
Ma bonne amie d’Accrochet a traduit ce patron en français ! Obtenez la version française gratuite ici. Si vous achetez le pdf sur Ravelry, vous obtiendrez les versions française et anglaise.
(My good friend at Accrochet has translated this pattern into French! Get the free French version here. If you buy the pdf on Ravelry, you will get both the French and English versions.)
Stuff It!
If you don’t like this crochet uterus as a bag, feel free to stuff it! You can fill it with fiberfill and sew the top closed for a cute uterus softie. You could even add some personality with an embroidered face. It’s your uterus – do whatever you like with it!

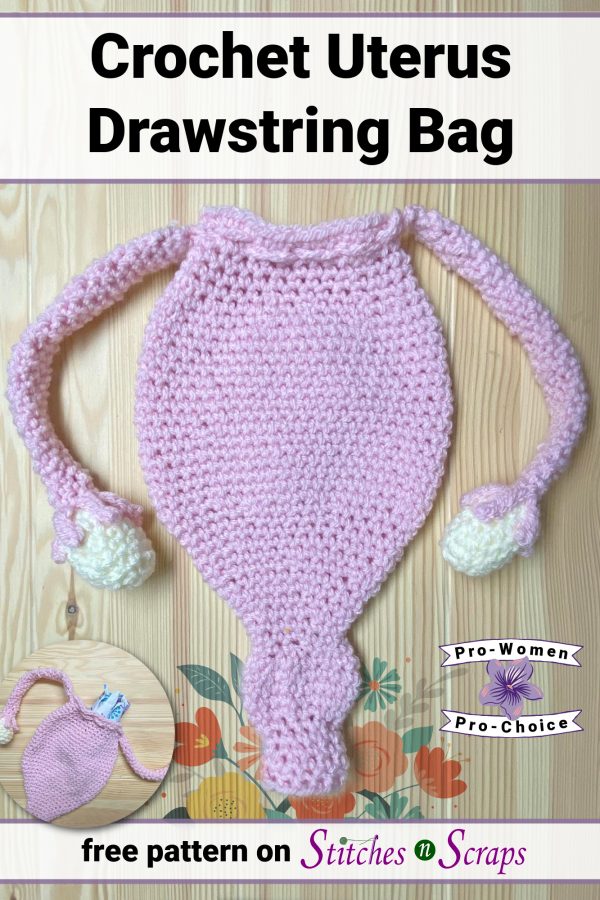
Uterus Drawstring Bag Anatomy
This diagram shows the names I used in the pattern for the various sections. I’m not a medical professional of any kind, so I don’t claim this to be an anatomically correct model. It just helps to use the anatomical names to refer to the sections of the pattern.

The pattern starts with a small section of the vagina, which is folded in on itself and closed at the top. This way it still looks like an open tube, but stuff won’t fall out of your bag.
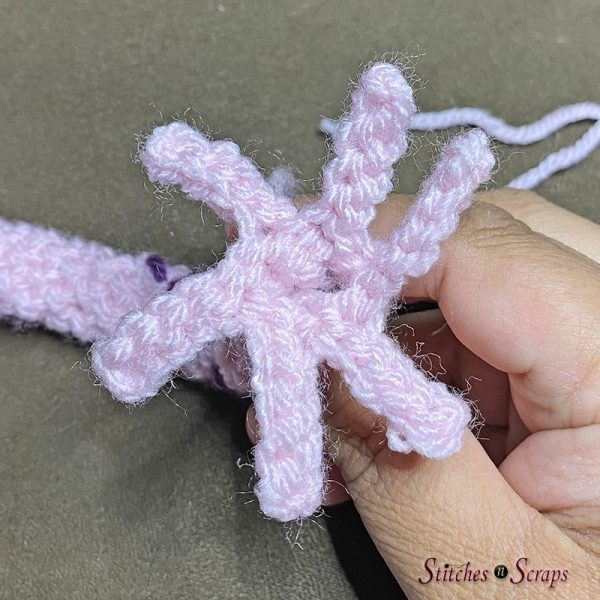
Next comes the cervix, followed by the uterus. The fallopian tubes on each side double as drawstrings for the bag. On the end of each fallopian tube, there are 6 dangling fingers called fimbriae (singular is fimbria). These cradle the white ovaries at the end.


Materials:
- Yarn: Worsted weight yarn
- 150 yds pink
- 25 yds white
- Hook: Size H/5 mm crochet hook or size needed to obtain gauge
- Notions:
- Yarn needle
- Stitch marker or scrap of yarn to use as a running stitch marker
- Small amount of fiberfill stuffing
Project Level:
Intermediate – Amigurumi with intermediate shaping and multiple pieces.
Size:
When laid flat and not counting tubes or ovaries – 6.75″ wide at widest point, 11.5″ tall.
Gauge:
14 sc x 12 rnds = 4″. Exact gauge is not critical.
Abbreviations used:
blo = back loop only
ch = chain
dec = decrease (see Special Stitches)
inc = increase (see Special Stitches)
rnd = round
sc = single crochet
sl st = slip stitch
st(s) = stitch(es)
Special Stitches
Decrease (dec): Insert hook into front loop only of next st, and then into the front loop only of the following stitch, yarn over and pull up a loop, yarn over and pull through both loops on hook.

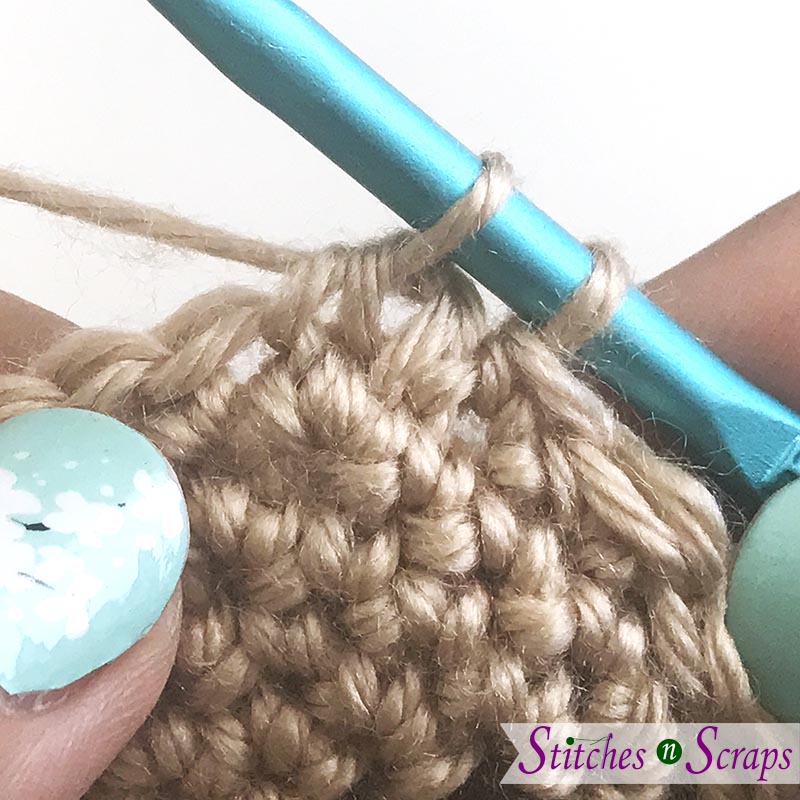
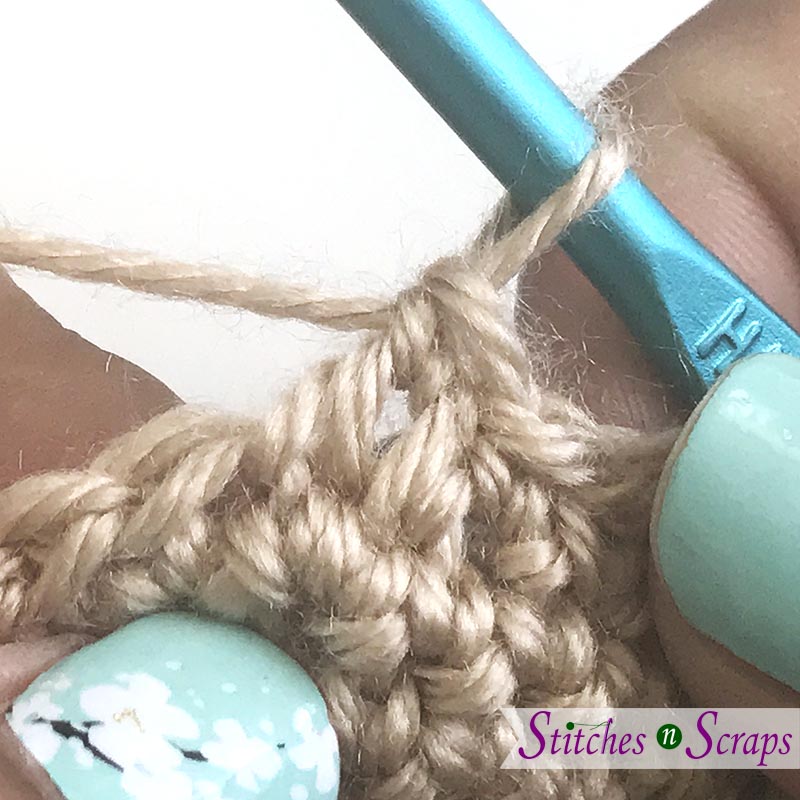
Increase (inc): Sc in back loop only of indicated st, then sc in both loops of same st. This counts as two stitches in the end of round stitch counts.
See this tutorial for a more detailed look.

Instructions:
Entire pattern is worked in continuous rounds. Do not join or turn unless indicated. Use a stitch marker to mark the first stitch of the round.
Vagina
With pink, ch 2, leaving a 6-inch starting tail.
Rnd 1: 6 sc in 2nd ch from hook. (6 sts)
Rnd 2: Inc in each st around. (12 sts)
Rnds 3-5: Sc in each st around.
Rnd 6: Sc in blo of each st around.
Rnds 7-10: Sc in each st around.
Do not fasten off.

Push bottom of vagina in so that it folds at rnd 6. You now have a double-layered tube, with the unused loops from rnd 5 around the bottom opening.

To secure this fold in place, use the starting tail to sew a couple of loose stitches connecting rnd 1 to the posts of rnd 10. Weave in the end.

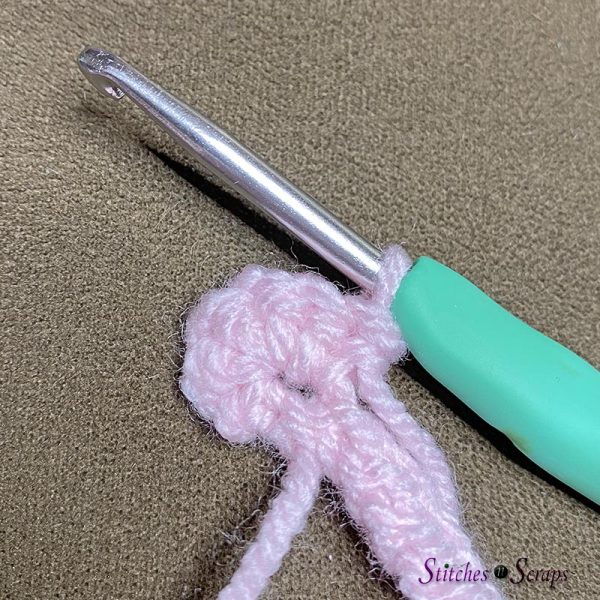
Cervix
Rnd 11: [Inc in next st, sc in next st] 6 times. (18 sts)
Rnd 12: [Inc in next st, sc in each of next 5 sts] 3 times. (21 sts)
Rnds 13-15: Sc in each st around.
Rnd 16: [Dec, sc in next st] 7 times. (14 sts)
Rnd 17: [Dec, sc in each of next 5 sts] twice. (12 sts)
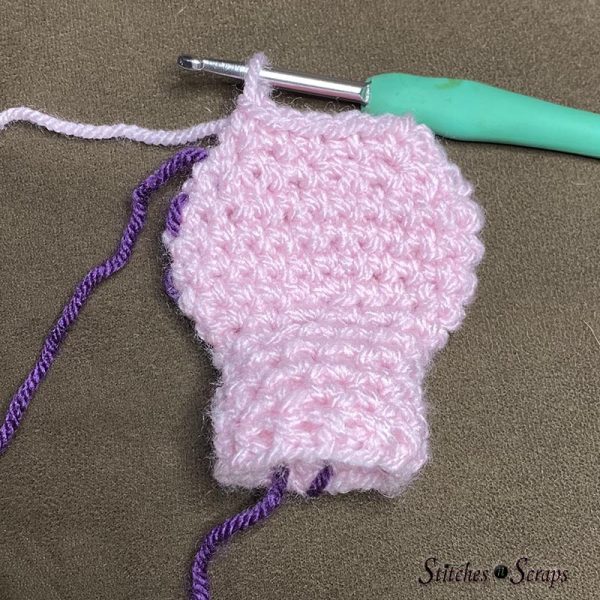
Uterus
Rnd 18: Sc in next st, inc in next st, [sc in each of next 2 sts, inc in next st] 3 times, sc in last st. (16 sts)
Rnd 19: Sc in each st around.
Rnd 20: [Inc in next st, sc in each of next 3 sts] 4 times. (20 sts)
Rnd 21: Sc in each st around.
Rnd 22: Sc in each of next 2 sts, inc in next st, [sc in each of next 4 sts, inc in next st] 3 times, sc in each of last 2 sts. (24 sts)
Rnd 23: Sc in each st around.
Rnd 24: [Inc in next st, sc in each of next 3 sts] 6 times. (30 sts)
Rnd 25: [Inc in next st, sc in each of next 9 sts] 3 times. (33 sts)
Rnd 26: Sc in each of next 5 sts, inc in next st, [sc in each of the next 10 sts, inc in next st] twice, sc in each of the last 5 sts. (36 sts)
Rnd 27: [Inc in next st, sc in each of next 5 sts] 6 times. (42 sts)
Rnd 28: Sc in each of next 3 sts, inc in next st, [sc in each of next 6 sts, inc in next st] 5 times, sc in each of last 3 sts. (48 sts)
Rnds 29-43: Sc in each st around.
Rnd 44: Sc in each of next 3 sts, dec, [sc in each of next 6 sts, dec] 5 times, sc in each of last 3 sts. (42 sts)
Rnd 45: [Dec, sc in each of next 5 sts] 6 times. (36 sts)
Rnd 46: Sc in each of next 2 sts, dec, [sc in each of next 4 sts, dec] 5 times, sc in each of last 2 sts. (30 sts)
Rnds 47-50: Sc in each st around.
Fasten off.

First Fallopian Tube
With pink, ch 35. Do not fasten off.
Weave this chain through the stitches on rnd 49 of the uterus, going over and under 3 stitches at a time. The ends should come out 3 stitches away from where you started.

Pull the working loop through the first ch to join the 2 ends.

Rnd 1: Ch 1, working through both layers together, 6 sc in the joined end chains. (6 sc)
Rnds 2-30: Sc in each st around.

Rnd 31 (Fimbriae): [sl st in next st, ch 6, sl st in 2nd ch from hook and in each of the next 4 chs] 6 times, sl st in same st as beginning of rnd.
Fasten off leaving a 12-inch tail for sewing.
Second Fallopian Tube
With pink, ch 35. Do not fasten off.
Starting directly opposite the first fallopian tube, weave this chain through the stitches on rnd 49 of the uterus, going over and under 3 stitches at a time. These stitches will be offset from the first tube – where you went down, you will now go up, and where you went up, you will now go down.

Pull the working loop through the first ch to join the 2 ends as you did before.
Repeat rnds 1-31 of first fallopian tube.
Fasten off leaving a 12-inch tail for sewing.
Ovary (Make 2)
With white, ch 2.
Rnd 1: 6 sc in 2nd ch from hook. (6 sts)
Rnd 2: Inc in each st around. (12 sts)
Rnds 3-7: Sc in each st around.
Rnd 8: Dec around. (6 sts).
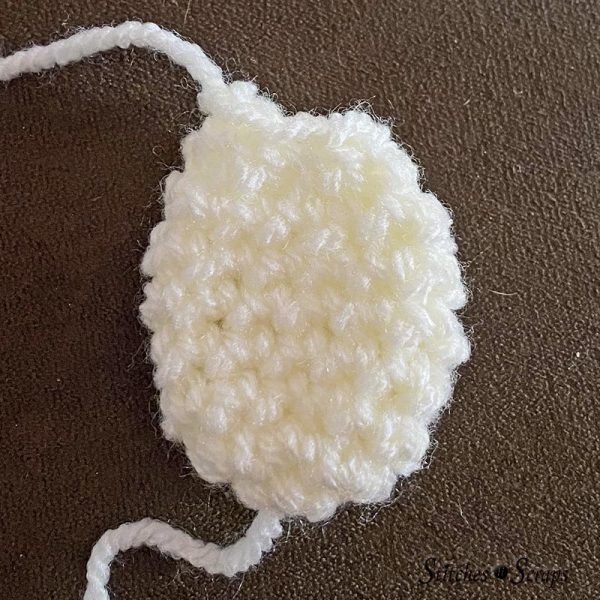
Fasten off.
Stuff ovary with fiberfill. Sew the last round closed with the tail, then weave in ends.

Assembly:
Place an ovary at the end of a fallopian tube, between the fimbriae. Use the long tail from the fallopian tube to sew the end in place.

Arrange the fimbriae evenly spaced around the ovary. Continuing with the same end, carefully tack each fimbria to the ovary, just below the tip.

As you travel from one fimbria to the next, be sure to hide the pink yarn inside the ovary so it doesn’t show on the white.
Repeat for the 2nd ovary and fallopian tube.
Weave in all ends.
Rate this uterus drawstring bag pattern!
I hope you enjoyed this uterus drawstring bag pattern.
A downloadable pdf of this pattern is available on Ravelry for a small fee. Through the end of 2022, I will donate any profits from those Ravelry sales to the Planned Parenthood Action Fund.
Do you want the best of Stitches n Scraps delivered right to your inbox? Don’t miss a stitch – Subscribe now!


You May Also Like

Fiber Fun in Florida

Tapestry Crochet Gift Card Holder
