Crochet Glasses Case – Seeing Spots
Big dots, little dots, I’m seeing lots of spots! Protect your eyeglasses with the Seeing Spots crochet glasses case.
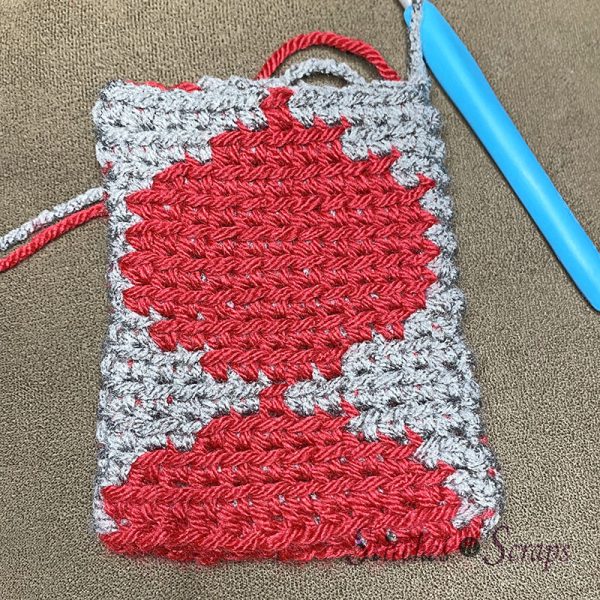
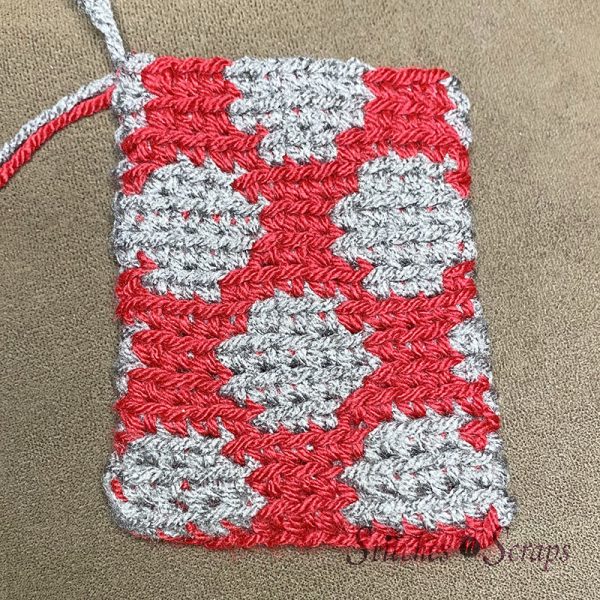
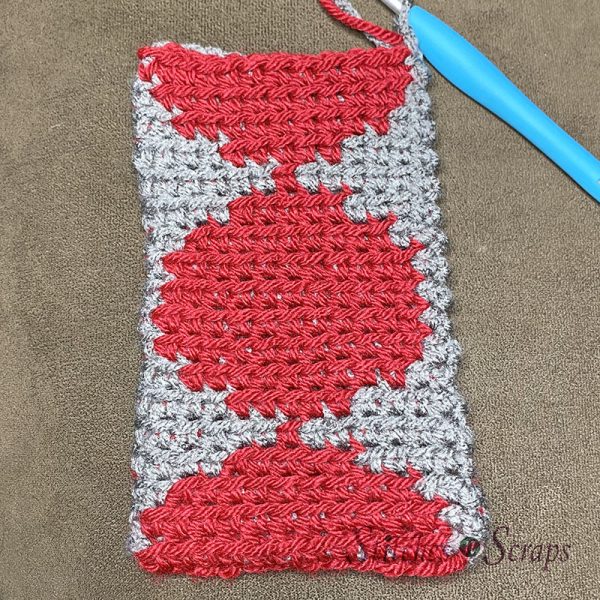
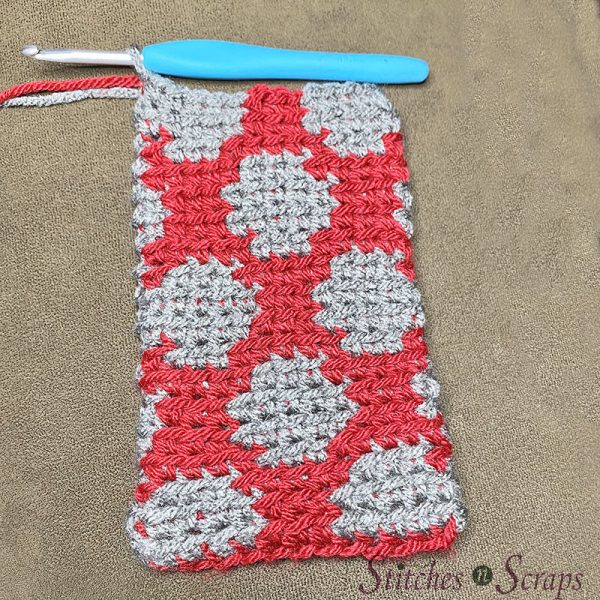
This tapestry crochet pattern has a different polka dot design on each side, with little dots on the front and big dots on the back. Pull it all together with a circular button, and you have a fun and functional pouch to protect your glasses.

This content is protected by copyright. See this Terms of Use / Copyright page for more information.
This post contains sponsored content and/or affiliate links. If you click an affiliate link and make a purchase, I may get a commission.
Scrappy Stitchers Stash Bash Crochet Along
This crochet glasses case is the October pattern for the 2020 Stash Bash Crochet Along. Each month, I will post a new, stash-busting pattern, and a giveaway prize too! Join in the fun on the Scrappy Stitchers Facebook group. Remember to use the hashtag #ScrappyStitchersStashBash in your social media posts!

Tapestry Crochet Colorwork
It may look intimidating at first, but tapestry crochet is one of the easiest forms of colorwork to do. By carrying both yarns through every stitch, you create a dense, squishy fabric and don’t have a ton of ends to weave in when you’re done.
Tapestry Crochet Videos
Watch a quick demo of this technique in the September 24th Lunchtime Live video. Here’s an excerpt of just that section.
Watch the whole video on YouTube!
In another video, I showed how to work the first round of my Tapestry Crochet Gift Card Holder pattern This eyeglass case has a different stitch count and color pattern, but it uses the same technique for working into the chain. Watch that video here.
Crochet Button
You can use almost any type of button for this pattern, as long as it fits through the hole securely. I had a few buttons that would work in my stash, but none looked super cute with the design. So I chose to crochet my own button, using a variation of button #4 from this collection of 4 button patterns.

I have included the instructions, but feel free to use any button you like, for your own personal touch!
Reading Glasses from Readers.Com
I made this crochet glasses case for my new pair of reading glasses. About a month ago, Readers.Com gave me a free pair of their readers to try out and review. I didn’t realize how much I was straining to see my stitches, particularly at night, until I tried them on! You can find the full review of the reading glasses here.


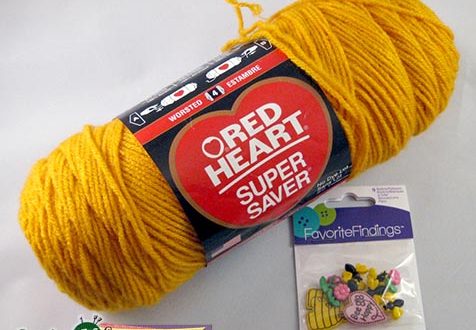
Materials
- Yarn: Worsted-weight yarn
- 25 yds color A (shown in red)
- 25 yds color B (shown in grey)
- Hook: Size H / 5 mm crochet hook or size needed to match gauge.
- Notions:
- 3/4 inch to 7/8 inch button (optional)
- Scissors
- Stitch marker
- Tapestry needle
Project Level
Intermediate: Tapestry crochet colorwork in the round, working in back loops only, decreases and buttonhole in flap.
Size
About 3.5 inches x 6 inches not including flap.
Gauge
15 sc in back loop only x 12 rounds = 4 inches
Use pattern as gauge swatch – After round 6, work should measure about 3.5 inches wide x 2 inches tall. Exact gauge is not critical but will affect finished size and yardage needed.
Abbreviations used
This pattern uses US terms.
| blo | back loop only |
| ch | chain |
| rep | repeat |
| rnd | round |
| RS | right side(s) |
| sc | single crochet |
| sc2tog | single crochet next 2 stitches together |
| sl st | slip stitch |
| sp | space |
| st(s) | stitch(es) |
| tsc-A | tapestry single crochet in color A (see Special Stitch) |
| tsc-B | tapestry single crochet in color B (see Special Stitch) |
Recommended Resources
Special Stitches / Techniques
Tapestry Single Crochet (tsc-A / tsc-B):
Single crochet in back loop only, using indicated color (A or B). Work over the other, unused color so that it is hidden inside the stitch.

For the first half of round 1 ONLY, work the tapestry single crochet stitches into the back bump of the starting chain. See this back bump tutorial for more about working into the back bump of a chain.

Color Changes: Change colors in the last part of the previous stitch. See this changing colors tutorial for more details on clean color changes.

Instructions
Main Section Chart
(scroll down for written instructions)

Main Section
Join rounds where indicated with a sl st in the first st of the round, using color B. Mark the first stitch of each round to make joining easier. Be sure you are actually joining into the first single crochet of the round, not into the previous slip stitch or chain. Do not turn your work unless specifically indicated.
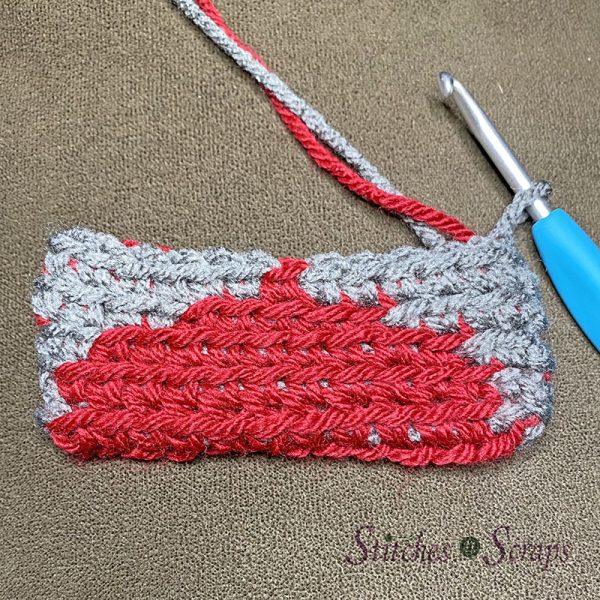
Ch 13 with color A, ch 1 with color B.

Rnd 1:
Working into the back bumps of the chain, tsc-B in 2nd ch from hook, tsc-A in next 11 chs, tsc-B in next ch.

On the opposite side of the chain, there will be 2 unused loops remaining for each stitch – a front loop and a back loop. Working into the back loops only, tsc-B in next 5 chs, tsc-A in next 3 chs, tsc-B in last 5 chs, join. (26 sts)

Rnd 2: Ch 1, tsc-B in first st, tsc-A in next 11 sts, tsc-B in next 6 sts, tsc-A in next 3 sts, tsc-B in last 5 sts, join.
Rnd 3: Ch 1, tsc-B in first 2 sts, tsc-A in next 9 sts, tsc-B in next 2 sts, tsc-A in next st, tsc-B in next 3 sts, tsc-A in next 5 sts, tsc-B in next 3 sts, tsc-A in last st, join.
Rnd 4: Ch 1, tsc-B in first 4 sts, tsc-A in next 5 sts, tsc-B in next 4 sts, tsc-A in next 5 sts, tsc-B in next 3 sts, tsc-A in last 5 sts, join.
Rnd 5: Ch 1, tsc-B in first 6 sts, tsc-A in next st, tsc-B in next 7 sts, tsc-A in next 3 sts, tsc-B in next 5 sts, tsc-A in next 3 sts, tsc-B in last st, join.
Rnd 6: Ch 1, tsc-B in first 4 sts, tsc-A in next 5 sts, tsc-B in next 5 sts, tsc-A in next 3 sts, tsc-B in next 5 sts, tsc-A in next 3 sts, tsc-B in last st, join.
Rnd 7: Ch 1, tsc-B in first 2 sts, tsc-A in next 9 sts, tsc-B in next 2 sts, tsc-A in next 5 sts, tsc-B in next 3 sts, tsc-A in last 5 sts, join.
Rnd 8: Ch 1, tsc-B in first st, tsc-A in next 11 sts, tsc-B in next st, tsc-A in next st, tsc-B in next 3 sts, tsc-A in next 5 sts, tsc-B in next 3 sts, tsc-A in last st, join.
Rnds 9-10: Repeat rnd 2
Rnd 11: Repeat rnd 8
Rnd 12: Repeat rnd 7
Rnd 13: Repeat rnd 6
Rnd 14: Repeat rnd 5
Rnd 15: Repeat rnd 4
Rnd 16: Repeat rnd 3
Rnds 17-18: Repeat rnd 2
Fasten off color B only.
Flap
This section is worked back and forth in rows, with color A only.
Row 1 (RS): Ch 1, do not turn, sc in first 13 sts, leaving remaining sts unworked. (13 sts)
Row 2: Ch 1, turn, sc in each st across.
Row 3: Ch 1, turn, sc in first st, sc2tog, sc in next 7 sts, sc2tog, sc in last st. (11 sts)
Row 4: Ch 1, turn, sc in each st across.
Row 5: Ch 1, turn, sc in first st, sc2tog, sc in next 5 sts, sc2tog, sc in last st. (9 sts)
Row 6: Ch 1, turn, sc2tog twice, ch 1, sk next st, sc2tog twice. (4 sts, 1 ch-sp)
Row 7: Ch 1, turn, sc2tog, sc in ch-1 sp, sc2tog. Fasten off. (3 sts)

Edging: With RS facing and working in sides of rows, join A with sl st in first st of row 1. (Ch 1, sl st) in each row to top of flap, (ch 1, sl st) in next 3 sts from row 7, (ch 1, sl st) in side of each row to bottom of flap. Fasten off. (17 sts)

Crochet Button (optional)
With B, ch 2, leaving a 6-inch tail for sewing.
Rnd 1: 3 sc in 2nd ch from hook, do not join.
Rnd 2: 2 sc in each st around, do not join.
Rnd 3: (Sc in next st, sk next st) 3 times, fasten off.
Sew button closed with ending tail and bring it out at the bottom, next to the other tail.
Finishing:
Sew button in place so it fits through the ch-1 sp on the flap. If using a crocheted button, use the longer of the two tails to sew it on.

Weave in all ends.
Share this Crochet Glasses Case on Pinterest!
Here’s an image perfect for pinning:

Rate this Crochet Glasses Case Pattern!
I hope you enjoyed this crochet glasses case pattern. A downloadable pdf of this pattern is available on Ravelry for a small fee.
Interested in using this pattern for a class or workshop? Check out my Terms of Use for usage details.
Do you want the best of Stitches n Scraps delivered right to your inbox? The Stitches n Scraps email newsletter includes highlights from the blog as well as special features not available elsewhere. Don’t miss a stitch – Subscribe now!


5 Comments
Verna
I wear prescription glasses for reading (close up work), but I really wonder if these glasses would work well enough for me, and save the hundreds of dollars for rx’d glasses. I have an unusually difficult sized face and it’s in between child and ‘normal’ adult size. I’m glad they allow measurements for the frames because that’s what I’d need to do. I usually choose frameless frames because of my size.
I have done tapestry before and intarsia and love the graph work! I’ve made blankets and pillows. I’m sure I’ve some other things but it isn’t coming to mind at the moment.
Thank you for the chance to win a pair, and your pattern.
Jill Smith
I wear bifocals and would love to try readers! It would be a nice change I think.
MaryAnn Atzrott
I would definitely get the “Buttercup “ glasses. I occasionally use reading glasses but get mine from the Dollar Tree. I used to wear contacts but I had LASIK surgery a couple years ago and don’t need them anymore.
I’ve been wanting to try Tapestry crochet but haven’t yet.
Teresa Knitting
I wear contacts for distances. I have a couple of really cheap readers if there is something in really tiny print that I need to read.
Jill A. Dupre
I would pick one of the clear colored frames as I have always wanted to have a pair like that. I do use magnifiers when I crochet…especially when crocheting with dark colors.