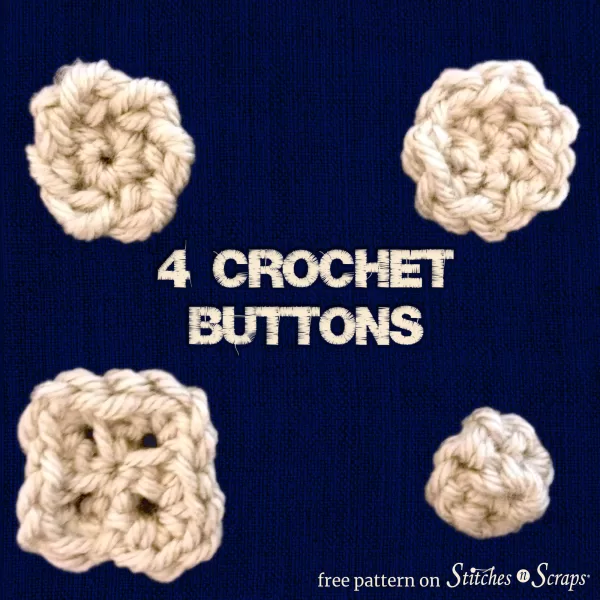
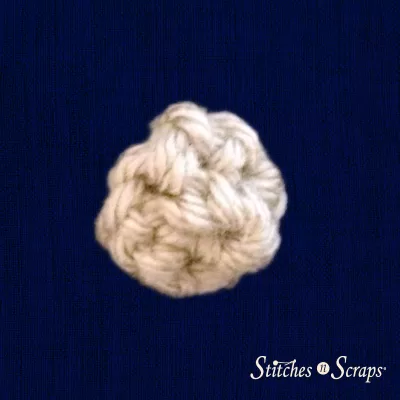
4 Crochet Buttons
Buttons can make or break a project, and sometimes it’s hard to find just the right ones. So what do you do? Make them of course! Here are 4 crochet buttons you can make in minutes, perfect for any project.
This content is protected by copyright. See this Terms of Use / Copyright page for more information.
This post contains sponsored content and/or affiliate links. If you click an affiliate link and make a purchase, I may get a commission.
Mix or Match
Match your project perfectly by making them out of the same yarn, or use a contrasting yarn for a decorative pop. These crochet buttons are a great use of scrap yarn too. Whip a few up with leftover scraps and you’ll soon have a fabulous crochet button collection!


Materials
- Yarn: 5-10 yds worsted weight yarn
- Hook: Size I (5.5 mm) crochet hook
- Notions: Yarn needle
Project Level
Easy: Basic stitches worked in the round, crab stitch/reverse single crochet.
Size/Gauge
Buttons 1-3 are about 1″ across. Button 4 is about 1/2-3/4″ across.
Exact gauge is not critical for this project but may affect yardage needed.
Abbreviations used
This pattern uses US terms.
- ch = chain
- rev sc = reverse single crochet / crab stitch
- RS = right side
- sc = single crochet
- sc2tog =single crochet 2 stitches together
- sl st = slip stitch
- sp = space
- st(s) = stitch(es)
- WS = wrong side
Recommended Resources
Instructions
Leave long starting and/or ending tails. You can use these tails to attach the buttons to your project.
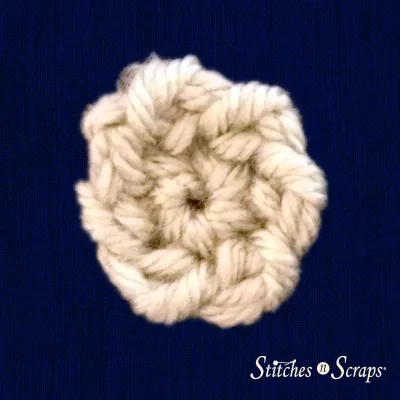
Button 1
Rnd 1 (RS): Ch 2, 6 sc in 2nd ch from hook, join with sl st in first st. (6 sc)
For a thicker button, make 2 separate pieces of rnd 1 and then work rnd 2 through both pieces together.
Rnd 2: Ch 1, working from left to right around the circle, rev sc in each st around. (6 rev sc)
Fasten off.
Use tail to sew rnd 2 closed.
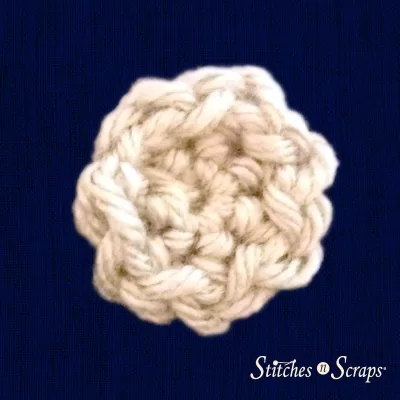
Button 2:
Rnd 1 (RS): Ch 2, 6 sc in 2nd ch from hook, join with sl st in first st. (6 sc)
For a thicker button, make 2 separate pieces of rnd 1 and then work rnd 2 through both pieces together.
Rnd 2: (Ch 1, sl st) in each st around
Fasten off.
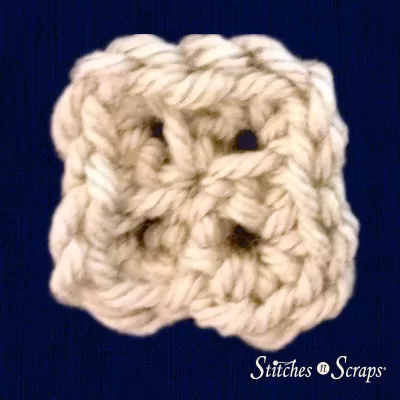
Button 3:
Rnd 1 (WS): Ch 4, sc in 4th ch from hook (skipped chs count as ch 2-sp), [ch 2, sc] 3 times in same ch, join with a sl st to first ch 2 sp. (4 sc, 4 ch-2 sps)
Rnd 2: Ch 1, turn, 2 sc in same ch-2 sp, sl st in next sc, [2 sc in next ch-2 sp, sl st in next sc] 3 times. (8 sc)
Fasten off.
Button 4:
Rnd 1 (WS): Ch 2, 6 sc in 2nd ch from hook, join with sl st in first st. (6 sc)
Rnd 2: Ch 1, turn, sc2tog in first 2 sts, [sc2tog in next 2 sts] twice. (3 sc2tog)
Fasten off.
Sew tail through each st on Rnd 2 and pull tightly to close.
Rate this crochet buttons pattern!
I hope you enjoy the pattern! Which button was your favorite?
Do you want the best of Stitches n Scraps delivered right to your inbox? Don’t miss a stitch – Subscribe now!


4 Comments
Kathryn McDowell Pless
What a cute idea! Thanks for sharing.
Pia Thadani
thanks!
B, J. Licko-Keel
Pia, this is a lovely article that will be useful for many projects. I have been making a crocheted button for many years that is similar to the instructions for #4–but with a little extra twist–I start with a long length of yarn before making the first stitch. After all the stitches for the button have been completed, I use this long beginning yarn as a stuffing for the button before closing the last stitch, and then leave another long length before cutting the yarn that is to be used to fasten the button. This easy-to-remember step helps keep the button’s shape after washing and drying because sometimes, when a stuffing is omitted, the empty button flattens after being cleaned or washed (or even worn for a while). I nope you try and like this little “extra” which I have been teaching in many of my crochet classes. It’s been a real pleasure reading your newsletter and look forward to many more.
Pia Thadani
Thanks BJ! Yes I’ve done the stuffing sometimes, when I want a puffier button 🙂 That’s a good tip.