Crochet Amigurumi Watering Can
Every little gardener needs a little watering can! This crochet amigurumi watering can is an adorable essential for a garden play set. Embellish it with flowers and add embroidery for a personal touch. With 2 strands of yarn held together, it’s quick and fun to make!

This content is protected by copyright. See this Terms of Use / Copyright page for more information.
This post contains sponsored content and/or affiliate links. If you click an affiliate link and make a purchase, I may get a commission.
CAL Central Toybox Crochet Along
This crochet amigurumi watering can is my first design for the 2025 Toybox Crochet Along (CAL) at CAL Central. The CAL is separated into 4 themes, starting with a garden theme.

Join in the fun on the Facebook Group. See the main post for the full schedule, other patterns, and giveaway information too!
King Cole Comfort Aran Yarn
I love King Cole Comfort Aran yarn for crochet amigurumi. It’s an acrylic and nylon blend yarn that creates a wonderfully soft, strong, smooth, and slightly glossy fabric. For this watering can, I used some skeins from my stash.

I chose #3328 Grey for the main color and #337 Denim to make the water, spout top, and flower embellishments. The watering can works in almost any main color. For the water, if you prefer a brighter blue, try #3590 Cornflower.


Materials
- Yarn: King Cole Comfort Aran – 60% acrylic, 40% nylon yarn (220 yds / 3.5 oz / 100g per skein)
- 280 yds 3328 Grey (A)
- 65 yds 337 Denim (B)
Note: For a brighter option, try 3590 Cornflower.
- Hook: Size J / 6 mm crochet hook or size needed to match gauge
- Notions:
- Scissors
- Tapestry Needle
- Stitch Markers (2)
Project Level
Easy: Single crochet with yarn under instead of yarn over, increases, decreases, sewing pieces together.
Size
Approximately 12 inches wide x 7.5 inches tall
Gauge
With 2 strands of yarn held together: 13 yusc x 14 rnds = 4 inches / 10 cm
Water and Base should each measure approximately 4.5 inches x 4 inches
Abbreviations used
This pattern uses US terms.
- bpyusc = back post yarn under single crochet (see Special Stitches)
- ch = chain
- dc = double crochet
- dec = decrease (see Special Stitches)
- inc = increase (see Special Stitches)
- rem = remain(s/ing)
- rep = repeat
- RS = right side
- sc = single crochet
- sl st = slip stitch
- st(s) = stitch(es)
- WS = wrong side
- yo = yarn over
- yu = yarn under (see Special Stitches)
- yusc = yarn under single crochet (see Special Stitches)
Special Stitches
Yarn Under (yu): Bring yarn under hook from back to front.
Yarn Under Single Crochet (yusc): Insert hook where indicated, yu and pull up a loop, yo and pull through both loops on hook.
Increase (inc): Yusc in back loop only of indicated st, yusc in both loops of same st. Inc counts as 2 yusc in stitch counts at end of rows/rnds. See this Almost Invisible Increase tutorial for a closer look.
Invisible Join: Remove working loop from hook. Insert hook from back to front through first st of rnd, place working loop back on hook and pull through from front to back. See this Joining Rounds tutorial for a closer look.
Decrease (dec): Insert hook in front loop only of next 2 sts together, yu and pull up a loop through both sts, yo and draw through both loops on hook.
This decrease is an alternative to a sc2tog. If preferred, you can work a normal sc2tog, replacing the first 2 yo with yu.
Back Post Yarn Under Single Crochet (bpyusc): Insert hook from back to front and to back again around post of indicated st, yu and draw up a loop, yo and draw through both loops on hook.
Notes
- Use 2 strands of yarn held together for all sections of pattern except Flowers.
- After weaving in tails, pull ends through stuffing and out again, pull taught and cut close to work so that end recedes after being cut and is hidden inside of work.
Instructions
Flowers (make 3)
With 1 strand of B, ch 2.
Rnd 1: [Sc, 3 dc] 5 times in 2nd ch from hook. Fasten off, leaving a 12″ / 30 cm tail for sewing. Pull tail through first sc to join. (5 sc, 15 dc)
Set Flowers aside.
Wind 25-30 yds of B into a separate ball so that you can use 2 strands together for remainder of pattern.
Water
Water is worked in turned rounds to keep it from twisting or skewing. Scroll down for chart.
With 2 strands of B held together and leaving an 18″ / 45 cm tail for sewing, ch 4.
Rnd 1 (RS): 2 yusc in 2nd ch from hook, yusc in next ch, 3 yusc in next ch, working on opposite side of ch, yusc in next ch, yusc in same ch as beg of rnd, invisible join in first st. (8 sts)
Rnd 2: Ch 1, turn, inc in first st, yusc in next st, inc in next 3 sts, yusc in next st, inc in last 2 sts, invisible join in first st. (14 sts)
Rnd 3: Ch 1, turn, inc in first st, yusc in next st, inc in next st, yusc in next 2 sts, [inc in next st, yusc in next st] 3 times, yusc in next st, inc in next st, yusc in last st, invisible join in first st. (20 sts)
Rnd 4: Ch 1, turn, inc in first st, yusc in next 3 sts, [inc in next st, yusc in next 2 sts] 3 times, yusc in next st, [inc in next st, yusc in next 2 sts] twice, invisible join in first st. (26 sts)
Rnd 5: Ch 1, turn, yusc in first st, [inc in next st, yusc in next 3 sts] twice, yusc in next st, [inc in next st, yusc in next 3 sts] 3 times, yusc in next st, inc in next st, yusc in last 2 sts, invisible join in first st. (32 sts)
Rnd 6: Ch 1, turn, yusc in first st, inc in next st, yusc in next 5 sts, [inc in next st, yusc in next 4 sts] 3 times, yusc in next st, inc in next st, yusc in next 4 sts, inc in next st, yusc in last 3 sts, invisible join in first st. (38 sts)
Rnd 7: Ch 1, turn, yusc in first 2 sts, inc in next st, yusc in next 5 sts, inc in next st, yusc in next 4 sts, place marker in yusc just made, yusc in next 2 sts, [inc in next st, yusc in next 5 sts] 3 times, yusc in next st, inc in next st, yusc in last 3 sts, invisible join in first st. (44 sts)
In image, red star shows marker placement.

Fasten off. Weave in ending tail. Pull long tail to RS of work. Set Water aside.
Water Chart

Spout
Spout, Handle, and Body are worked in continuous rounds. Do not turn or join unless instructed. Use a stitch marker or running stitch marker to mark the first stitch of each rnd.
With 2 strands of B held together and leaving a 12″ / 30 cm tail for sewing, ch 2.
Rnd 1 (RS): 6 yusc in 2nd ch from hook. (6 sts)
Rnd 2: Inc in each st to end of rnd. (12 sts)
Rnd 3: [Inc in next st, yusc in next st] to end of rnd. (18 sts)
Rnd 4: Yusc in next st, inc in next st, [yusc in next 2 sts, inc in next st] to last st, yusc in last st. (24 sts)
Rnd 5: [Inc in next st, yusc in next 2 sts] to end of rnd, invisible join to first st. (32 sts)
Rnd 6: Ch 1, bpyusc around each st to end of rnd.
Rnd 7: [Dec, yusc in next 2 sts] to end of rnd. (24 sts)
Rnd 8: [Dec, yusc in next st] to end of rnd. (16 sts)
Begin stuffing Spout and continue stuffing firmly as work progresses.
Rnd 9: Dec to end of rnd, change to 2 strands of A held together in last st. (8 sts)
Rnds 10-25: Yusc in each st to end of rnd.
Rnd 26: Yusc in next 2 sts, [inc in next st, yusc in next 2 sts] twice. (10 sts)
Rnd 27: Yusc in next 3 sts, [inc in next st, yusc in next 2 sts] twice, yusc in last st. (12 sts)
Rnd 28: Yusc in next 5 sts, inc in next st, yusc in next st, inc in next st, yusc in last 4 sts. (14 sts)
Rnd 29: Sl st in next 2 sts, yusc in next 2 sts, inc in next st, yusc in next st, inc in next st, place marker in 2nd yusc of inc just made, yusc in next st, inc in next st, yusc in next 3 sts, sl st in next 2 sts. Fasten off, leaving an 18″ / 45 cm tail for sewing. (13 yusc)
Marked st is center front of Spout.
With tapestry needle, bring beginning (color B) tail down through center of top of Spout and out at color change (rnd 9) directly in line with marked center front. Pull gently until top of Spout indents slightly and angles towards center front.

Insert needle close to where it came out, then bring it back out through center of top of Spout. Adjust position and tightness as desired, then weave in tail to secure.
Weave in all other ends except for long tail for sewing. Set Spout aside.
Spout Support
With 2 strands of A held together and leaving a 12″ / 30 cm tail for sewing, ch 9.
Row 1: 3 yusc in 2nd ch from hook, yusc in next 6 chs, 3 yusc in next ch, working in opposite side of chain, yusc in next 6 chs, invisible join to first st. Fasten off leaving a 12″ / 30 cm tail for sewing. (18 sts)
Set Spout Support aside.

Handle
With 2 strands of A held together and leaving a 12″ / 30 cm tail for sewing, ch 6, being careful not to twist, sl st in first ch to form a circle.
Rnd 1: Yusc in 2nd ch from hook and each ch to end of rnd. (6 sts)
Rnds 2-25: Yusc in each st around. Stuff Handle as work progresses, leaving 1″ / 2.5 cm unstuffed at top and bottom.
Rnd 26: Yusc in each st around, join with sl st in first st. Fasten off leaving a 12″ / 30 cm tail for sewing.
Set Handle aside.
Top
With 2 strands of A held together, ch 2.
Row 1: 3 yusc in 2nd ch from hook. (3 sts)
Row 2: Ch 1, turn, inc in each st across. (6 sts)
Row 3: Ch 1, turn, inc in first st, yusc in next st, [inc in next st, yusc in next st] across. (9 sts)
Row 4: Ch 1, turn, inc in first st, yusc in next 2 sts, [inc in next st, yusc in next 2 sts] across. (12 sts)
Row 5: Ch 1, turn, yusc in first st, inc in next st, [yusc in next 3 sts, inc in next st] twice, yusc in last 2 sts. (15 sts)
Row 6: Ch 1, turn, yusc in first st, inc in next st, [yusc in next 4 sts, inc in next st] twice, yusc in last 3 sts. (18 sts)
Rnd 7: Ch 1, turn, yusc in first 2 sts, inc in next st, [yusc in next 5 sts, inc in next st] twice, yusc in last 3 sts, ch 1, working in sides of rows, yusc in each row across, join with sl st in turning ch-1. (35 sts)
Fasten off, leaving an 18″ / 45 cm tail for sewing. Set Top aside.

Base
With 2 strands of A held together, ch 4.
Rnds 1-6: Rep Rnds 1-6 of Water.
Rnd 7: Ch 1, turn, yusc in first 2 sts, [inc in next st, yusc in next 5 sts] twice, yusc in next st, [inc in next st, yusc in next 5 sts] 3 times, yusc in next st, inc in next st, yusc in last 3 sts, join with sl st in first st. (44 sts)
Do not fasten off.
Body
Rnd 1 (RS): Ch 1, bpyusc around each st to end of rnd. (44 sts)
Rnds 2-19: Yusc in each st to end of rnd. Do not fasten off.
Weave in starting tail.

Assembly
Attach Water
Place Water RS up on top of last rnd of Body, lining up marked st on Water with next st on Body. This should line up the oval-shaped Water with the oval-shaped Base. If it does not, adjust as necessary so they line up.
Joining Rnd: Working through Water and Body together, yusc in each st to last 10 sts, stuff Body firmly, yusc in each remaining st to end of rnd. Fasten off (44 sts)
Indent Water and Base
Place long tail of water on tapestry needle. Insert needle down through center of Water and out at center of Base, compressing Body as needed to get needle through.

Pull gently to indent Water and Base. Insert needle close to where it came out and bring it back up through center of Water. Adjust tension as desired, then weave in end to secure.

Attach Top
With RS up, line up curved edge of Top with either curved edge of Water. This will become the front edge. Sew Top to Joining Rnd around curved edge, using a whipstitch seam and long tail. This will be a visible seam that resembles a welded metal join.

Attach Flowers
Sew flowers to side of Body as desired. Optionally, add additional embroidery or embellishments such as leaves or stems.
Attach Spout and Spout Support
Line up marked center front of bottom of Spout with center front bottom of Body, at Base. Using long tail, whipstitch bottom of Spout in place, pausing before completing the seam to finish stuffing Spout firmly.

Using long tails, sew one short end of Spout Support to center front top edge of Body. Sew opposite short end to top of Spout at color change (Row 9). Flatten Support along Spout as needed to adjust length of support, and sew in place.

Attach Handle
Flatten 1″ / 2.5 cm of each end of Handle. Fold flattened ends towards inside and sew to top and bottom of Body, on opposite side from Spout.

Top fold line should be at top edge of Body, with end of Handle pointing down and bottom fold line should be at bottom edge of Body, with end of Handle pointing up. This helps Handle to curve outwards.
Weave in any remaining ends and remove markers.
Share this crochet amigurumi watering can pattern on Pinterest!
Here’s an image perfect for pinning.

Rate this crochet amigurumi watering can pattern!
I hope you enjoyed this crochet amigurumi watering can pattern! A downloadable pdf of this pattern is available on Ravelry for a small fee.
Do you want the best of Stitches n Scraps delivered right to your inbox? Don’t miss a stitch – Subscribe now!


You May Also Like
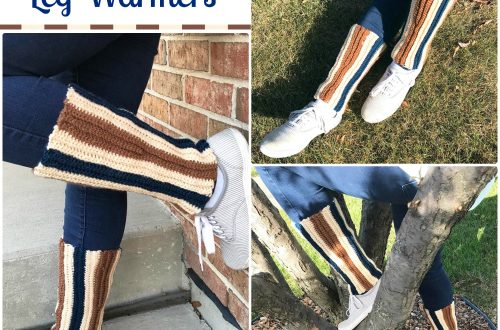
Free Pattern – Super Stretchy Leg Warmers

Corner to Corner Crochet Dishcloth – Symbiosis