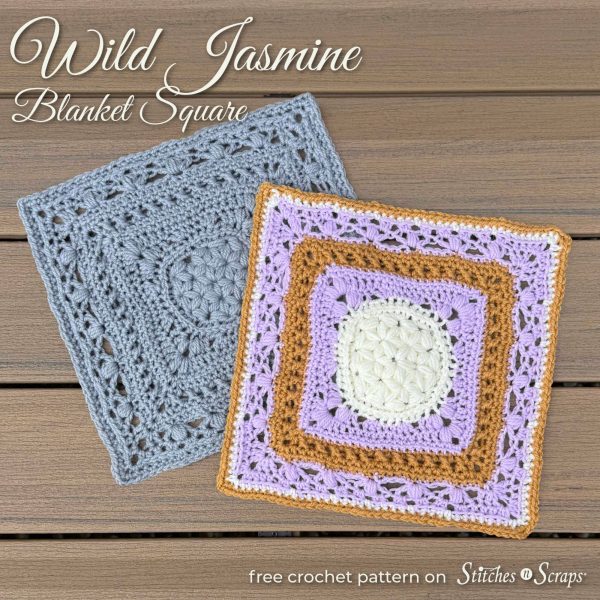
Wild Jasmine Crochet Square Pattern
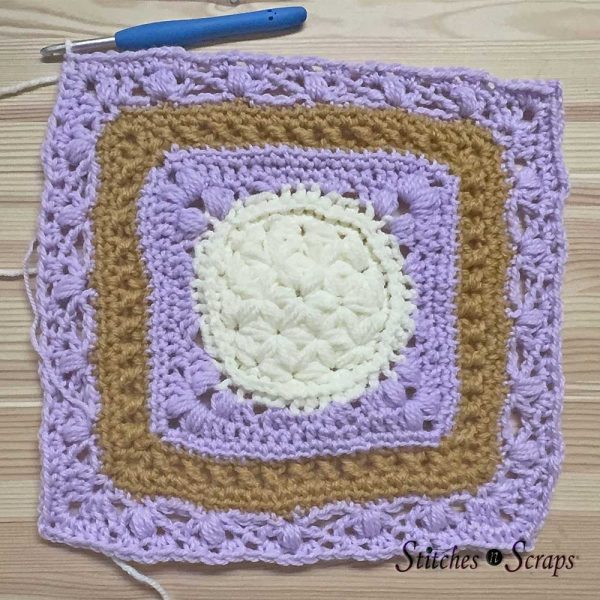
Bursting with texture, the Wild Jasmine blanket square is a floral-inspired journey through a variety of engaging stitch patterns. Fans, crosses, and puffs surround the jasmine stitch center circle that gives this crochet square pattern its name. The layered textures create a light, airy, and delicate feel, with just the right amount of structure.
This content is protected by copyright. See this Terms of Use / Copyright page for more information.
This post contains sponsored content and/or affiliate links. If you click an affiliate link and make a purchase, I may get a commission.
Moogly Afghan CAL
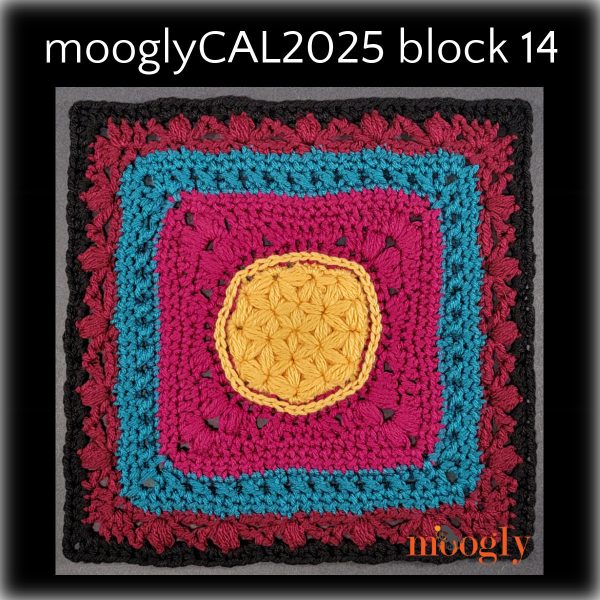
I designed this crochet square pattern for the Moogly 2025 afghan CAL. Are you crocheting along? This is square number 14 out of a total of 24 squares. But there’s still plenty of time to catch up! See the main post for the full schedule and links to all the squares.
Take a look at the block 14 post to see how Moogly’s version of this crochet square pattern turned out.
King Cole Comfort Aran Yarn
I used King Cole Comfort Aran yarn for this crochet square pattern. The acrylic and nylon blend is beautifully soft and smooth, with just a bit of shine to it. It comes in lots of lovely colors from brights to pastels and neutrals.

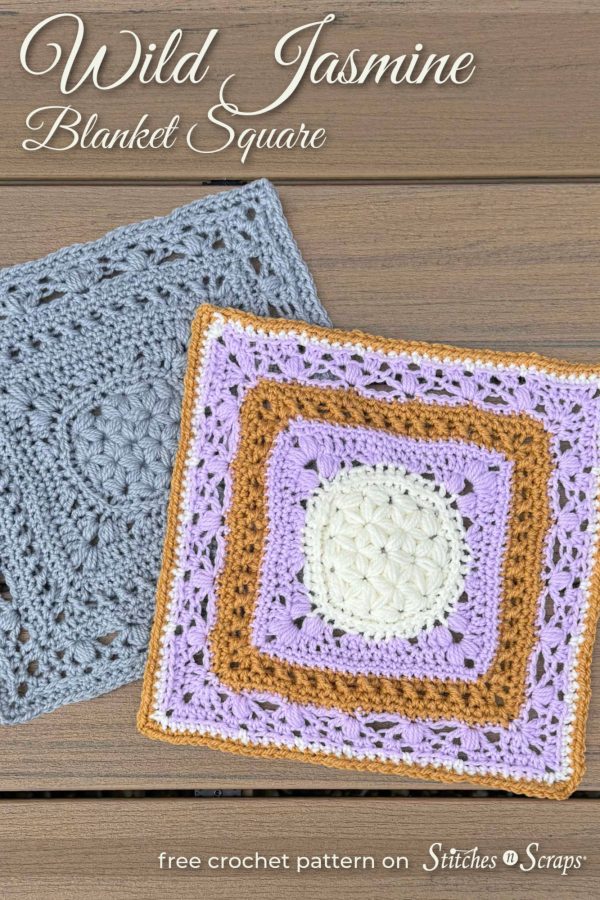
The solid color sample shows color 3328 Grey. For the multi-colored sample, I used 333 Cream, 3457 Orchid, and 3329 Truffle.
Video Tutorial Available!
Need a little extra help with this pattern? Grab the pattern and then follow along with the step-by-step video tutorial!


Materials
- Yarn: 150 yds King Cole Comfort Aran – 60% acrylic, 40% nylon yarn (220 yds / 3.5 oz / 100g per skein) – See note below
- Hook: Size J / 6 mm crochet hook or size needed to match gauge
- Notions:
- Scissors
- Tapestry Needle
Note: Solid sample shows color 3328 Grey. Multi-colored sample shows the following yarn colors and amounts.
- 50 yds Cream (333): Rnds 1-4
- 30 yds Orchid (3457): Rnds 5-7 & 11-13
- 70 yds Truffle (3329): Rnds 8-10 & 14-15
Project Level
Intermediate: Jasmine stitch, puff stitches, back loop only, post stitches and crossed stitches.
Size
Approximately 12 inches / 30 cm square
Gauge
Rnds 1-7 of pattern = 7 inches / 17.5 cm square.
Abbreviations used
This pattern uses US terms.
| 2-puff cl | 2 puff stitch cluster (see Special Stitches) |
| 3-puff cl | 3 puff stitch cluster (see Special Stitches) |
| blo | back loop only |
| bphdc | back post half double crochet (see Special Stitches) |
| ch | chain |
| csdc | chainless starting double crochet (see Special Stitches) |
| dc | double crochet |
| fpdc | front post double crochet (see Special Stitches) |
| hdc | half double crochet |
| LC | left cross (see Special Stitches) |
| puff | puff stitch (see Special Stitches) |
| rep | repeat |
| rnd | round |
| RS | right side |
| sc | single crochet |
| sc2tog | single crochet 2 together |
| sl st | slip stitch |
| sm puff | small puff stitch (see Special Stitches) |
| st(s) | stitch(es) |
| WS | wrong side |
| yo | yarn over |
Recommended Resources
Special Stitches
Back Post Half Double Crochet (bphdc): Yo, insert hook from back to front and to back again around post of indicated st, yo and pull up a loop, yo and draw through all 3 loops on hook.
Chainless Starting Double Crochet (csdc): Pull working loop up to height of a dc, while holding loop firmly in place, twist hook counterclockwise (towards you first and then around the back) around loop creating a faux yarn over (both strands of this yarn over together count as 1 loop on hook), insert hook in first st, yo and pull up a loop, [yo and pull through 2 loops on hook] twice.

Front Post Double Crochet (fpdc): Yo, insert hook from front to back and out to front again around post of indicated st, yo and pull up a loop, [yo and draw through 2 loops on hook] twice.
Left Cross (LC): Sk next st, fpdc around next st, working in front of fpdc just made, fpdc around skipped st.
Puff Stitch (puff): [Yo, insert hook in indicated st or sp, yo and pull a loop up] 4 times (9 loops on hook), yo and pull through all 9 loops on hook, ch 1 to close.
Jasmine Stitches
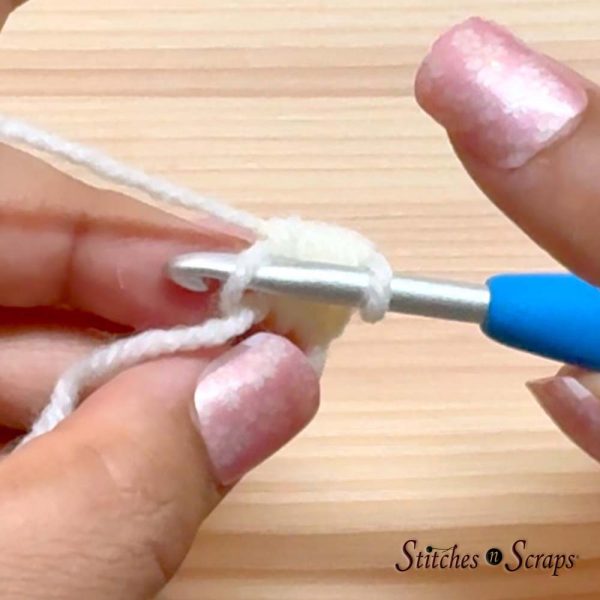
Sm Puff Stitch (sm puff): [Yo, insert hook in magic ring, yo and pull a loop up] 3 times (7 loops on hook), yo, hold working yarn with non-hook hand so it doesn’t get lost inside stitch (you will need to put your hook under it again later) and pull through all 7 loops on hook, insert hook under held yarn, yo and pull through held yarn and lp on hook (top of st), ch 1.
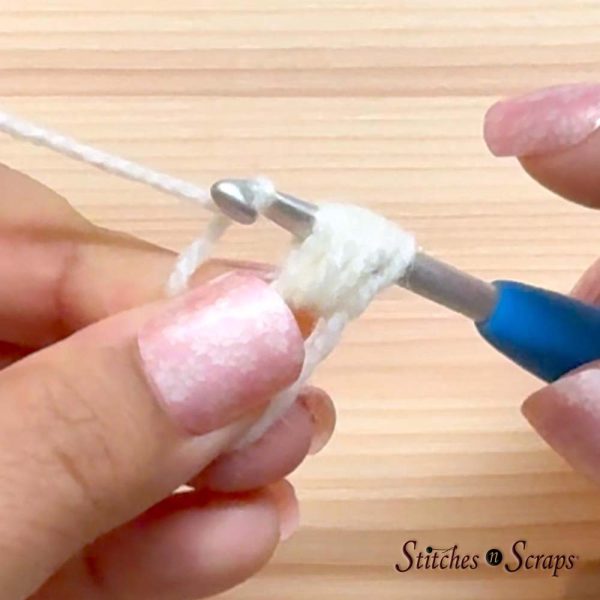
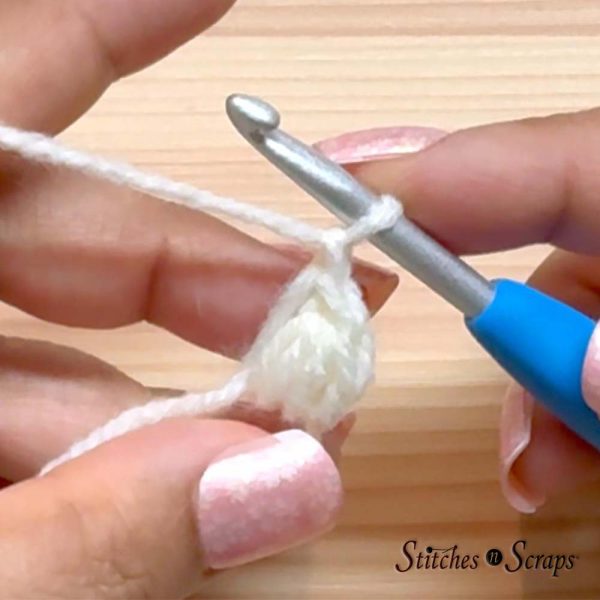
This is the first or “anchor” puff of the Jasmine stitch pattern. The height of this puff stitch will determine the size of all the puffs in the Jasmine stitch section).
2 Puff Stitch Cluster (2-puff cl): Pull working loop up to same size as last puff or cl made, [yo, insert hook where indicated for first leg, yo and pull a loop up to same height as other loop(s)] 3 times (7 loops on hook – first leg of cluster), [yo, insert hook where indicated for 2nd leg, yo and pull a loop up to same height as other loops] 3 times (13 loops on hook – 2nd leg of cluster), yo, hold working yarn with non-hook hand and pull through all 13 loops on hook, insert hook under held yarn, yo and pull through held yarn and lp on hook (top of st), ch 1.
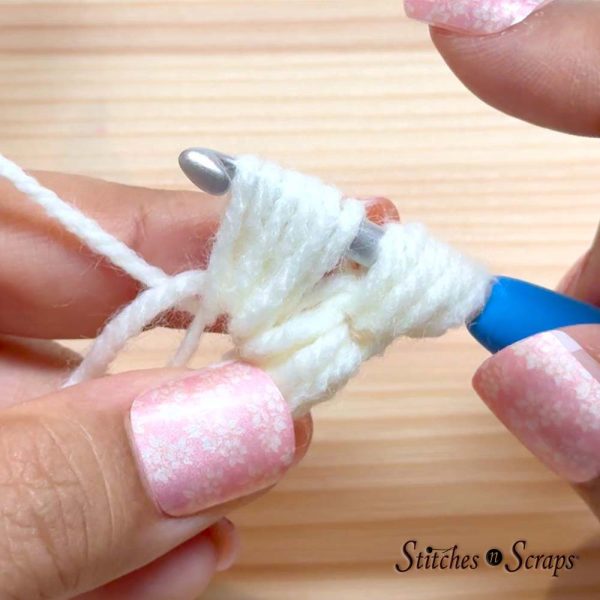
3 Puff Stitch Cluster (3-puff cl): Pull working loop up to same size as last puff or cl made, [yo, insert hook where indicated for 1st leg, yo and pull a loop up to same height as other loop(s)] 3 times (7 loops on hook – first leg of cluster), [yo, insert hook where indicated for 2nd leg, yo and pull a loop up to same height as other loops] 3 times (13 loops on hook – 2nd leg of cluster), [yo, insert hook where indicated for 3rd leg, yo and pull a loop up to same height as other loops] 3 times (19 loops on hook – 3rd leg of cluster) yo, hold the working yarn with non-hook hand and pull through all 19 loops on hook, insert hook under held yarn, yo and pull through held yarn and loop on hook (top of st), ch 1.
Instructions
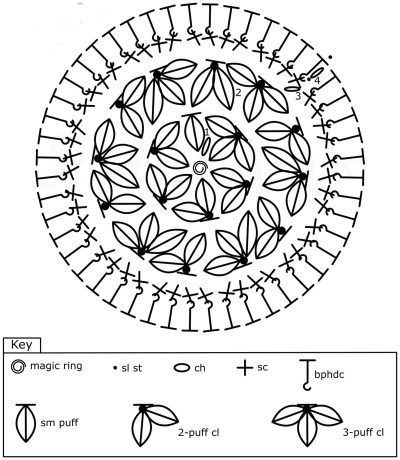
Jasmine Stitch Center Circle
Scroll down for chart
Make a magic ring and ch 1.
If you prefer not to use a magic ring, ch 2 and treat 2nd ch from hook as magic ring for Rnd 1. All Rnds are worked on RS, do not turn your work.
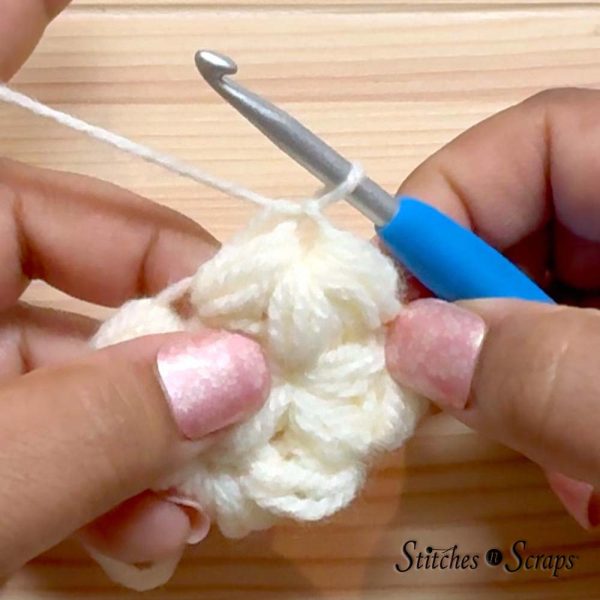
Rnd 1 (RS): Sm puff in magic ring, 2-puff cl placing first leg in sm puff just made and 2nd leg in magic ring, [2-puff cl placing first leg in cl just made and 2nd leg in magic ring] 3 times, 3-puff cl placing first leg in cl just made, 2nd leg in magic ring, and 3rd leg in top of beginning sm puff, pull tail to tighten magic ring. (1 sm puff, 4 2-puff cls, 1 3-puff cls).
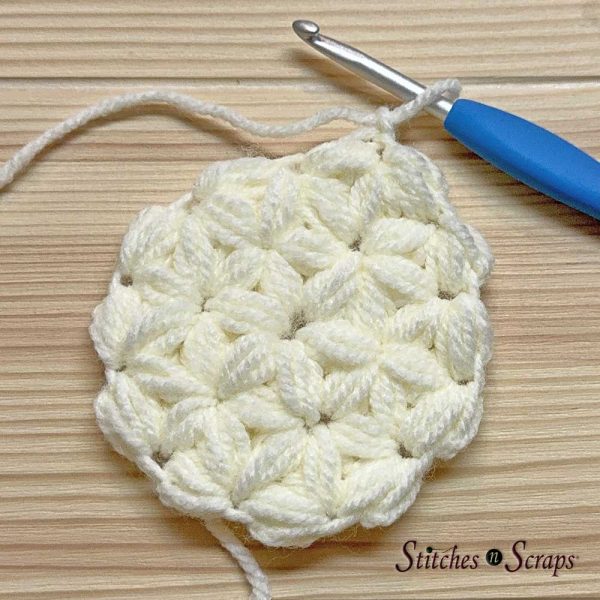
Rnd 2: 2-puff cl placing first leg in top of cl just made and 2nd leg in top of beginning sm puff of Rnd 1, place marker in cl just made to find it more easily later, [3-puff cl placing first leg in top of cl just made, 2nd leg in top of next st (at base of last leg of previous cl), and 3rd leg in top of next st, 2-puff cl placing first leg in top of cl just made and 2nd leg in top of next st (at base of last leg of previous cl)] 5 times, 3-puff cl (do not ch-1 at end of this cl) placing first leg in top of cl just made, 2nd leg in top of next st, and 3rd leg in marked top of first cl of rnd, remove marker. (6 2-puff cls, 6 3-puff cls)
Rnd 3: Ch 1, 4 sc in top of each cl around, join with sl st in first st. (48 sc)
Rnd 4: Ch 1, bphdc around each st around, join with sl st in first st. (48 bphdc)
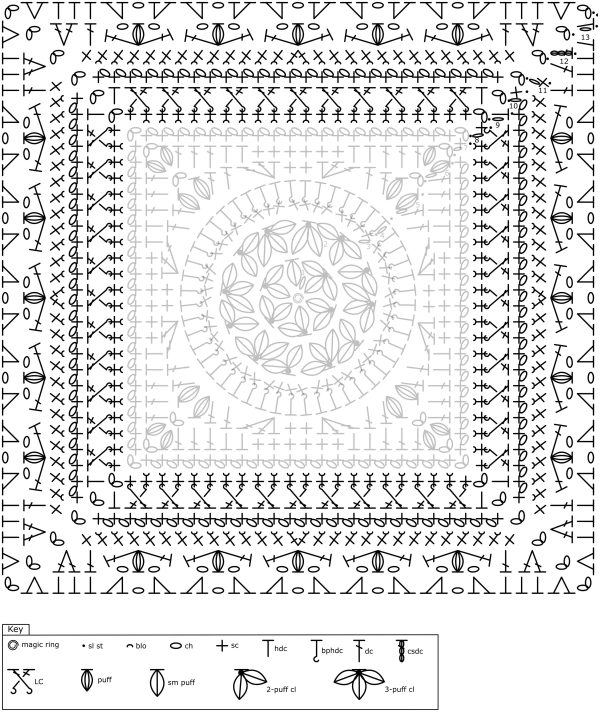
Rnds 1-4 Chart
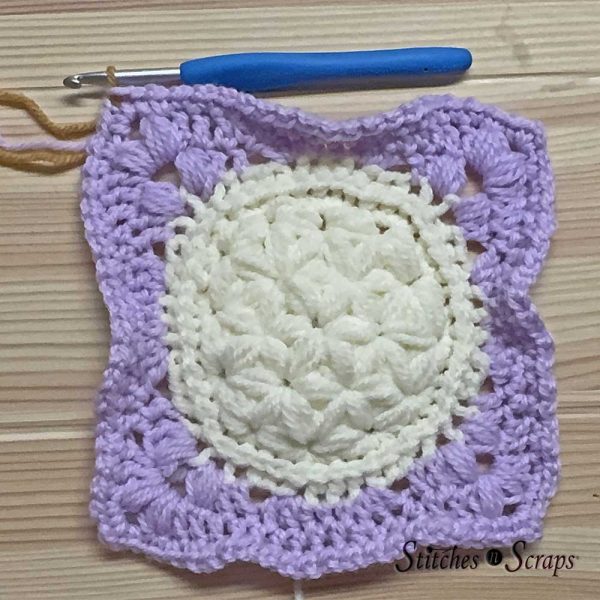
Circle to Square
Scroll down for chart
Rnd 5: Ch 1, puff in first st, ch 2, *(puff, dc) in next st, dc in next st, sk next 2 sts, (2 dc, hdc) in next st, sc in next 2 sts, (hdc, 2 dc) in next st, sk next 2 sts, dc in next st**, (dc, puff) in next st, ch 2; rep from * 3 times more, ending at ** on last rep, dc in same st as beginning puff, join with sl st in beginning puff, sl st in first ch-2 sp. (8 puffs, 32 dc, 8 hdc, 8 sc, 4 ch-2 sps)
Rnd 6: Ch 1, (puff, ch 2, puff, dc) in first ch-2 sp, *dc in next 2 sts, hdc in next 2 sts, sc in next 6 sts, hdc in next 2 sts, dc in next 2 sts**, (dc, puff, ch 2, puff, dc) in next ch-2 sp; rep from * 3 times more, ending at ** on last rep, dc in beginning ch-2 sp, join with sl st in beginning puff, sl st in first ch-2 sp. (8 puffs, 24 dc, 16 hdc, 24 sc, 4 ch-2 sps)
Rnd 7: Ch 1, (sc, ch 2, sc) in first ch-2 sp, ch 1, (sc, ch 1) in each st to next ch-2 sp, [(sc, ch 2, sc) in next ch-2 sp, ch 1, (sc, ch 1) in each st to next ch-2 sp] 3 times, join with sl st to first st, sl st in first ch-2 sp. (80 sc, 76 ch-1 sps, 4 ch-2 sps)
Rounds 5-7 Chart
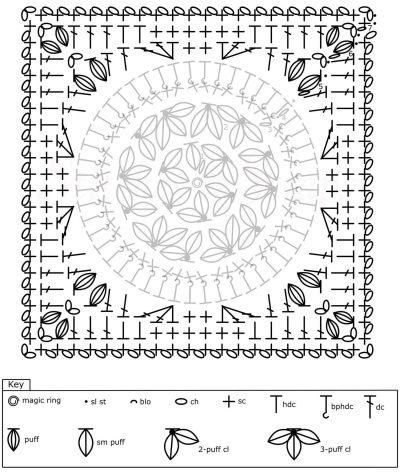
Crossed Stitches
Scroll down for chart
Rnd 8: Ch 1, (sc, ch 2, sc) in first ch-2 sp, skipping all ch-1 sps, sc in blo of each sc to next ch-2 sp, [(sc, ch 2, sc) in next ch-2 sp, sc in blo of each sc to next ch-2 sp] 3 times, join with sl st to first st, sl st in first ch-2 sp. (88 sc, 4 ch-2 sps)
Rnd 9: Ch 1, (hdc, ch 2, hdc) in first ch-2 sp, LC across to next ch-2 sp, [(hdc, ch 2, hdc) in next ch-2 sp, LC across to next ch-2 sp] 3 times, join with sl st to first st, sl st in first ch-2 sp. (44 LC, 8 hdc, 4 ch-2 sps)
Rnd 10: Repeat Rnd 7. (104 sc, 100 ch-1 sps, 4 ch-2 sps)
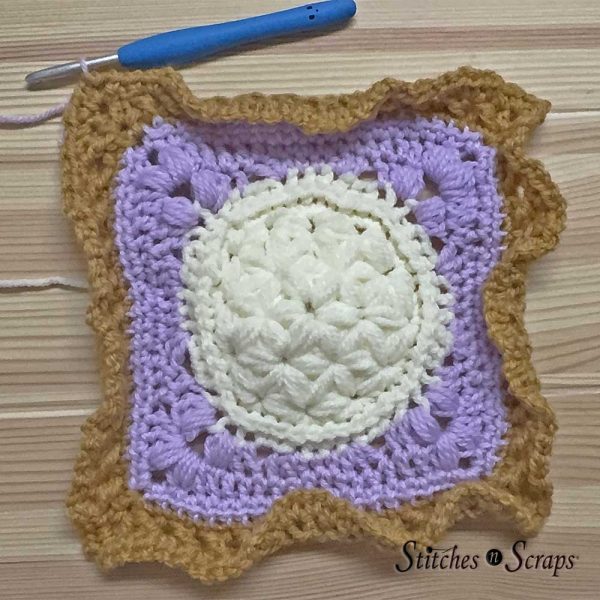
Fans
Scroll down for chart
Rnd 11: Ch 1, (sc, ch 2, sc) in first ch-2 sp, skipping all ch-1 sps and working in blo of all sts, sc in next 12 sts, sc2tog, sc in next 12 sts, [(sc, ch 2, sc) in next ch-2 sp, sc in next 12 sts, sc2tog, sc in next 12 sts] 3 times, join with sl st to first st, sl st in first ch-2 sp. (108 sc, 4 ch-2 sps)
If you prefer, you can work “Ch 5 (counts as dc and ch-2 sp)” instead of “Csdc, ch 2” in Rnd 12.
Rnd 12: (Csdc, ch 2, 2 dc) in first ch-2 sp, *dc in next st, sk next 2 sts, (dc, ch 1, puff, ch 1, dc) in next st, [sk next 4 sts, (dc, ch 1, puff, ch 1, dc) in next st] 4 times, sk next 2 sts, dc in next st**, (2 dc, ch 2, 2 dc) in next ch-2 sp; rep from * 3 times more, ending at ** on last rep, dc in beginning ch-2 sp, join with sl st in first st, sl st in first ch-2 sp. (20 puffs, 64 dc, 40 ch-1 sps, 4 ch-2 sps)
Adjusting for Size
If your square is already close to 12″, work alternate Rnd 13 and skip Border.
Rnd 13: Ch 1, (hdc, ch 2, 2 hdc) in first ch-2 sp, *hdc in next 3 sts, [sk next dc, 2 hdc in next ch-1 sp, ch 1, sk next puff, 2 hdc in next ch-1 sp, sk next dc] 5 times, hdc in next 3 sts**, (2 hdc, ch 2, 2 hdc) in next ch-2 sp; rep from * 3 times more, ending at ** on last rep, dc in beginning ch-2 sp, join with sl st in first st, sl st in first ch-2 sp. (120 hdc, 20 ch-1 sps, 4 ch-2 sps)
Alternate Rnd 13 (to skip Border): Ch 1, (hdc, ch 2, 2 hdc) in first ch-2 sp, *hdc in next 3 sts, [sk next dc, 2 hdc in next ch-1 sp, sc in next puff, 2 hdc in next ch-1 sp, sk next dc] 5 times, hdc in next 3 sts**, (2 hdc, ch 2, 2 hdc) in next ch-2 sp; rep from * 3 times more, ending at ** on last rep, dc in beginning ch-2 sp, join with sl st in first st, sl st in first ch-2 sp. (120 hdc, 20 sc, 4 ch-2 sps)
Rounds 8-13 Chart
Border
Rnd 14: Ch 1, (sc, ch 2, sc) in first ch-2 sp, sc in blo of each st and in each ch-1 sp (as normal) across to next ch-2 sp, [(sc, ch 2, sc) in next ch-2 sp, sc in blo of each st and in each ch-1 sp across to next ch-2 sp] 3 times, join with sl st in first st. (148 sc, 4 ch-2 sps)
Adjusting for Size
To adjust size, skip or rep Rnd 15 as needed.
Rnd 15: Sl st in first ch-2 sp, ch 1, (sc, ch 2, sc) in first ch-2 sp, sc in each st across to next ch-2 sp, [(sc, ch 2, sc) in next ch-2 sp, sc in each st across to next ch-2 sp] 3 times, join with sl st in first st, sl st in first ch-2 sp. (156 sc, 4 ch-2 sps)
Fasten off. Weave in ends. Wash and block.
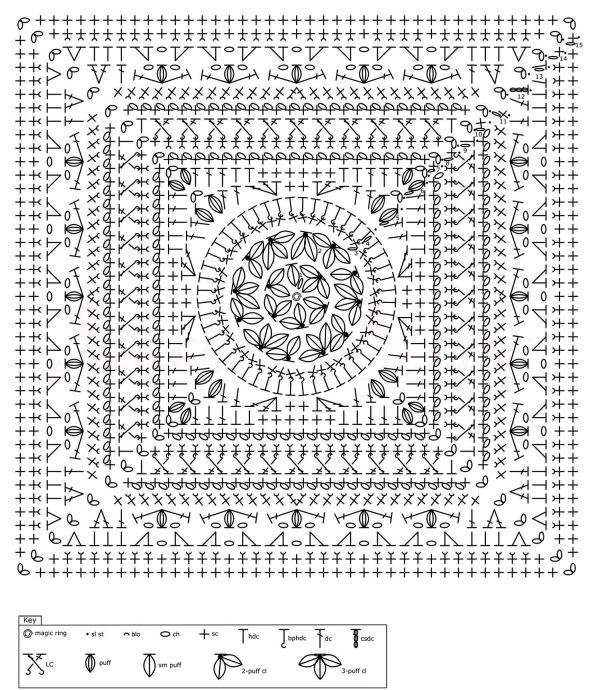
Full Square Chart
Share this crochet square pattern on Pinterest!
Here’s an image perfect for pinning.
Rate this crochet square pattern!
I hope you enjoyed this crochet square pattern! A downloadable pdf of this pattern is available on Ravelry for a small fee.
Do you want the best of Stitches n Scraps delivered right to your inbox? Don’t miss a stitch – Subscribe now!


You May Also Like

Free Pattern – Last Minute 4th of July Headband

What Learning Crochet Can Add to Your Life – Guest Post by Kathryn Vercillo
