Knitting Tutorials
Ready for a new knit stitch, technique, or pattern? You’re in the right place! Browse all the knitting tutorials, or select a category from the dropdown menu. What will you learn today?

This cast on is sometimes called the alternating cable cast on, or the seed stitch cast on. It's similar to ...More
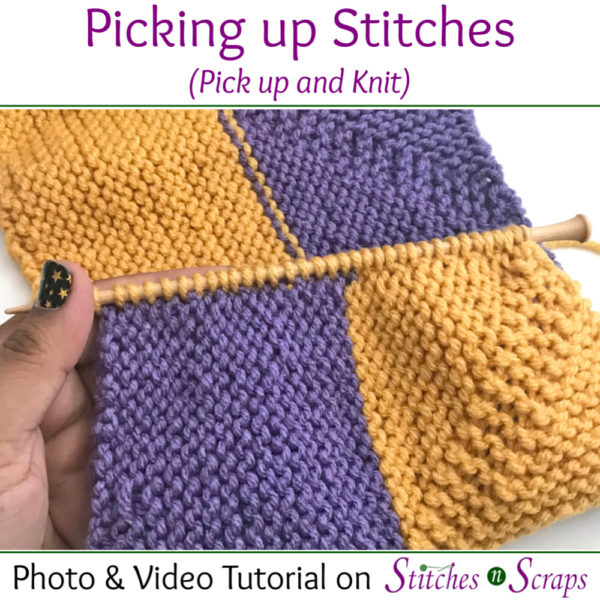
Picking up stitches is an important skill in knitting. It lets you start working in a different direction, from any ...More

The Cable Cast On creates a firm edge that has a pretty, twisted appearance and doesn't stretch as much as ...More
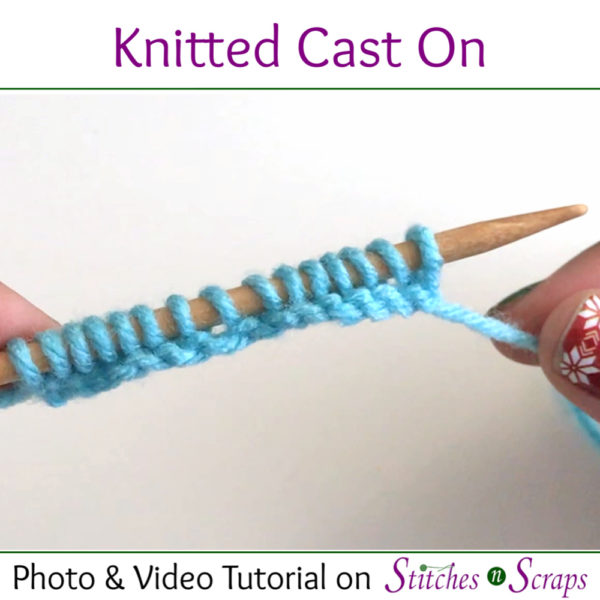
The knitted cast on is one of the most basic cast on techniques. It's a great one for new knitters ...More

Fair Isle is a colorwork technique in knitting, in which you work with multiple colors at once. This usually leaves ...More
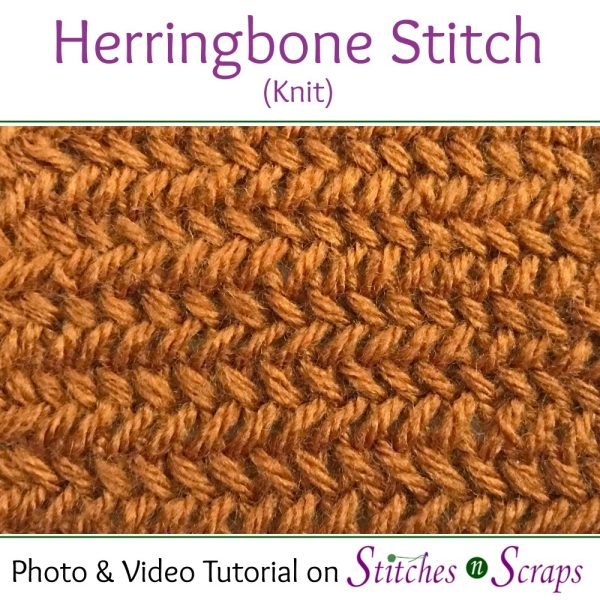
The knit herringbone stitch uses slight modifications to common decrease stitches. This creates a dense, zig-zag texture. Learn how in ...More

Most of the time in knitting, we want our stitches to lay flat and even. If they twist, it's often ...More

Bobbles are a fun way to add texture to your knitting. As with most techniques in knitting and crochet, there ...More
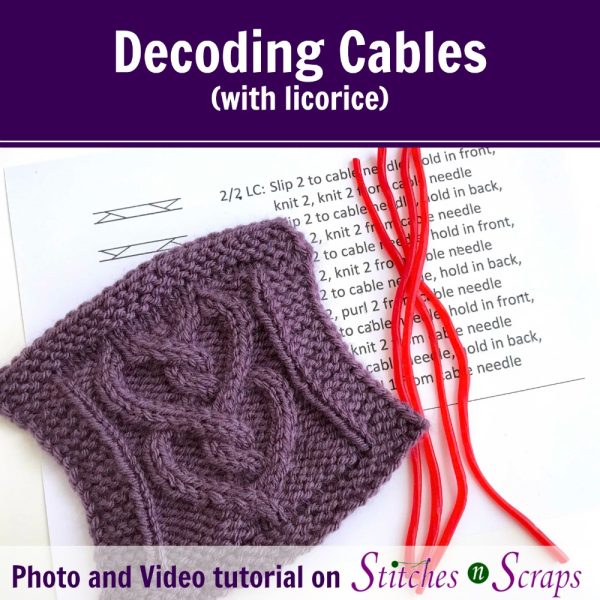
If you've never done them, cables can seem intimidating. They have weird abbreviations and symbols, with complicated instructions for each ...More

The Latvian Braid stitch is a variant of fair isle / stranded colorwork, alternating between 2 colors. Raised "braids" are ...More