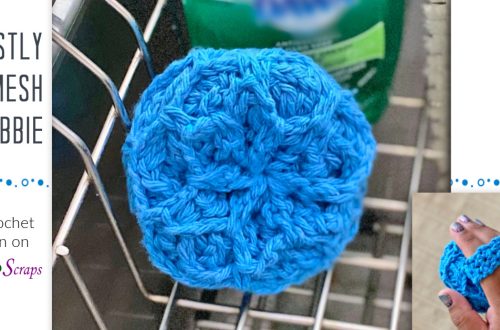
Free Pattern – Sleepy Snowman
Shhhh! This sweet little snowman is sleepy. He’s had a busy day playing in the freshly fallen snow, and now he’s resting, all cozy in his cap and scarf. Add a Sleepy Snowman to your holiday decor, or make one as a gift! He works up quickly, and is great for using up scraps.

This pattern was designed for the Holiday Stashdown CAL 2017 on CAL Central. With this CAL, you can clean out your stash and end up with some beautiful items for holiday gifting, plus there are tons of great giveaway prizes to be won!

This pattern is protected by copyright. Please do not distribute or share this pattern in any way other than by sharing a link to this page or to the pattern page on Ravelry. Click here for copyright information.
This pattern contains sponsored content and affiliate links (click for more info). If you click one of these links and then make a purchase, I may be compensated. You get the same great prices, and you will be helping to support this site!
Sleepy Snowman

![]()
Add this to your Ravelry Queue
Materials:
- Worsted weight yarn
- 50 yds white
- 10 yds each of green and silver
- Small amounts of black, red, and orange embroidery floss or crochet thread (to embroider face)
- Size H / 5 mm hook or size needed to obtain gauge
- Yarn needle
- Fiberfill / stuffing material (a couple of handfuls)
- Stitch marker (optional)
- Small pom-pom maker (optional)
Difficulty:
Intermediate – Simple stitches worked in continuous rounds, with some assembly and embroidery.
Size:
About 6″ tall (not counting hat).
Gauge:
14 sc x 17 rows = 4 inches. Exact gauge is not critical for this project, but stitches should be tight enough to hold stuffing in.
Abbreviations used:
- ch = chain
- sc = single crochet
- sc2tog = single crochet 2 together
- fphdc = front post half double crochet
- bphdc = back post half double crochet
- sl st = slip stitch
- st(s) = stitch(es)
- sp(s) = space(s)
- rnd = round
- RS = right side
Recommended Resources:
- Tutorial – How to make a pom pom without a pom pom maker
- Tutorial – Continuous rounds and running stitch markers
- Tutorial – Why Continuous Rounds Shift
- Tutorial – Changing Colors
Instructions:
Notes:
- Do not join rounds or turn, unless specifically instructed.
- You may find it helpful to mark the first stitch of each round with a stitch marker or piece of scrap yarn
Snowman
Head
Rnd 1 (RS): With white, work 6 sc in a magic loop OR ch 2, 6 sc in 2nd ch from hook. (6 sc)
Rnd 2: 2 sc in each st around. (12 sc)
Rnd 3: (2 sc in next st, sc in next st) 6 times. (18 sc)
Rnds 4-7: Sc in each st around (18 sc)
Rnd 8: (Sc2tog, sc in next st) 6 times. (12 sc)
Start stuffing head. Continue to stuff snowman as you go. Stuff firmly, but do not overstuff (stuffing should not show through stitches).
Rnd 9: Sc2tog around (6 sts)
Middle
Rnds 10-11: Repeat rnds 2-3.
Rnd 12: (2 sc in next st, sc in next 2 sts) 6 times. (24 sc)
Rnds 13-17: Sc in each st around (24 sc)
Rnd 18: (Sc2tog, sc in next 2 sts) 6 times. (18 sts)
Rnd 19: Repeat rnd 8.
Bottom
Rnd 20: Repeat rnd 3.
Rnd 21: Repeat rnd 12.
Rnd 22: (2 sc in next st, sc in next 3 sts) 6 times. (30 sc)
Rnds 23-28: Sc in each st around. (30 sc)
Rnd 29: (Sc2tog, sc in next 3 sts) 6 times. (24 sts)
Rnd 30: Repeat rnd 18.
Rnds 31-32: Repeat rnds 8-9.
Fasten off, leaving a 12 inch tail.
Finishing
Finish stuffing.
With tail and yarn needle, sew through each of last 6 stitches, using a running stitch. Pull tight to close bottom.
Flatten bottom (optional – helps snowman to stand freely): Sew tail up through center of bottom, and bring needle out somewhere on the neckline. Pull gently until bottom flattens. Insert needle 1 stitch over (in any direction), back down through the snowman, and out at the center bottom again.


Eyes & Mouth: Using images as a guide, embroider eyes and mouth. They are both made the same way. Come up at 1 side (A). Go down the other side (B), and come up below and in the middle of those two points (C). Make sure the thread goes under your needle, so it is pulled down slightly in the middle. Go back down as close as possible to the same spot (C), making sure you are catching that thread in your stitch as you do, to lock it in place.


Nose: I didn’t originally have a nose on my snowman, until one of the testers (Heather – Libbadiah on Ravelry), added a little carrot nose on hers. I liked it so much, I had to add one to mine too! It’s made the same way as the other features, except that the stitch is worked vertically instead of horizontally, and then tacked down off to the side. Thanks Heather!

Weave in all tails. Weave the starting and ending tails of the embroidery floss / threads into sections where they will be hidden – so under where the hat will be, or where the scarf will be.
Hat
With silver, ch 20, leaving a 16 inch starting tail. Being careful not to twist, join with sl st to form a circle.
Rnd 1 (RS): Ch 1, hdc in back bump of 2nd ch from hook and each ch across, join with sl st to first st. (20 sts)
Rnd 2: Ch 1, bphdc in first st, (fphdc in next st, bphdc in next st) around to last st, fphdc in next st, join with sl st, changing to green. (20 sts)
Rnds 3-6: With green, sc in each st around. Do not join. (20 sc)
Rnd 6: (Sc2tog, sc in next st) 6 times, sc2tog. Do not join. (13 sc)
Rnd 7: Sc in next st, sc2tog 6 times. Fasten off. (7 sts)
Use green tail to sew top of hat shut, then weave in the end.
Make a pom pom with silver yarn, and trim to about 1 inch. Use tails from pom pom to sew or tie it onto the hat, then weave in the ends.
Use starting (silver) tail from hat to sew hat to snowman’s head, then weave in the end.


Scarf
With silver and green yarns together, ch 36. Tie a knot at each end of the chain and trim tails to form “fringe”. Wrap around snowman’s neck as desired.

Important! If you are making this for children, be sure to sew all pieces (including the scarf) securely into place so they can’t be removed or get wrapped around little fingers.
I hope you enjoy making this pattern! Thanks to pandastamper, tawnierose, libbadiah, and JStockert for testing it!
A downloadable pdf of this pattern is also available in my Craftsy store or on Ravelry, for a small fee. The fee for the pdf format is to offset the advertising revenue lost when you print or download the pattern rather than viewing it online.
Do you want the best of Stitches ‘N’ Scraps delivered right to your inbox? The Stitches ‘N’ Scraps email newsletter includes highlights from the blog as well as special features not available elsewhere. Don’t miss a stitch – Subscribe now!


2 Comments
CHARLOTTE THELEMAQUE
real cute will make two for the great grand children…
Pia Thadani
I’m so glad you like it! I’d love to see them when they’re done 🙂