Free Crochet Patterns
Find the perfect, free crochet pattern for your next project! Browse them all, or select a category from the dropdown menu. Where will your creativity take you today?
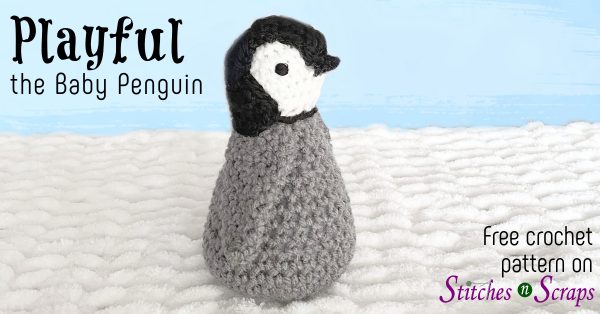
Playful the Baby Penguin has arrived just in time for the holidays! She's an emperor penguin chick, so she loves ...More

Give your dog a cozy, supportive place to sleep! This crochet dog bed has 5 inches of foam inside and ...More

Use up your yarn scraps to make your own crochet footbag! Footbags work up quickly and are great for family ...More
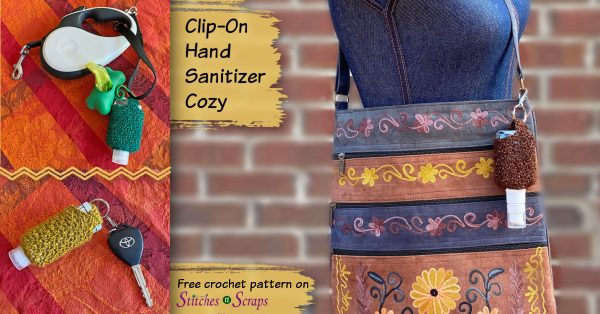
Never be without your hand sanitizer again! Turn your travel size bottle into a clip-on hand sanitizer with this quick ...More

Breezy the Baby Bat is a laid back kinda guy who loves hanging out with his batty friends. This Halloween ...More
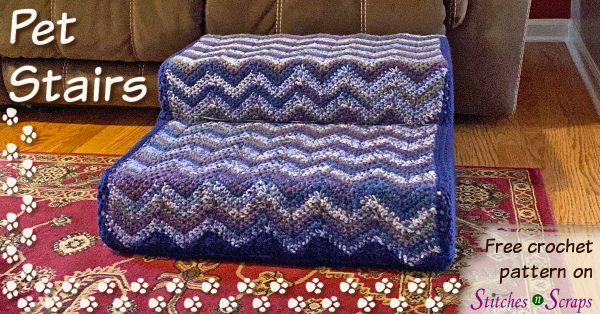
Sometimes our smaller fur babies need a little help to reach high places. Give them a boost with these crochet ...More

Make yourself a sweet treat for Halloween! Put your favorite bar of soap in this Candy Corn Soap Saver. Crochet ...More

Gear up for fall with the Sheet Metal Scarf. Dressed up or dressed down, the straight, simple lines and ombre, ...More

Clean up with the Mostly Mesh Scrubbie! This easy crochet scrubbie pattern works up fast with a rolled mesh tube ...More

Sunny the Baby Bunny is hopping your way to spread a little joy! How can you not smile when you ...More