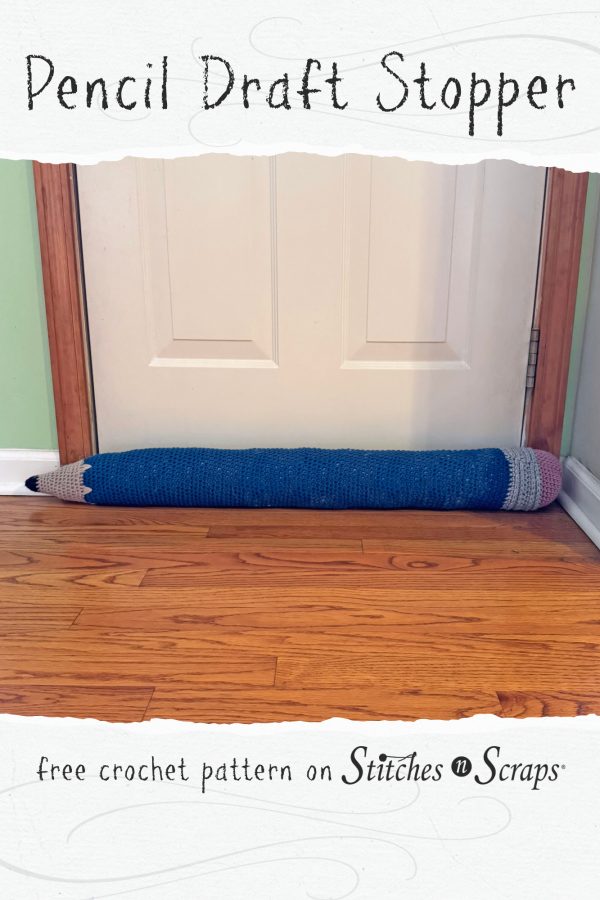
Crochet Pencil Draft Stopper
Feeling the chill where you shouldn’t be? Block drafty windows and doors with a Crochet Pencil Draft Stopper! Customize the colors and length for a whimsical way to stay warm this season. It’s great for offices and kids of all ages, and makes a great gift too!

This content is protected by copyright. See this Terms of Use / Copyright page for more information.
This post contains sponsored content and/or affiliate links. If you click an affiliate link and make a purchase, I may get a commission.
Giftstravaganza Crochet Along
I designed this crochet pencil draft stopper for the 2023 Giftstravaganza CAL hosted by Underground Crafter. Get ready for holiday gifting with daily patterns, and enter for a chance to win fun prizes too! Each week has a theme, and this week’s theme is “Gifts for Home”. See the full schedule and all the other great patterns in the main CAL post.

Poly Fil Premium Fiber Fill
Fairfield World generously gave me lots of Poly-Fil Premium Polyester Fiber Filling for previous projects, like Playful the Baby Penguin shown below. It’s my go-to for all my amigurumi and stuffed designs because it’s so soft and squishy and easy to use!

My favorite stuffing tip is to tear the stuffing into small bits and stuff just a little at a time, rather than trying to put a whole handful in all at once. This creates a smoother finish and avoids clumps and lumps.


Project Level
Intermediate: Mostly basic stitches worked in the round. Some 3rd loop of half double crochet, and some spike stitches.
Size
Without stuffing: 3.25 inches diameter x 36 inches long
With stuffing: 4 inches diameter x 39 inches long. Note that how firmly you stuff your pencil will have an impact on the finished size.
Gauge
14 sc x 15 rnds = 4 inches.
Abbreviations used
This pattern uses US terms.
- blo = back loop only
- ch = chain
- dec = decrease
- hdc = double crochet
- inc – increase
- rnd = round
- RS = right side
- sc = single crochet
- sk = skip
- sl st = slip stitch
- sp = space
- st(s) = stich(es)
- tlo = third loop only
- yo = yarn over
Special Stitches
Increase (inc): Sc in blo of next st, sc in both loops (like normal) of same st. (See increase tutorial here)
Decrease (dec): Insert hook into front loop only of both of next 2 stitches, yarn over and draw up a loop, yarn over and draw through both loops on hook.
This is an alternative to a single crochet 2-together (sc2tog) stitch. If you prefer, you can use the standard sc2tog instead.

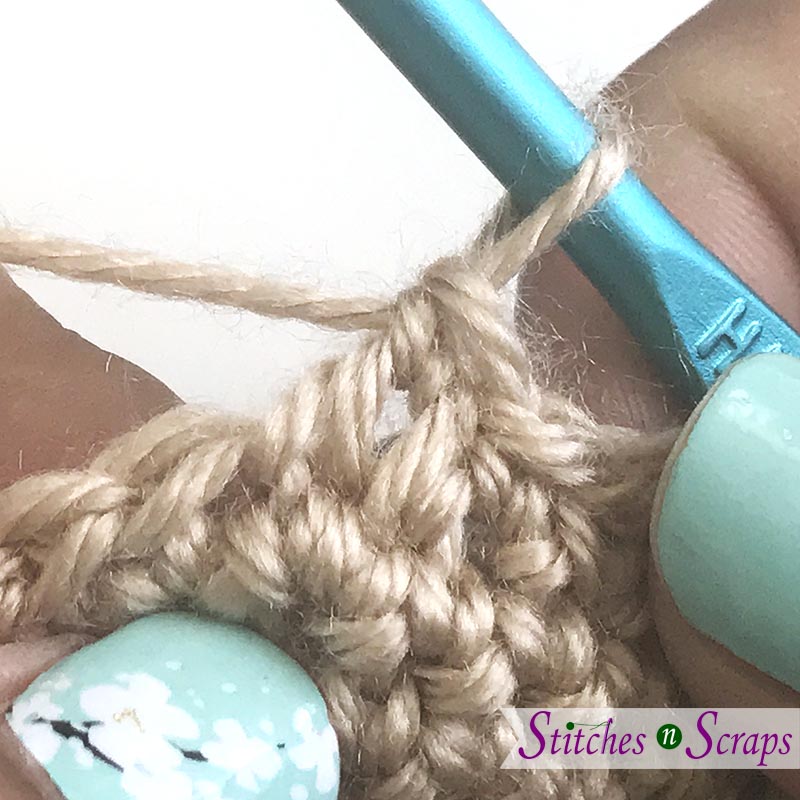
Spike Fan: Worked over 3 sts and counts as 3 sts.
Insert hook in first st, yo and pull up a loop (2 loops on hook), insert hook 2 rows below second st, yo and pull up a loop to height of current row (3 loops on hook), yo and pull through all 3 loops on hook (first stitch made).

Insert hook in same st 2 rows below second st, yo and pull up a loop to height of current row, yo and pull through both loops on hook (2nd stitch made).
Insert hook in same st 2 rows below second st, yo and pull up a loop to height of current row (2 loops on hook), insert hook in 3rd st and pull up a loop (3 loops on hook), yo and pull through all 3 loops on hook (3rd stitch made).

When working back into a spike fan, work into all 3 sts individually.

Instructions
Join rnds where indicated with a sl st in first st of the rnd.
Eraser
Rnd 1: With pink, ch 2, 6 sc in 2nd ch from hook, join. (6 sts)
Rnd 2: Ch 1, inc in each st around, join. (12 sts)
Rnd 3: Ch 1, inc in first st, sc in next st, [inc in next st, sc in next st] around, join. (18 sts)
Rnd 4: Ch 1, inc in first st, sc in each of next 2 sts, [inc in next st, sc in each of next 2 sts] around, join. (24 sts)
Rnd 5: Ch 1, sc in each of first 2 sts, inc in next st, [sc in each of next 3 sts, inc in next st] around to last st, sc in last st, join. (30 sts)
Rnd 6: Ch 1, inc in first st, sc in each of next 4 sts, [inc in next st, sc in each of next 4 sts] around, join. (36 sts)
Rnds 7-11: Sc in each st around, join, change to grey when joining last rnd.
Ferrule
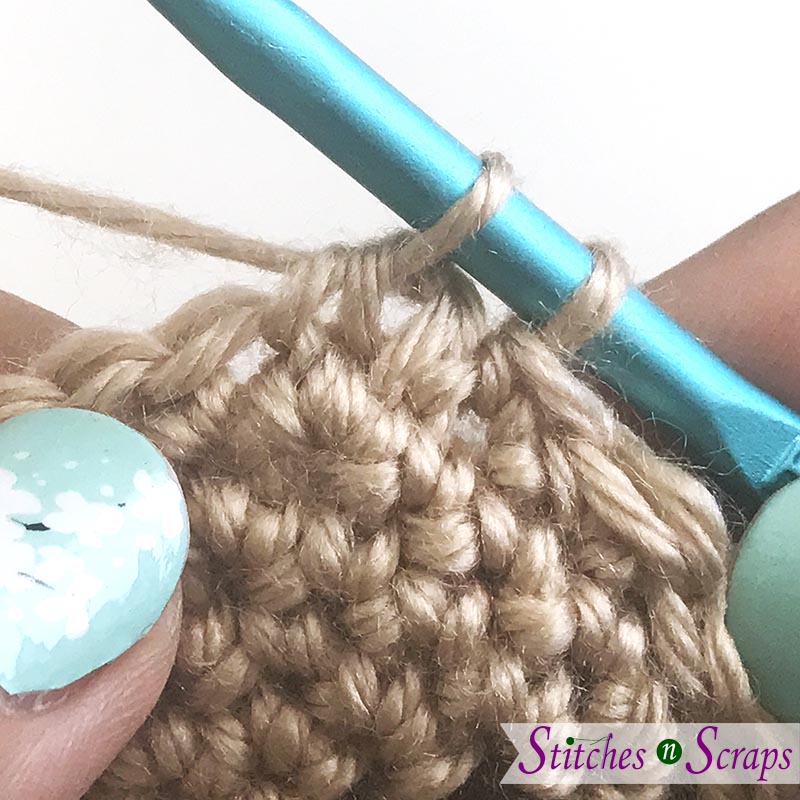
Rnd 12: With grey, ch 1, hdc in each st around, join.
Rnd 13: Ch 1, hdc in tlo of each st around, join.
Rnd 14: Ch 1, sc in tlo of each st around, join.
Rnds 15-17: Rep Rnds 12-14, change to main color when joining last rnd.
Body
Rnd 18: With main color, ch 1, sk first st, sc in each remaining st around, do not join.
Rnd 19: Sc in first ch-1 sp and in each st around, do not join.
Continue to sc in each st around in continuous rnds until pencil measures about 30 inches (or about 8-9″ shorter than desired finished length) from beginning of eraser. There is no need to mark the first st of the rnds, you can end the last rnd wherever you like.
Ending the last rnd: Sl st in next 2 sts, fasten off.

Turn pencil inside out and weave in all ends.
Stuff pencil firmly and evenly, but not so full that stuffing shows through the stitches. For best results, add small pieces of stuffing at a time. Roll pencil back and forth on a hard surface a few times to even out the stuffing.
Point
Leave all tails on RS of work going forward, so that you can weave them in more easily once pencil is finished. Continue stuffing as you go.
Join beige with a sl st in any st on last rnd of body.
Rnd 1: Sc in first 3 sts, spike fan, [sc in next 3 sts, spike fan] around, join. (18 sc, 6 spike fan)
Rnd 2: Ch 1, sc in first 5 sts, dec, [sc in next 10 sts, dec] twice, sc in last 5 sts, join. (33 sts)
Rnd 3: Ch 1, sc in first 9 sts, dec, [sc in next 9 sts, dec] twice, join. (30 sts)
Rnd 4: Ch 1, sc in each st around, join.
Rnd 5: Ch 1, sc in first 4 sts, dec, [sc in next 8 sts, dec] twice, sc in last 4 sts, join. (27 sts)
Rnd 6: Ch 1, sc in first 7 sts, dec, [sc in next 7 sts, dec] twice, join. (24 sts)
Rnd 7: Ch 1, sc in each st around, join.
Rnd 8: Ch 1, sc in first 3 sts, dec, [sc in next 6 sts, dec] twice, sc in last 3 sts, join. (21 sts)
Rnd 9: Ch 1, sc in first 5 sts, dec, [sc in next 5 sts, dec] twice, join. (18 sts)
Rnd 10: Ch 1, sc in each st around, join.
Stuff pencil tip.
Rnd 11: Ch 1, sc in first 2 sts, dec, [sc in next 4 sts, dec] twice, sc in last 2 sts, join. (15 sts)
Rnd 12: Ch 1, sc in first 3 sts, dec, [sc in next 3 sts, dec] twice, join and change to black. (12 sts)
Rnd 13: With black, ch 1, sc in each st around, join.
Finish stuffing (use back of crochet hook to push stuffing into tip if needed).
Rnd 14: Ch 1, sc in first st, dec, [sc in next 2 sts, dec] twice, sc in last st, join. (9 sts)
Rnd 12: Ch 1, sc in first st, dec, [sc in next st, dec] twice, join. (6 sts)
Rnd 13: Ch 1, dec around, fasten off. (3 sts)
Use tail to sew tip of pencil closed as needed.
Weave in all remaining ends, going through the stuffing so that they don’t show on the RS.
Share this Crochet Pencil Draft Stopper on Pinterest!
Here’s an image perfect for pinning.
Rate this Crochet Pencil Draft Stopper Pattern!
I hope you enjoyed this crochet pencil draft stopper pattern. A downloadable pdf of this pattern is available on Ravelry for a small fee. The fee for the pdf format offsets the advertising revenue lost when you print or download the pattern rather than viewing it online.
Do you want the best of Stitches n Scraps delivered right to your inbox? The Stitches n Scraps email newsletter includes highlights from the blog as well as special features not available elsewhere. Don’t miss a stitch – Subscribe now!


2 Comments
Kara Cahill
Totally making two of these for my homeschool classroom!! ✏️
Pia Thadani
yay! Would love to see pics if you do! 🙂