Tutorial – Solomon’s Knot / Lover’s Knot
The Solomon’s knot or Lover’s knot stitch (lk) is a fast and easy way to create beautiful, lacy fabrics. The actual stitch is very simple – an extended chain combined with a single crochet. Here’s how you do it:
Pull up a working loop to the desired length. If you are following a pattern, it should specify the length. Most often, the lks at the edges of your work will need to be a bit shorter than the rest of the lks.
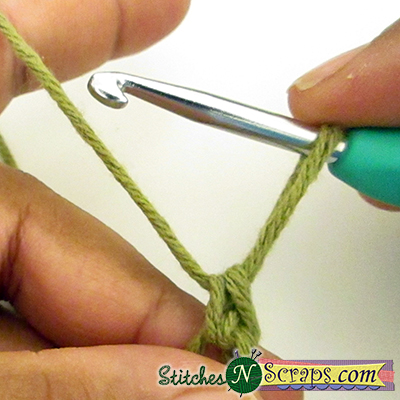
Now holding your loop in place, yarn over and draw through, just as though you were making a chain, but do not tighten it. What you now have is a very long chain.
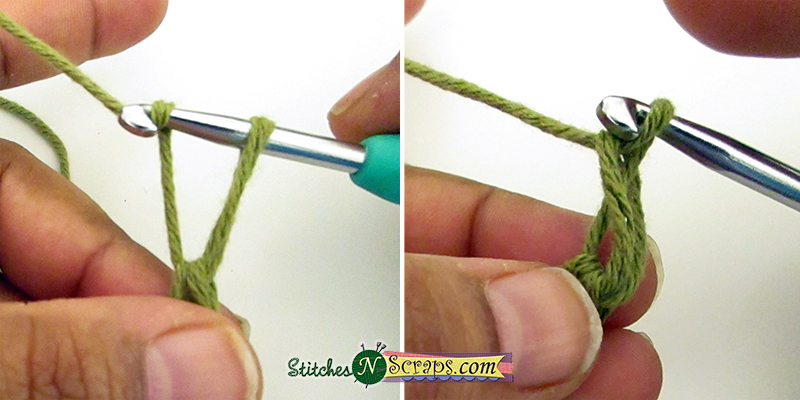
To secure this chain so it won’t change size, we’re going to work a single crochet into the back bump. Just like any chain, there will be a “V” at the front with 2 strands, and a third strand at the back. We’re going to insert our hook under that back strand.

Now complete an sc stitch as normal – yo, draw up a loop, yo, pull through both loops on hook.

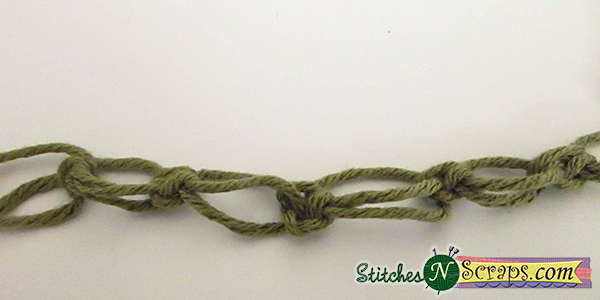
That’s it, that’s the lover’s knot stitch. Here are several in a row. You can see that each lk stitch is made up of a chain or “loop” and an sc. Sometimes you will see patterns refer to these parts of the stitch individually (i.e. “sk two loops, sc in next sc”)
When you work into an lk stitch, you will usually work into the sc part of it, unless otherwise specified in the pattern. In this way, the lk stitches are connected to each other to form various shapes. In my little swatch here, you can see triangle shapes on the first row, and diamond shapes on the 2nd row.
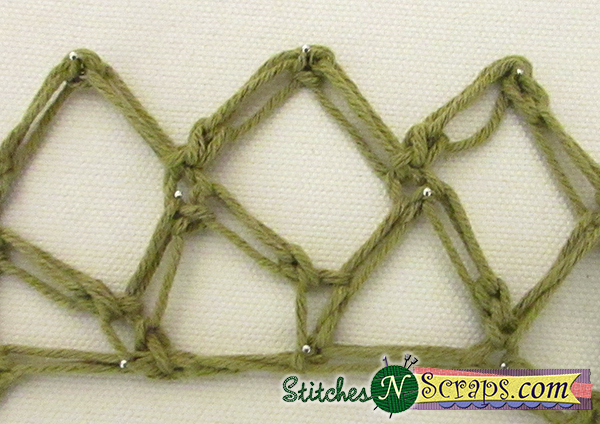
The triangles are made by working (2 lk, sc in next st) – so you have one lk forming the bottom of the triangle and 2 forming the sides. The diamonds are made by working (2 lk, sk next st, sc in next st). Now you have 2 lks forming the bottom two sides of the diamond, and 2 lks forming the top. By varying the length and number of the lk stitches, you can create all sorts of different shapes, including increases and decreases!
The real key to beautiful lovers knots (and the hardest part of making them) is keeping the lengths of your loops even. This just takes practice. Once you are familiar with the stitch, you can create large pieces of fabric remarkably quickly, and with very little yarn! I will soon be sharing with you a pattern for a basic shawl I made last summer, using this beautifully simple stitch.


3 Comments
Anne Cartwright
Wonderfully clear explanation. Thank you. This stitch has always defeated me so now you try again.
Pia Thadani
yay! I’m glad it helped you! 🙂
Pia Thadani
Sure! Sorry for the late reply, I’ve been travelling. Please comment on that post (https://stitchesnscraps.com/free-pattern-bohemian-wraps-of-three/) and let me know what you’re having trouble with. I’d be happy to help.
Thanks!