Embroidered Snowflakes and Surface Crochet
Follow along, step by step, through decorating the Snowflake Crochet Coin Purse! Learn how to add columns of surface crochet in the corners, and embroidered snowflakes on the front and back panels.
This content is protected by copyright. See this Terms of Use / Copyright page for more information.
This post contains sponsored content and/or affiliate links. If you click an affiliate link and make a purchase, I may get a commission.
Bag Along CAL
The Snowflake Crochet Coin Purse Pattern features the split single crochet stitch in rounds.
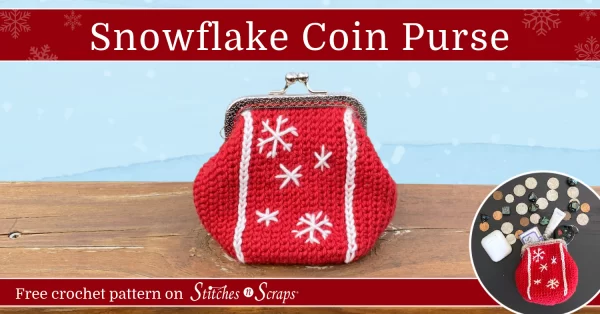
This is the last of 6 bag patterns in the 2022 Bag Along CAL. See the full schedule and all the other patterns in the main Bag Along CAL post.
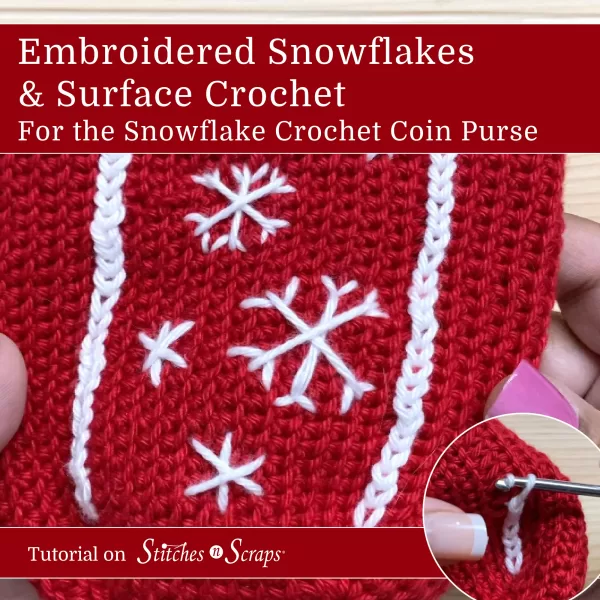
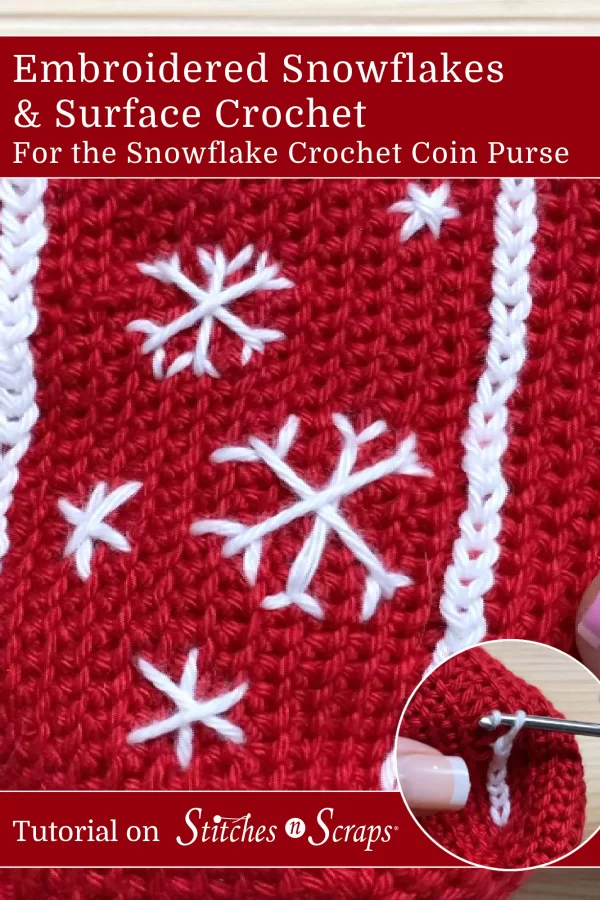
Surface Crochet Slip Stitches
Surface crochet slip stitches form the chained columns at the corners of the bag. These stitches float over the surface of the existing crochet stitches.

Hold the working yarn underneath the fabric, inside the bag. To start, insert your hook through the fabric and pull up a loop. For each slip stitch, insert your hook into the fabric in the desired location, pull up a loop, and pull that loop through the loop on your hook.

You can use this technique on just about any type of crochet fabric. In this case, each corner of the bag has a column of unused loops from stitches that were worked into the back loop only. By placing one slip stitch over each of these loops, we can make an evenly-spaced chain.
Embroidered Snowflakes
Aside from the corners, the rest of the bag uses split single crochet stitches. These form a grid-like fabric that’s a perfect background for embroidery.

For each snowflake, start with a horizontal or vertical stitch. Then make 2 diagonal lines. Choose the starting point of the first diagonal line, and count how many stitches over and how many rows up/down it is from the end of the starting horizontal/vertical line.
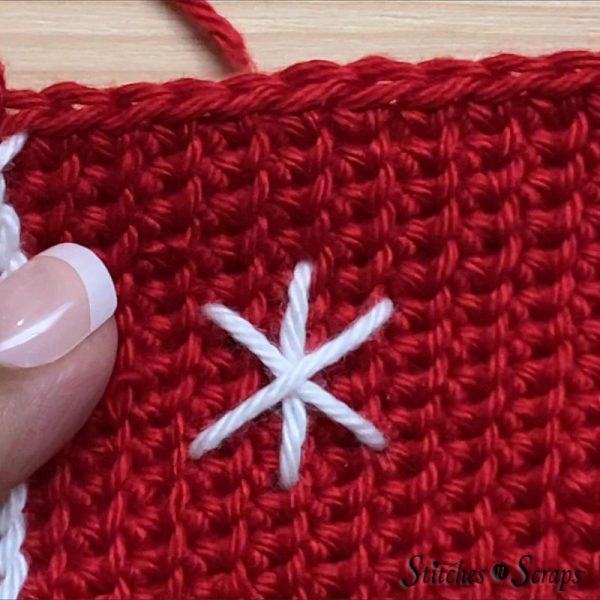
Mirror this same distance on the opposite corner to center your diagonal line perfectly over the starting line. Repeat this going in the opposite direction to make the 2nd diagonal line. For larger snowflakes, add small “V” shapes at the end of each spoke.

Keep the Inside Neat
Remember that you will be putting items into this coin purse. Long “floats” of loose yarn between snowflakes can get in the way and snag. To keep things neat, either cut your yarn between snowflakes, or weave it carefully through the stitches from one point to another so there are no long floats.

Alternatively, you could make a lining for your bag! Use this Box Bottom Bag Tutorial as a guide. If you do make a lining, sew the lining to your bag before attaching the purse frame.
Embroidered Snowflakes and Surface Crochet Video Tutorial
Share this tutorial on Pinterest! Here’s an image perfect for pinning:
Rate this Embroidered Snowflake and Surface Crochet Tutorial!
Do you want the best of Stitches n Scraps delivered right to your inbox? Don’t miss a stitch – Subscribe now!


You May Also Like

Classic Crochet Cables Tutorial

Split Single Crochet Stitch in Rounds and Rows
