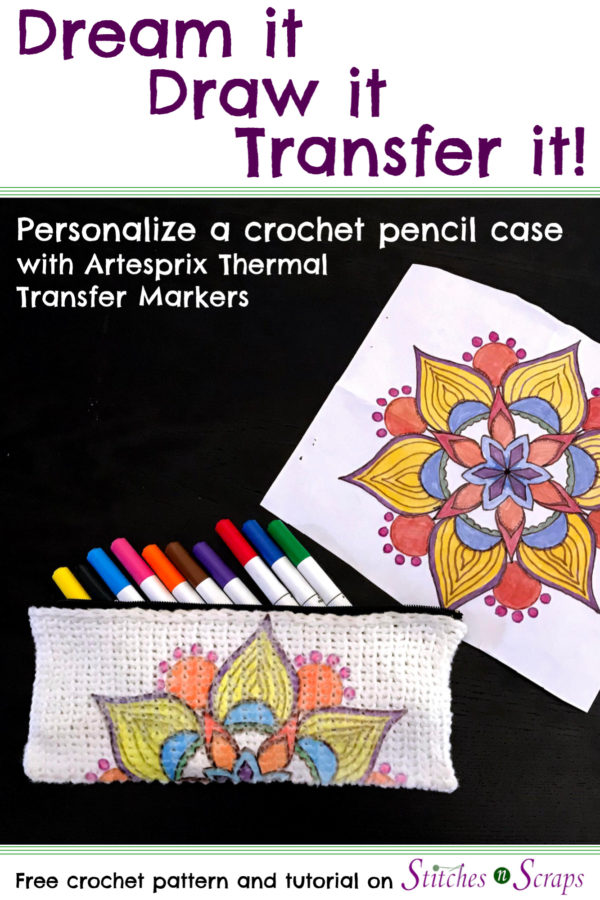
Personalized Crochet Pencil Case
Have you ever colored on your crochet? Now you can! Draw or trace your own design, and add it to the Back to School Pencil Case crochet pattern to create your very own, personalized, crochet pencil case!
Artesprix Thermal Transfer Markers
A while ago, Artesprix had given me a free set of their thermal transfer markers and some other supplies to try out and review. I had lots of fun using them to create this fun, butterfly coaster.

The heat transfer process works on polyester surfaces, so the folks at Artesprix asked if I thought it would work well on a crocheted item made with polyester yarn. Well, the only way to find out was to try it, so I did. As it turns out, it works really well! The image transferred quickly and easily, and looks great. Are you ready to give it a try for yourself?
Materials
For this project you will need:
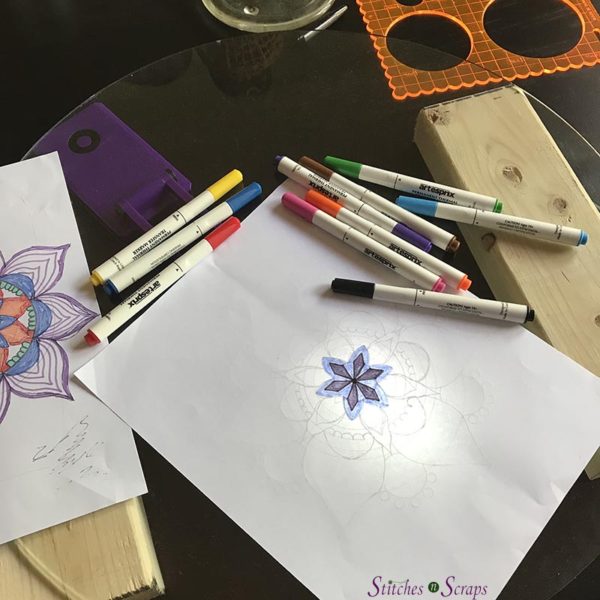
- ArtEsprix Thermal Transfer Markers
- Heat resistant tape
- 2-3 silicone sheets
- Crochet pencil case made with polyester yarn
- 1-2 sheets of copy paper
- Pencil or erasable pen
- Iron or heat press
- Old towel, extra paper, or other waste material to protect your work surface
Crochet Pencil Case
Start by making a pencil case with my Back to School Pencil Case pattern. This pattern was designed specifically for this project, using a stitch pattern that works up smoothly and evenly for the best transfer surface. Be sure to use the recommended yarn, or another 100% polyester yarn.
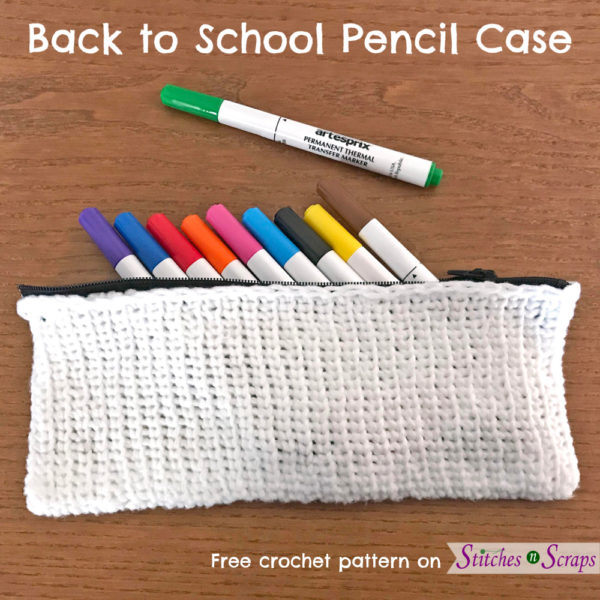
White yarn will give you the truest color transfer, but you can experiment with other, light color backgrounds as well. Similarly, I chose a black zipper so that if my design overlapped the zipper at all, it wouldn’t show.
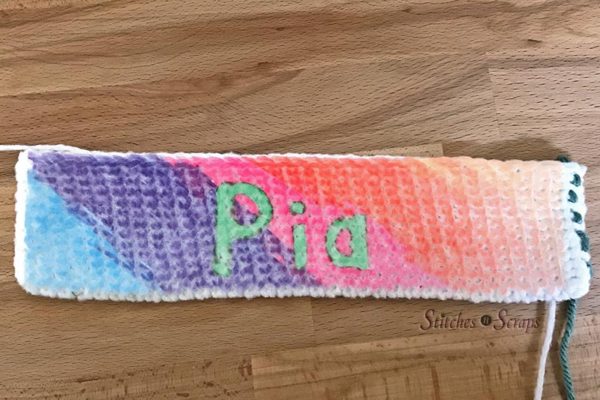
Make a test swatch
The thermal transfer process is permanent and will “kill” the yarn. This means it will start to melt the surface ever so slightly, creating a smooth and shiny finish. Check out this great post on Moogly for more information on intentionally killing synthetic yarns. If this is your first time doing this, you may want to try a smaller, practice swatch first. I did a larger size swatch because I was also figuring out the gauge and sizing for the pencil case.
Prepare your design
This is the part that took me the longest, because I’m not very good at drawing. I chose a geometric design that I could break down into parts to draw more easily, and then started with a rough sketch.

When you have the general idea, draw your final image on regular copy/printer paper. A pencil or erasable pen works best, so you can correct any mistakes. I used 24 lb printer paper, because it’s what I had available. It is just slightly thicker than the normal, 20 lb paper, so it holds up better to lots of erasing and has less bleed through from the markers. On your final drawing, make sure the lines are dark enough to trace on the other side of the paper.
For a nice, clean image with no extraneous pen lines, trace and color your design on the backside of the paper with the Artesprix thermal transfer markers. Depending on your work surface, you may want to place an extra piece of paper or two underneath, to protect from ink bleeding through. A light table is not required, but it does makes the lines much easier to see. If you’re like me and don’t have one, you can make one!
A makeshift light table
A light table is nothing more than a translucent surface with a light underneath it. To make one, all you need is a glass surface, a light, and a way to prop up the surface so you can get the light under it. I started with a rectangular glass vase, and a small, foldable LED light.
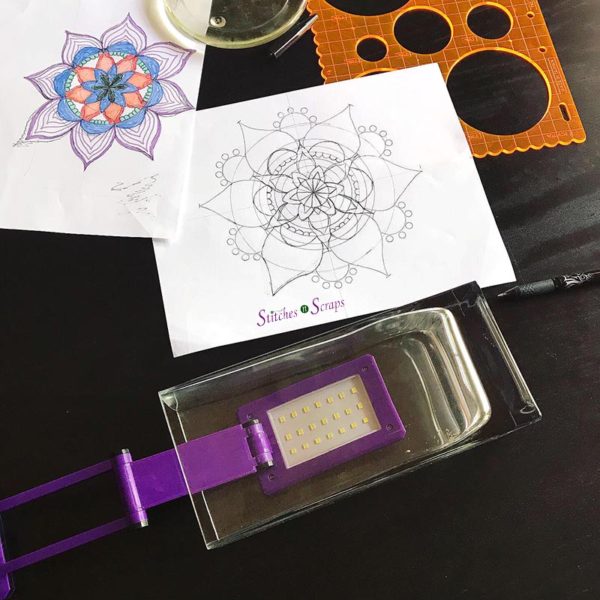
The contractor who is finishing our basement asked me about this, and I explained what it was. I told him I did have a bigger surface, but nothing to prop it up with. He disappeared into the basement for a few minutes, and came back with two pieces of 2 x 4, which worked perfectly with this glass table top!
Keep in mind the thermal transfer ink reacts to heat, so don’t use any surface or light source that could get hot!
Protect your work surface
When you are happy with your final image, it’s time to prepare your work surface and pencil case. Start with a layer to protect your work surface. This can be an old towel, extra paper, some cardboard, or anything else that is flat and can be ironed.
Prepare your pencil case
Carefully fold a silicone sheet to the size of the pencil case and slip it inside. This will stop the pigment from bleeding through from one side to the other.

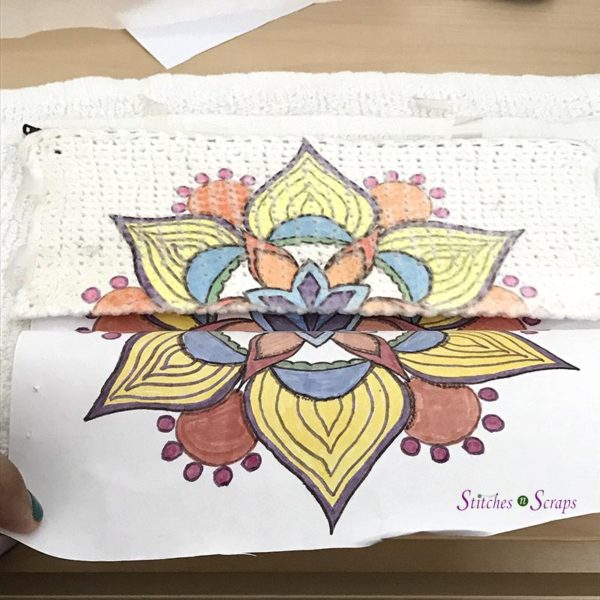
On top of the pencil case, position the design you want to transfer. If you’re using an image that does not wrap around, you can do one side at a time. I chose to wrap my image around the bottom of the pencil case. I used pins to secure it at first, while I made final adjustments.
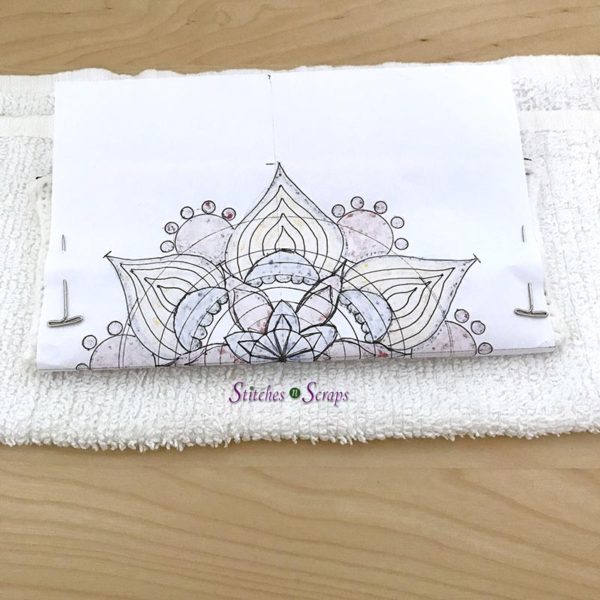
Once you are satisfied with the position, tape the paper into place around the edges with heat resistant tape and remove any pins. The idea is to secure the image to the pencil case so that it will not move while ironing. I cut off some of the extra paper on top so that I could tape around the top as well.
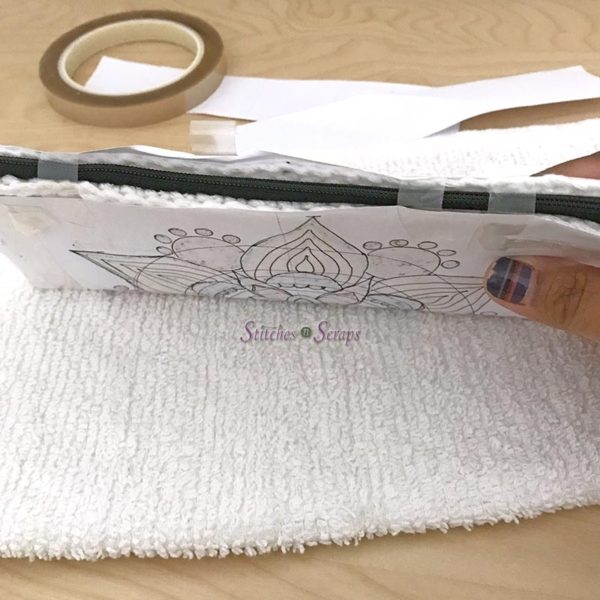
Because the tape is heat resistant, it is important not to cover any part of the image with it. If you do, the tape will stop some of the heat from getting through, and you might end up with an uneven transfer. If your design covers the entire surface of the pencil case, tape it to the table tightly instead, with the pencil case held down firmly underneath.
Protect your iron
Place your pencil case on top of your protected work surface, then put another silicone sheet on top. This will stop any of the pigment from getting onto your iron. Now we’re ready to transfer the image!
The Artesprix thermal transfer markers were designed for use with an iron or with a heat press. If you do have a heat press, you can use that instead. Follow the instructions on the back of the package regarding heat settings.
Transferring the image
This is the most satisfying part, and is also the fastest! Set your iron to a fairly hot setting with no steam. For me, the hottest my iron would go without steam is just a bit past “Rayon,” so that’s what I went with.

Now iron over the top of your work, applying some pressure, and moving the iron steadily and slowly. Be careful not to dislodge the image or the pencil case. If you’re working around the bottom, tilt the iron carefully so that it presses into the bottom edge as much as possible too.

At my heat setting, it only took about 1-2 minutes for the image to fully transfer. Your iron may vary, but you can check it by peeling back a tiny corner.
For a wrap around image, very carefully flip the pencil case over and iron the other side as well.
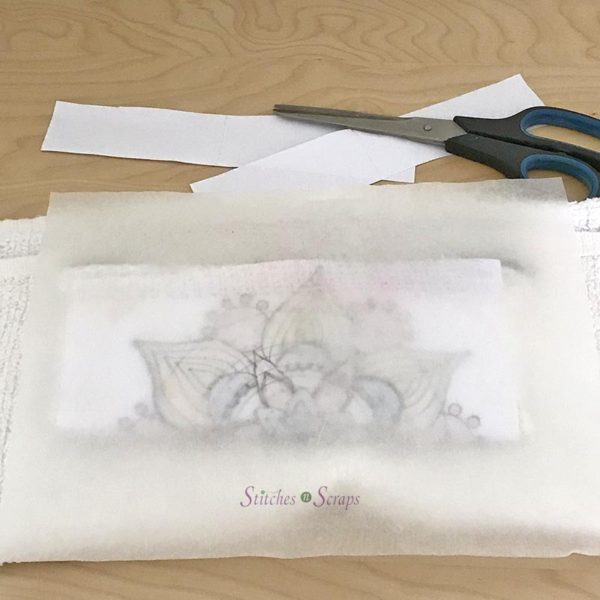
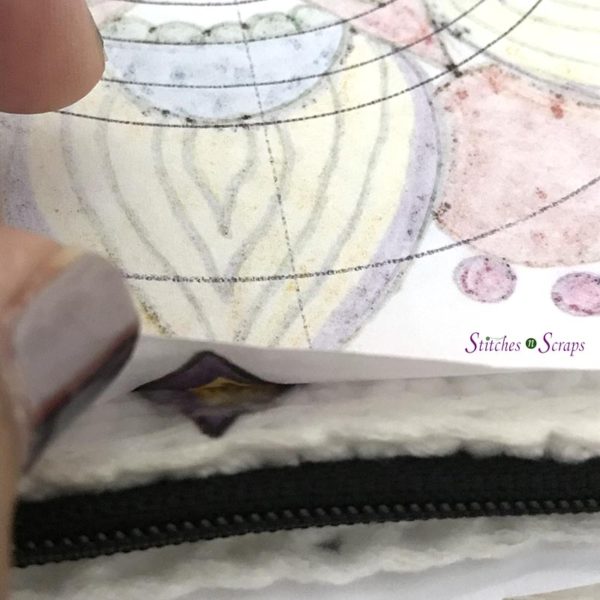
Check your image
Gently and slowly, peel back the tape and paper to see if the image has transferred. Try to do this without moving the paper out of position, so that if there are any light spots you can replace the paper and go over them again.
For a wrap around image, replace the paper and tape, then flip the pencil case over and check the other side.
Once you are fully satisfied, remove the paper and enjoy your personalized, crochet pencil case! (And in your excitement, don’t forget to turn off the iron…)
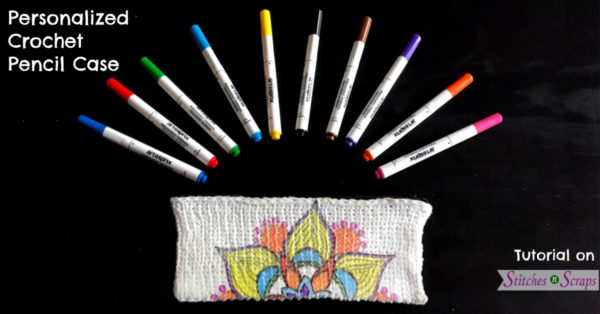
I hope you enjoy making this personalized, crochet pencil case!
Do you want the best of Stitches n Scraps delivered right to your inbox? The Stitches n Scraps email newsletter includes highlights from the blog as well as special features not available elsewhere. Don’t miss a stitch – Subscribe now!
Rate this personalized, crochet pencil case project!


One Comment
Alexandra
This is soooo cool! Endless possibilities!