Mini Crochet Christmas Wreath with Jingle Bells
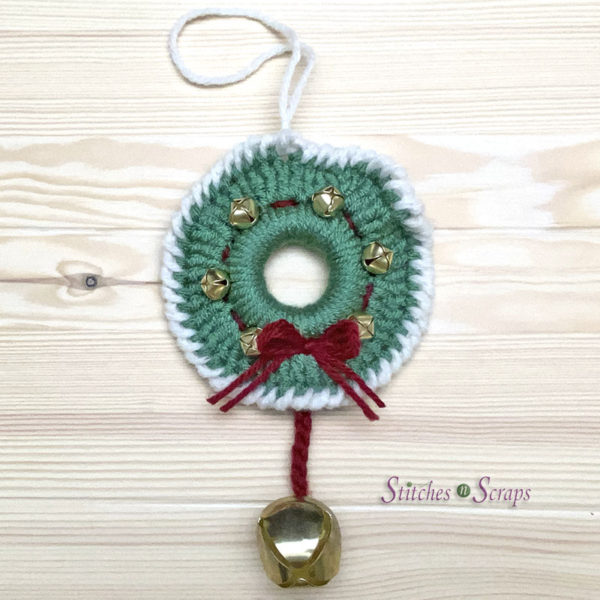
Welcome guests with a jingle when you hang this mini crochet Christmas wreath on your door! Hang one on your tree, or cabinet doors too. You can even add them to your gift wrapping for an extra festive touch!

This easy wreath pattern is a great way to use up scraps from other holiday projects. You can also use beads or buttons instead of the smaller bells.
This post contains sponsored content and/or affiliate links. If you click an affiliate link and make a purchase, I may get a commission.
Jingle Bells
Jingle bells (or cross style bells) come in a wide variety of sizes and colors, and are such a fun crafting item. I made my wreath entirely from my stash, including the gold bells.
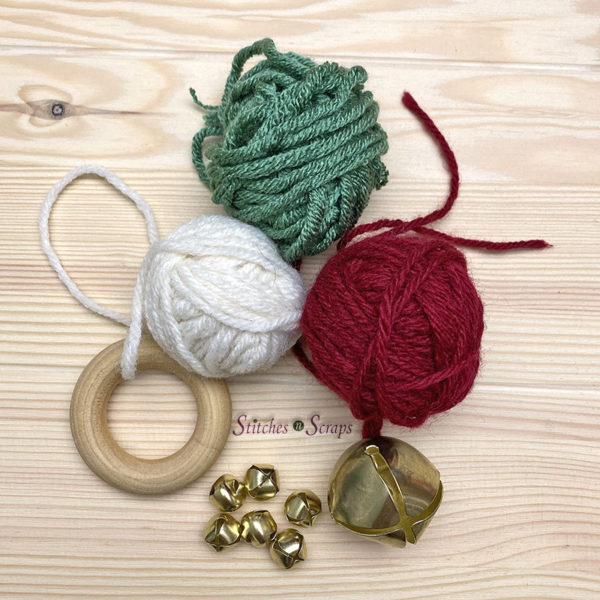
The larger bell I used is about 1.5 inches or 36 mm, and the smaller ones are about 3/8 inch or 10 mm.
Here are some fun jingle bells available on Etsy:
- Large bells
- Small bells
And here are some choices from Amazon
- Large bells
- Small bells
The exact sizes aren’t critical for the design, so feel free to be creative. Try using a different style of bells, or use buttons or beads in place of the smaller bells. You can even leave the larger bell off entirely if you prefer.
Choosing a center ring
The center of the wreath is a 2 1/4 inch ring. There are lots of options available at most craft stores in metal, plastic, and wood. If your ring is just a little larger or smaller, that’s ok. As long as the stitches from round 1 cover it completely.
For my wreath, I used a wood toss ring from Woodpecker Crafts. They had originally sent me some wood rings for free to make my Fearless necklace pattern, and I have a few left over.

I like the thickness of the ring for this project because it gives the center a fuller, fluffier appearance. If you use a thinner ring, you will end up with a more open center.
Materials
- Yarn: Worsted weight yarn
- 25 yds green
- 10 yds white
- 5 yds red
- Hook: Size H/8 5mm crochet hook or size needed to match gauge.
- Notions:
- Wood ring (2.25 inches / 57 cm)
- 6 small bells (3/8 inch / 9 mm)
- 1 large bell (1.5 in / 38 mm)
- Yarn Needle
Project Level
Intermediate: Working in the round, working around a ring, modified crab stitch / reverse single crochet
Size
About 4.5 inches in diameter, not counting large bell.
Gauge
12 sc x 14 rows = 4 inches. Gauge is not critical as long as center ring is fully covered.
Abbreviations used
(Pattern is written in US terms)
ch = chain
sc = single crochet
dc = double crochet
st(s) = stitch(es)
sl st = slip stitch
Recommended Resources
Instructions
The entire pattern is worked on the right side of the work. Do not turn your work unless indicated.
Wreath
With green, make a sl st around the wood ring
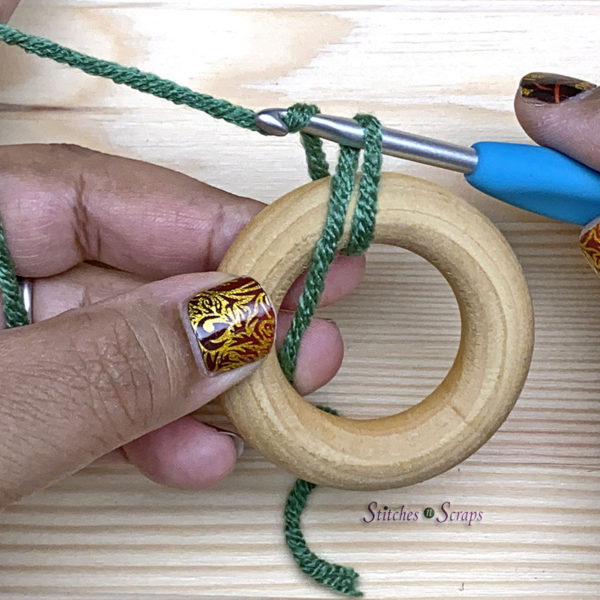
Rnd 1: Ch 1, 24 sc into wood ring, join with sl st to first st. (24 sc)

Rnd 2: Ch 3, dc in same st, 2 dc in each st around, join with sl st to first st. Fasten off green. (48 dc)
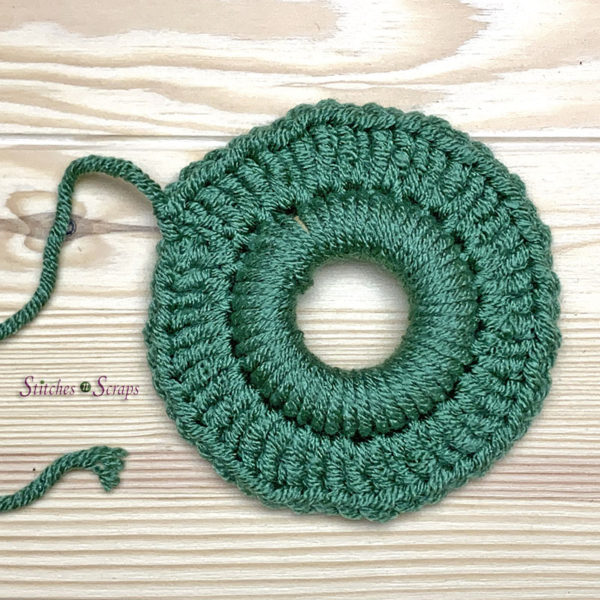
Weave in green tails.
Edging:
Note the ch 1 between each sc in the edging. This is important to keep the edge from being too tight.
Join white with sl st in any st, leaving a 4 inch tail.
Edging Rnd: Working in the opposite direction (as for reverse sc or crab stitch), (ch 1, sc) in each st around. Do not join. (48 reverse sc)

Fasten off white, leaving an 8 inch tail. Sew this tail through the first stitch, from front to back, to join the round.
Hanging loop
Sew the same white tail back again through the same stitch, front from to back, creating a loop of desired size for hanging. Both the starting and ending tails should now be at the back of the work.
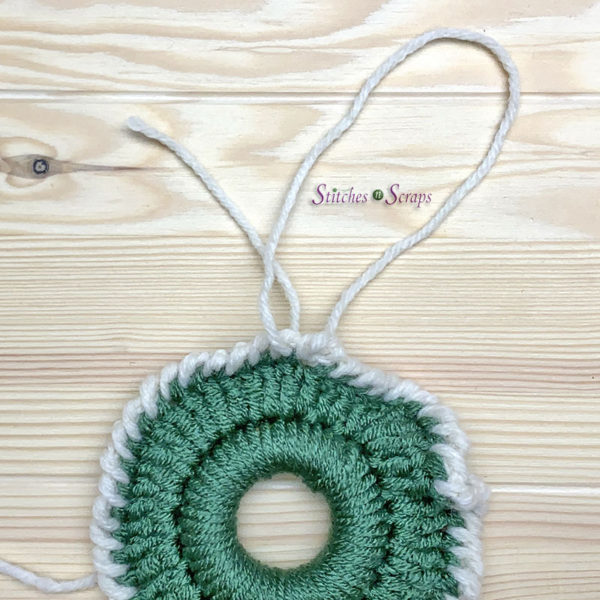
Tie the starting and ending tails together in a firm knot at the back of the work, holding the hanging loop in place.

Tie the loop in a knot at the bottom as well.
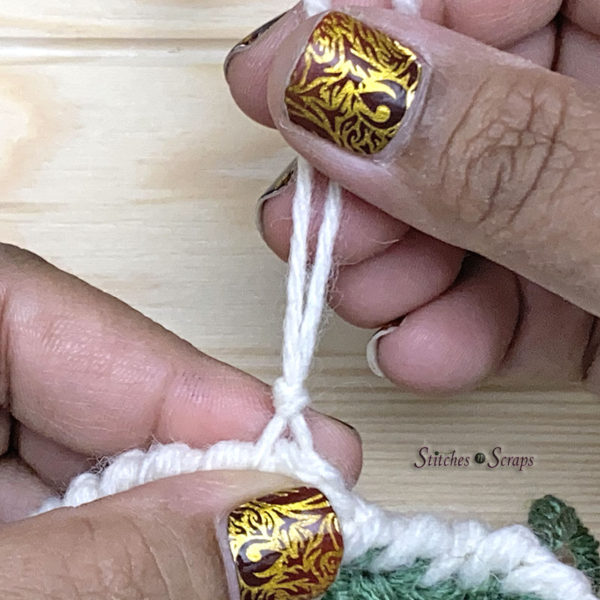
Weave in white tails.
Small bells
Cut a 24-36 inch length of red yarn and thread it onto the tapestry needle.
Find the bottom center of Round 1, directly opposite the hanging loop. There should be 12 stitches on each side. Insert needle from front to back through the stitch just to the right of center and pull it through leaving a 6 inch tail.
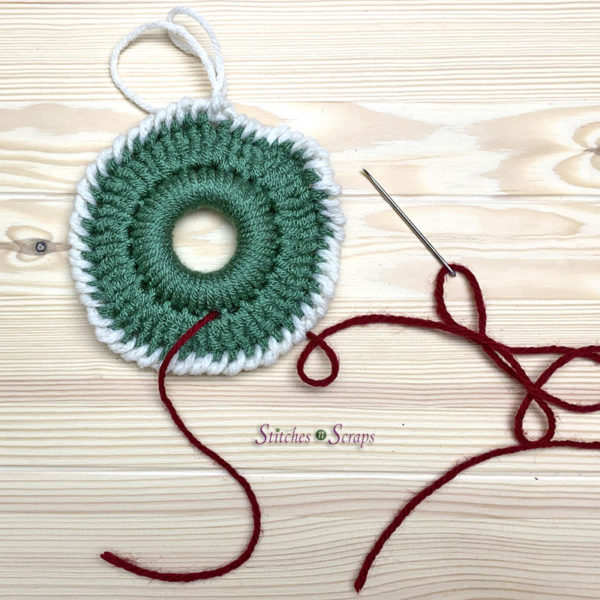
*Bring the needle up from back to front in the next st to the right.
Thread a small bell onto the needle
Bring the needle down from front to back in the next st
Bring the needle up in the next st,** and down in the next st.

Repeat from * until all 6 bells have been placed, ending at ** on the last repeat.
You should now have both ends of the red yarn in the front, one on either side of the center. Both tails should be at least 6 inches long.

Large bell
Cut a 36 inch length of red yarn and fold it in half. Make a slip knot where it is folded, so that both ends are roughly the same length.

Pull the slip knot through the bell and place it on the hook
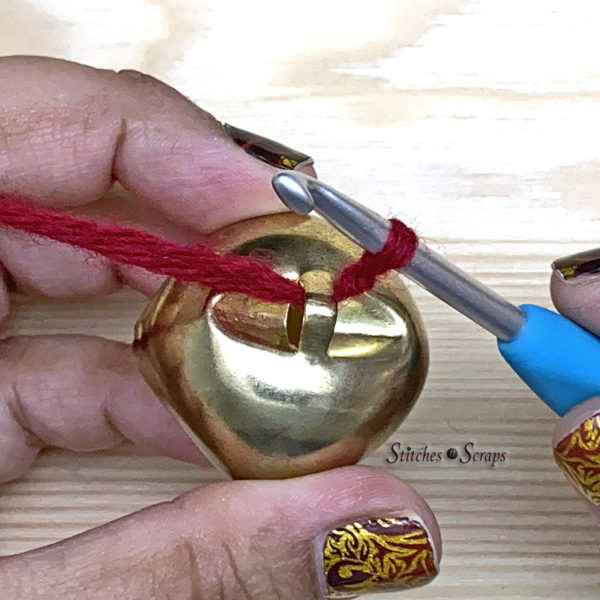
Working with both tails held together, chain 9, fasten off.
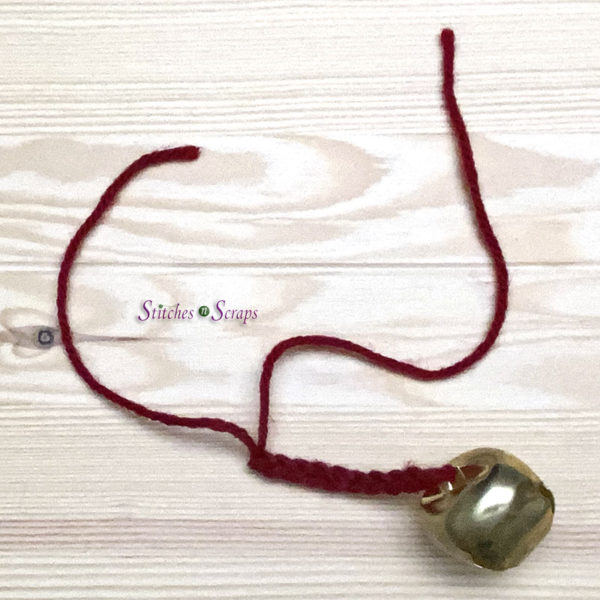
Separate the tails. Pull 1 tail through each side of the center at the bottom of the wreath, from back to front, in the same spaces as the other red tails. You should now have 2 red tails coming out of each side of the center.

Holding each pair of tails together, tie a bow. If desired, add a dot of glue at the center for a more permanent finish. Trim ends.
Rate this Mini Crochet Christmas Wreath Pattern!
I hope you enjoyed this Crochet Leg Warmer pattern. A downloadable pdf of this pattern is available on Ravelry for a small fee. The fee for the pdf format is to offset the advertising revenue lost when you print or download the pattern rather than viewing it online.
Do you want the best of Stitches n Scraps delivered right to your inbox? The Stitches n Scraps email newsletter includes highlights from the blog as well as special features not available elsewhere. Don’t miss a stitch – Subscribe now!


2 Comments
Alexandra
Really cute, Pia! I think it would be fun hanging in the center of a holiday wreath, and would make a lovely ornament as well. Pinned.
Pia Thadani
Hi Sandra! My free patterns are free because they are supported by the advertising. However, if you prefer an ad-free, printable version, I have that available for a small fee on Ravelry. Here’s the link to this one: https://www.ravelry.com/patterns/library/jingle-bell-mini-wreath