Jacob’s Ladders in Knitting and Crochet
Jacob’s Ladders add bold texture to any project. See a few different ways of making the necessary loops in both crochet and knitting, then learn how to chain those loops together to form the ladder.

This content is protected by copyright. See this Terms of Use / Copyright page for more information.
This post contains sponsored content and/or affiliate links. If you click an affiliate link and make a purchase, I may get a commission.
What is a Jacob’s Ladder?
A Jacob’s ladder starts with a series of loops. These loops are then chained together to form a thick braid on the surface of your fabric.
Making the loops
Almost any method of making loops will work for Jacob’s ladders.
Crochet loops
In crochet, you can make several chains between two stitches. Making a chain loop on every row or every alternate row is a common way of forming a vertical ladder.

Very tall stitches also work well. A row of tall stitches make a horizontal ladder across the row. You can make every stitch tall, or separate your tall stitches with shorter ones in between.

Knit loops
The simplest way to make knit loops is to knit the same stitch multiple times in a row. The effect is the same as making a crochet chain.
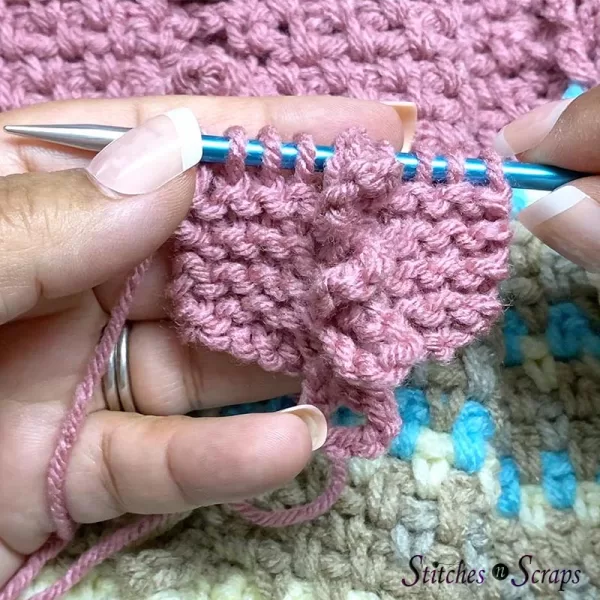
Knit the stitch as normal, then put your other needle into the stitch and knit it again. Repeat until you have the length you want.
Binding off and casting on stitches every few rows is another option. Try I-cord loops to create even chunkier Jacob’s Ladders.
Arranging the Loops
Jacob’s ladders require a little advance planning. Where you place the loops, how big the loops are, and how much space there is between them all make a difference in the final look.
Separate loops with plain rows or stitches to make each section of the ladder longer. Longer loops make a chunkier, puffier ladder. For a super wide ladder, add extra stitches behind each loop so that it spans a wider distance.

The loops don’t have to be placed in straight rows. Make diagonal lines, zig zags, or even curves by shifting where you place each successive loop. You can even make multiple lines of loops and cross them over each other to make cables, like I did in this Jacob’s Ladder Cabled Throw.
Forming Jacob’s Ladders
Scroll down for video
Once you have the loops arranged as you like them, forming a Jacob’s ladder is easy. Simply pull each successive loop through the one before it as though making a chain.
For a neat, closed bottom, give the first loop a 1/2 twist. You can twist in either direction, but probably want to be consistent across a project.
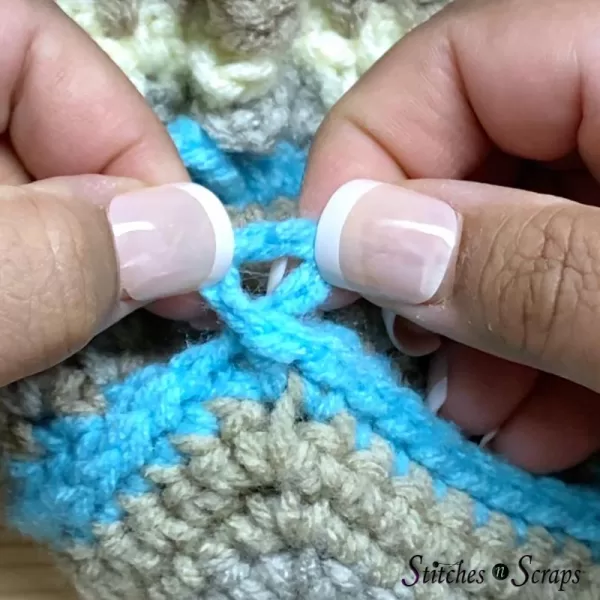
Then pull the 2nd loop through the first one.

Continue pulling each loop through the one before it. Each loop will secure the one before it, just like links in a chain.

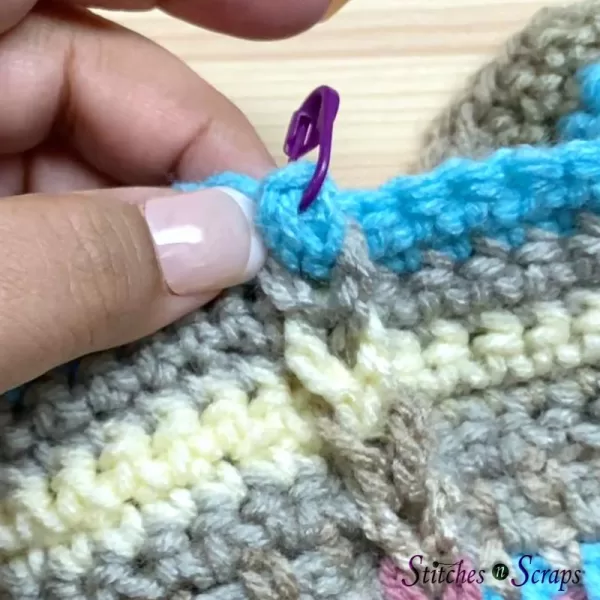
Hold the final loop in place with a stitch marker until you are ready to secure it.
Securing Jacob’s Ladders
After forming a Jacob’s ladder, the final loop needs to be secured in some way. If it is not, then the whole chain can unravel. One common way of securing Jacob’s ladders is to slip stitch into the top loop on the next row.

You can also simply sew the loop in place with a bit of yarn.
Try it out!
Now that you know how to form Jacob’s Ladders, try out your new skills on this Tropical Stripes Market Bag pattern! It uses a Jacob’s ladder to reinforce each corner of the bag.

I also used Jacob’s Ladders in:
- Dreaming of Pinwheels Blanket
- Jacob and Julia Bracelet
- Accidental Beanie
- Jacob’s Ladder Edging Tutorial
Jacob’s Ladders Video Tutorial
Share this tutorial on Pinterest! Here’s an image perfect for pinning:

Rate this Jacob’s Ladders tutorial!
Do you want the best of Stitches n Scraps delivered right to your inbox? Don’t miss a stitch – Subscribe now!


You May Also Like

Pattern Review – Crochet Mannequin Heads by 5 Little Monsters
Tea Cozy Tuesday – August – Week #2
