Halloween Ghost Ornament Knitting Pattern
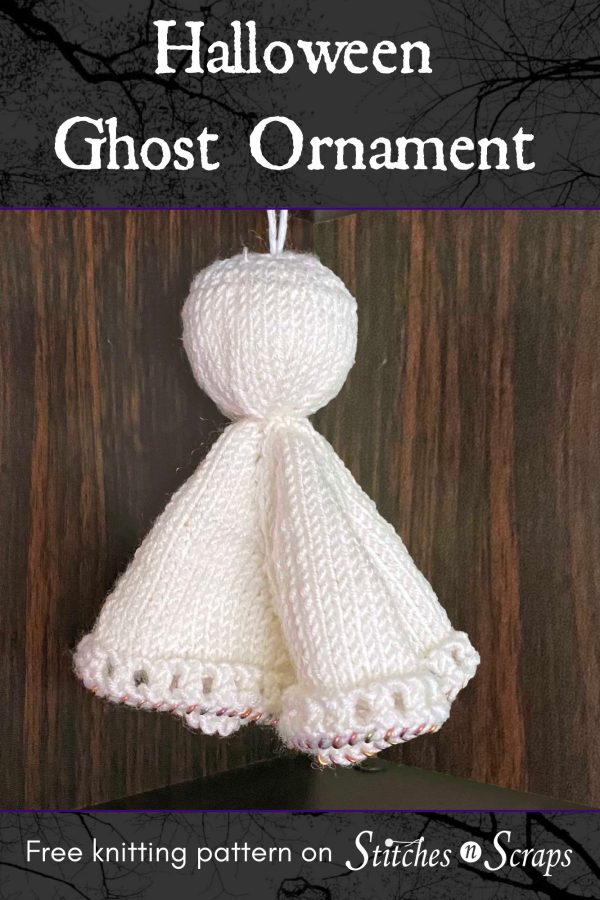
Hang this adorable Halloween ghost ornament anywhere you need a little more holiday spirit! With a pretty beaded edge, they’re perfect for curtain ties, wreaths, garlands, and more.

This content is protected by copyright. See this Terms of Use / Copyright page for more information.
This post contains sponsored content and/or affiliate links. If you click an affiliate link and make a purchase, I may get a commission.
Potomac Czech Glass O Beads
Color
Potomac Beads recently let me choose a selection of free beads to use for some designs. For this pattern, I chose Czech glass O beads, 2 x 4mm, in the color “Jet Purple Iris Gold”. The product number is 76819.

I chose this color because it has an overall copper feel, which is perfect for fall, but with twinkles of golds, purples, and greens mixed in. They’re even more vibrant in person, and feel slightly iridescent when they catch the light.
Shape and hole size
The beads themselves are similar to seed beads, but with half the thickness. The best way to describe them is like tiny, shiny, donuts, with nice big holes in the middle. I love the way they nestle between the stitches on the bind off edge.

For this project, my yarn was on the thinner end of the medium (#4 – worsted/aran weight) spectrum. I tested the beads with a thicker, aran weight yarn as well and was able to get them on without too much trouble. I wouldn’t recommend using them on anything thicker than that though.
All the other beads Potomac sent me are really beautiful as well, and you’ll be seeing them in projects soon!
Beading with Floss Threaders
For this pattern, you will be adding the beads one at a time while knitting, rather than stringing them on the yarn ahead of time. Typically, this is done by pulling the stitch through the bead with a crochet hook. Check out this knitting with beads tutorial for a closer look.

With larger yarns, the hook that’s small enough to go through the bead is often too small to easily grasp the yarn. This is particularly true with slippery or splitty yarns. So I prefer to use a floss threader instead! Floss threaders are meant for threading floss through dental work, but they make excellent and versatile beading needles too. We explored beading with floss threaders in Lunchtime Live episode 58.


Materials
- Yarn: 55 yds worsted weight yarn
- Needles: Size 4 / 3.5 mm needles or size needed to match gauge, for knitting in the round. Use a set of double pointed needles, or a circular needle long enough for the magic loop method.
- Notions:
- Tapestry Needle
- 4 stitch markers – preferably with 1 different from the others to mark end of round.
- Small amount of PolyFil fiberfill
- 121 Potomac Beads Czech Glass O Beads (2x4mm), shown in item #76819 – Jet Purple Iris Gold.
- Crochet hook that can fit through the beads, or see this video about using a floss threader instead!
Project Level
Intermediate: Kfb and yo increases, k2tog decreases, beaded bind off.
Size
About 5 inches tall, not counting hanging loop.
Gauge
25 sts x 36 rnds = 4 inches in stockinette
Exact gauge isn’t critical but will affect the yardage needed. Stitches should be tight enough so that stuffing doesn’t show.
Abbreviations used
k = knit
k2tog = knit 2 together
kfb = knit front and back
p = purl
pm = place marker
rnd = round
sm = slip marker
st(s) = stich(es)
yo = yarn over
Instructions
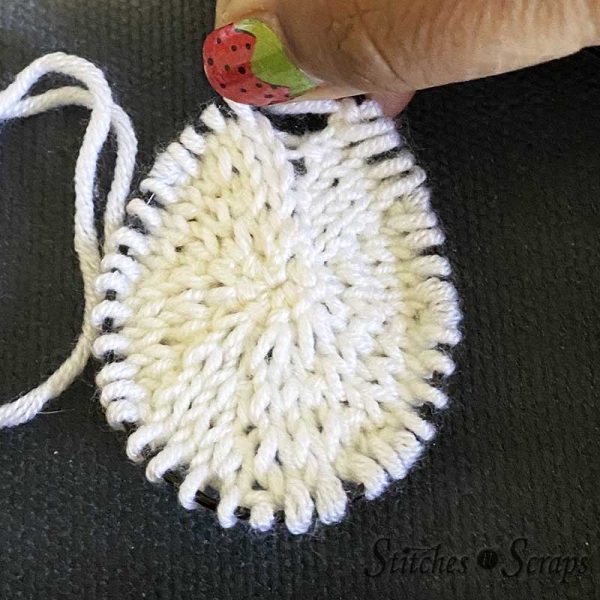
Head
Cast on 8 sts, leaving an 18-inch starting tail.
Any lower profile cast on will work – I used a long tail cast on for mine.
Distribute stitches evenly on double-pointed needles or magic loop, to knit in the round.
Rnd 1: Kfb around (16 sts)
All even rnds in head: K around
Rnd 3: [K1, kfb] around. (24 sts)
Rnd 5: [K2, kfb] around. (32 sts)
Rnd 7: [K3, kfb] around. (40 sts)
Use starting tail to sew top of head closed. Weave tail in enough to secure but do not cut it. Leave it on the right side of the work, sticking out the top of the head.
The pictures show the tail on the wrong side of the work, but it should actually be on the right side
Rnds 8-12: K around.
Rnd 13: [K3, k2tog] around. (32 sts)
Rnd 15: [K2, k2tog] around. (24 sts)
Rnd 17: [K1, k2tog] around. (16 sts)
Rnd 19: K2tog around. (8 sts)
Rnd 20: K around.

Body
Rnd 21: Kfb around. (16 sts)
Rnd 22: K around.
Rnd 23: [K1, yo, k2, yo, k1, pm] 4 times. (24 sts, 4 markers)
Use a unique marker for the end of the round. If a marker placement would fall at the end of one of your needles or at your magic loop, you can skip placing the marker, and instead count the end of the needle or magic loop as a marker.
I did this for the first few rounds, and then added the other 2 markers when it got bigger.
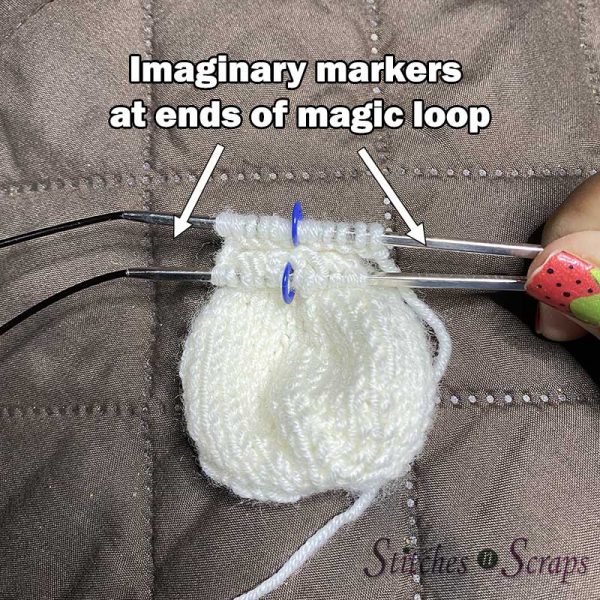
Rnd 24: K around, slipping markers as you come to them.
Rnd 25: [K1, yo, k to 1 st before marker, yo, k1, sm] 4 times. (32 sts)
Rnds 26-47: Repeat rnds 24-25 16 times. (120 sts)
Rnd 48: K around, slipping markers as you come to them.

Edging
Rnd 49: P around, removing markers as you come to them.
Rnd 50: (Yo, k2tog) around.
Rnd 51: P around.
Beaded Bind Off
Knit first stitch.
*Remove the new stitch from your needle and use a crochet hook or floss threader to pull the loop through a bead.

K1, then pass the beaded stitch over the stitch you just knit.
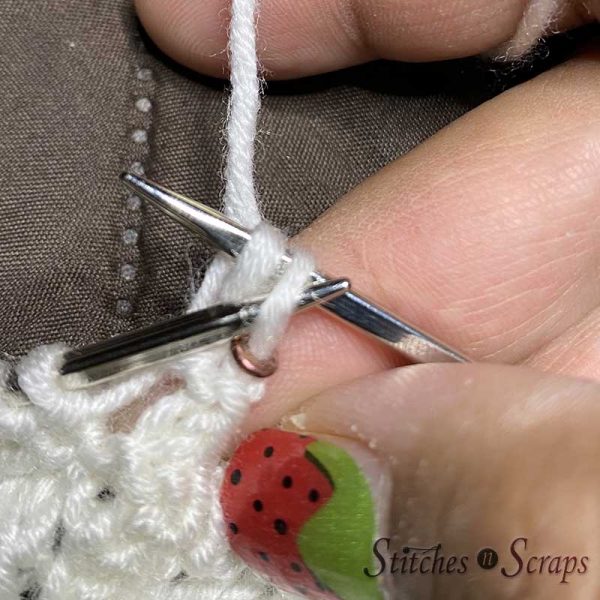
Repeat from * until all stitches are bound off.
Cut yarn and fasten off.
To close the gap at the end of the round, place a bead on the tail and then sew the tail into the first stitch of the round.
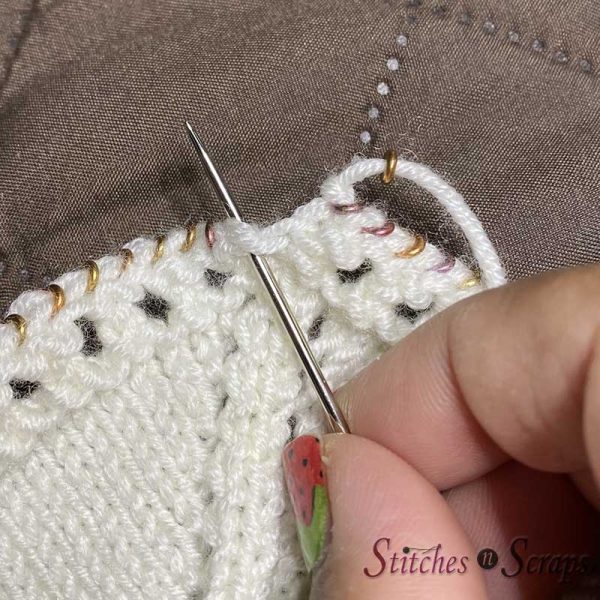
Weave in the end.
Finishing
Stuff Head
With starting tail on the outside (top) of the head, stuff head firmly with poly fil.
Sew starting tail down through the head and out through the opening

Use this tail to sew the bottom of the head closed.
Weave in all ends.
Hanging Loop
Cut a 12-inch length of yarn, fold it in half to form a loop and tie a knot about 1.5 inches from the fold.

Weave each tail separately into the top of the head to secure the loop to the ghost.
Alternately, you can use a piece of ribbon, wire, or clear fishing line to create a hanging loop.
Wash and hang to dry/block.
I hope you enjoyed this Halloween ghost ornament pattern. A downloadable pdf of this pattern is available on Ravelry for a small fee. The fee for the pdf format is to offset the advertising revenue lost when you print or download the pattern rather than viewing it online.
Do you want the best of Stitches n Scraps delivered right to your inbox? The Stitches n Scraps email newsletter includes highlights from the blog as well as special features not available elsewhere. Don’t miss a stitch – Subscribe now!


You May Also Like

Hanks, balls, and skeins – oh my!

Autumn Air Cowl Crochet Along – Week 2
