Free Pattern – Star Applique
Shine your brightest with a star applique. These crochet stars are fast and easy to make, and so versatile.

This post contains affiliate advertisements (click for more info). If you click one of these advertisements and then make a purchase, I may be compensated. You get the same great prices, and you will be helping to support this site!
The layered look
The size of the star depends on the yarn and hook you use. Creating 2 stars of different sizes and sewing them together makes a pretty, layered effect.

Perfect for holidays, or any day
I made these for an Independence Day display that I’ve been working on, but they would be great for Christmas or other holidays as well.
The versatile design can be used for so many things. Sew them onto clothing or bags, string them together into a garland, or glue them onto cards, frames, or anywhere else you need a star.
Great for scraps
Turn all those smaller balls of scrap yarn into a basket full of stars. That way you’ll always have stars on hand for any occasion!
This pattern is protected by copyright. Please do not distribute or share this pattern in any way other than by sharing a link to this page or to the pattern page on Ravelry. Click here for copyright information.
Star Applique

Add this to your Ravelry Queue
Materials
- Any yarn or thread (yardage will vary based on yarn used)
- Appropriate size hook for your yarn
- Tapestry Needle
Project Level
Easy: Simple stitches, working in the round, shaping at star points.
Size / Gauge
Can be made with any yarn or thread and an appropriate sized hook. The stars shown are as follows:
Purple star: 4.25 inches, worsted weight yarn, H / 5mm hook.
White stars: 3 inches, worsted weight yarn, G / 4 mm hook.
Red stars: 2 inches, DK weight yarn, F / 3.5mm hook.
Abbreviations used
(Pattern is written in US terms)
ch = chain
sc = single crochet
hdc = half double crochet
dc = double crochet
st(s) = stitch(es)
sl st = slip stitch
sk = skip
rnd = round
Recommended Resources
Instructions
Entire pattern is worked on the right side. Depending on your yarn and gauge, points may curl.
Rnd 1 (center circle): Ch 6, sl st in 6th ch from hook, (ch 5, sl st in same ch) 3 times, ch-2, dc in same ch. (5 loops)
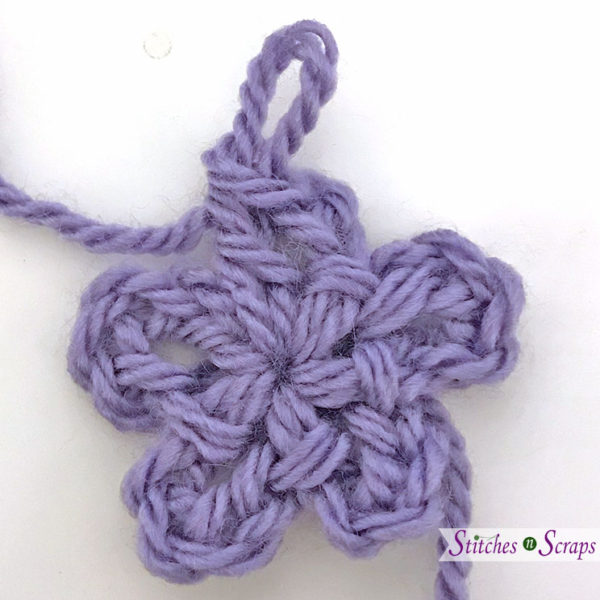
Rnd 2 (points): (Ch 5, sl st in 2nd ch from hook, sc in next ch, hdc in next ch, dc in last ch, sl st in next loop from rnd 1) 5 times, working the last sl st into the same loop as the beginning of the round. (5 points)

Rnd 3 (edging): [(Ch 1, sl st in next st) 4 times along edge of star point, ch 3, working down opposite edge of star point towards center circle, sl st in next st, (ch 1, sl st in next st) 3 times, sk next sl st] 5 times, join with sl st to first ch.

Fasten off, leaving long tails for sewing if needed.
For a layered star, make 2 stars of different sizes and sew them together.
When done sewing pieces together, weave in any remaining ends.
I hope you enjoy making this pattern. A downloadable pdf of this pattern is also available on Ravelry, for a small fee. The fee for the pdf format is to offset the advertising revenue lost when you print or download the pattern rather than viewing it online.
Do you want the best of Stitches n Scraps delivered right to your inbox? The Stitches n Scraps email newsletter includes highlights from the blog as well as special features not available elsewhere. Don’t miss a stitch – Subscribe now!


You May Also Like

May Flowers Pattern Collection

Combining Diagonal Box and Puff stitches
