Free Pattern – Li’l Pumpkin Hat
A couple of days ago, I shared with you my Puffy Pinwheel Hat pattern. One Friday evening, I was working on that pattern at my LYS, and my friend Annie said “that looks like a pumpkin!” Well of course she was right (she usually is), and of course I had to make a pumpkin version. How could I not?
Please note this pattern is for the stem, leaves, and vines only. To make the complete hat, you will need the free Puffy Pinwheel Hat pattern as well.

This pattern is protected by copyright. Please do not distribute or share this pattern in any way other than by sharing a link to this page or to the pattern page on Ravelry. Click here for copyright information.
This pattern contains affiliate links (click for more info). If you click one of these links and then make a purchase, I may be compensated. You get the same great prices, and you will be helping to support this site!
Li’l Pumpkin Hat
Add this to your Ravelry Queue
Materials:
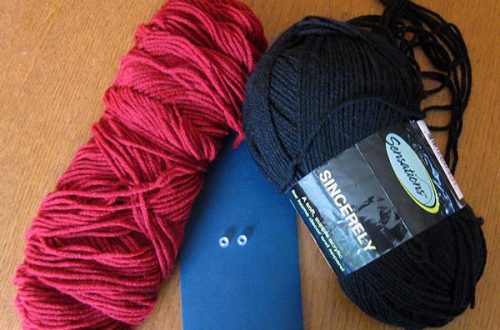
- Anne Geddes Baby Yarn:
- 100-150 yds Tangerine (orange – for hat)
- 15-20 yds Teddy (brown)
- 15-20 yds Grass (green)
- Size G / 6 (4.25 mm) hook or size needed to achieve gauge
- Yarn or tapestry needle
- 2 locking stitch markers
Difficulty:
Intermediate – Vine, leaves, and stem are intermediate difficulty. The hat itself though involves more techniques and is labeled as “Experienced”.
Sizes:
The stem, leaves, and vines are the same for all 3 sizes of the hat.
Gauge:
15 sc x 18 rows = 4″ square (same gauge as for hat)
Abbreviations used:
- ch = chain
- sc = single crochet
- hdc = half double crochet
- fphdc = front post half double crochet
- bphdc = back post half double crochet
- dc = double crochet
- sl st = slip stitch
- st(s) = stitch(es)
- sp(s) = space(s)
- rnd = round
- RS = right side
- WS = wrong side
Recommended Resources:

Hat:
- Make Puffy Pinwheel Hat pattern, using only orange for all parts except the top button (ignore all color changes).
- Make button in brown for the two smaller sizes. For the larger (toddler) size, make the first two rounds of the button in brown, then switch to orange for the third round.
- Assemble as normal. For a slightly different look, you can try sewing the sections together with brown instead of with orange. This will create a thin brown line between each section.
Stem:
Rnd 1 [RS]: With brown, work 8 hdc inside a magic circle and pull circle closed. Join with sl st to first st. OR Ch 2, work 8 hdc in 2nd ch from hook, join with sl st to first st. [8 hdc]
Rnd 2: Ch 1, turn, 2 hdc in each st, join with sl st to first st. [16 hdc]
Rnd 3: Ch 1, turn, bphdc in each st around, join with sl st to first st.
Rnd 4: Ch 1, do NOT turn, fphdc in next 2 sts, bphdc in next st, fphdc in next st, bphdc in next st, fphdc in next 2 sts, bphdc in next st, fphdc in next 2 sts, bphdc in next st, fphdc in next 3 sts, bphdc in last st, join with sl st to first st.
Note: The somewhat random front and back post stitches are just there to give the stem texture – it is not important to get them all in the right place. If you were to write an “f” for each front post stitch and a “b” for each back post stitch, rnd 4 would read: f, f, b, f, b, f, f, f, b, f, f, b, f, f, f, b.
Rnd 5: Ch 1, do NOT turn, work a fphdc in each front post stitch and a bphdc in each back post stitch around, join with sl st to first st. Fasten off, leaving a long tail for sewing.
Note: If you want a longer stem, you can repeat Rnd 5 to desired length before fastening off.

Leaves:
Make 3
Row 1 [WS]: With green, work 8 hdc inside a magic circle and pull circle closed. OR Ch 2, work 8 hdc in 2nd ch from hook. Do NOT join. [8 hdc]
Row 2: Ch 1, turn, 3 dc in first st, (dc, sl st, dc) in next st, (2 dc, sl st) in next st, (sc, hdc, dc) in next st, (dc, hdc, sc) in next st, (sl st, 2 dc) in next st, (dc, sl st, dc) in next st, (3 dc, sl st) in last st. Fasten off, leaving a long tail for sewing.
Vines:
Make 2
Row 1: With green, ch 31. Work 2 sc in each stitch across, allowing work to curl as you go. Fasten off, leaving a long tail for sewing.

Finishing:
- Stuff stem lightly and sew into place on top of button.
- Sew vines and leaves into place as desired.
- Sew in any remaining ends.

I hope you enjoy the pattern! Thank you, Annie, for the idea! A downloadable pdf of this pattern is also available in my Craftsy store for a $1 fee. The fee for the pdf format is to offset the advertising revenue lost when you print or download the pattern rather than viewing it online. The pdf includes both the original Puffy Pinwheel Hat, and this pumpkin variation.
If you would like to receive notifications of new posts and patterns as they become available, please follow this blog. You can follow by e-mail (look at the sidebar on the right for the follow by email option), or via RSS feed, or via your WordPress.com reader: Follow Stitches ‘N’ Scraps on WordPress.com


4 Comments
Darlene P.
Sweetness! Thank you for the pattern!
Pia Thadani
You’re welcome! I’m glad you like it 🙂
Carmen A. Lewis
Love this pattern it’s so easy and so beautiful thank you for sharing it.
Pia Thadani
You’re very welcome! 🙂