Free Crochet Patterns
Find the perfect, free crochet pattern for your next project! Browse them all, or select a category from the dropdown menu. Where will your creativity take you today?

Keep all the essentials close at hand with this patio chair caddy! It wraps around the arm of a chair, ...More

Pamper your pet with a snuggly new blanket! The Snuggle Square crochet pet blanket is a soft, cozy, and sturdy ...More
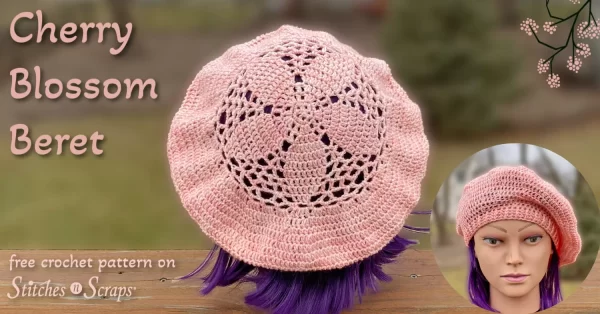
Welcome spring with pretty pink petals in the Cherry Blossom Beret! Delicate, floral lace and the classic style combine for ...More

Bobble "pearls" dance in intertwining lines over a plain background, forming circles to cradle a centerpiece or other table decorations. ...More

Take a magical, winter walk on wooded trails. Bare branches sparkle overhead with fresh snow, while frozen leaves crunch under ...More

Sometimes smaller is better. This snowflake crochet coin purse is just the right size for a few essentials. White embroidery ...More

Winter means steaming mugs of rich hot chocolate, full of floating mini marshmallows. Cradle your cocoa and protect your tables ...More

Columns of clusters give a lovely, all-over texture to this chunky crochet hat. With bulky weight yarn, the top-down pattern ...More

Columns of clusters add a lovely texture to this chunky crochet scarf. With bulky weight yarn and a simple, 2-row ...More

Layers of texture converge in the center of this 12-inch crochet square. The shifting stitch patterns and unique construction are ...More