Free Crochet Patterns – Home Décor
Find the perfect, free crochet pattern for your next project! Browse them all, or select a category from the dropdown menu. Where will your creativity take you today?
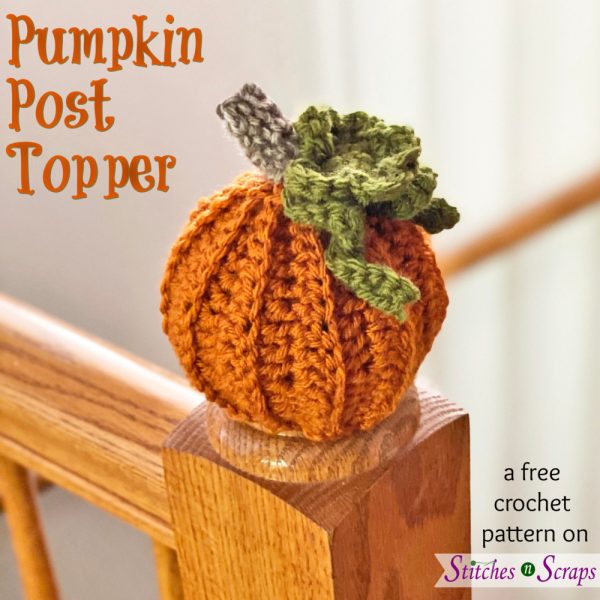
The post at the top of my staircase has a ball shaped cap. Do you have one like that? Learn ...More

Add a peg doll angel to a holiday display, on the tree, or as a gift. This crochet angel pattern ...More

Wash up with this lightly textured, corner to corner crochet dishcloth. The bright colors and simple texture works equally well ...More
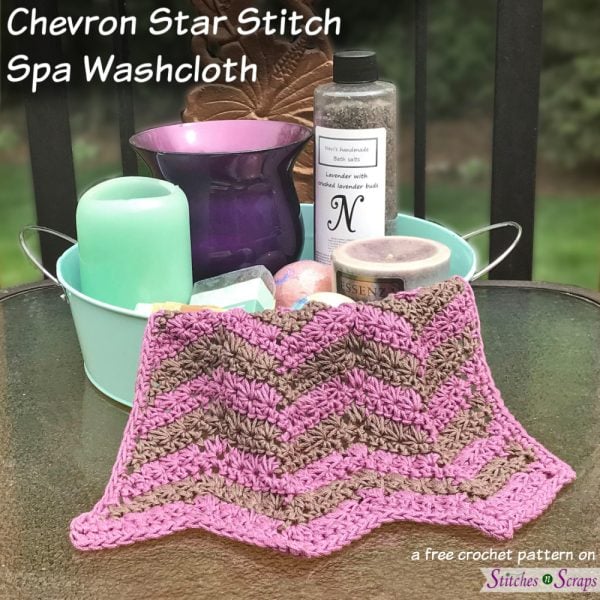
Treat yourself to a spa day with the Chevron Star Stitch Spa Washcloth. Bold chevron stripes and a rich texture ...More
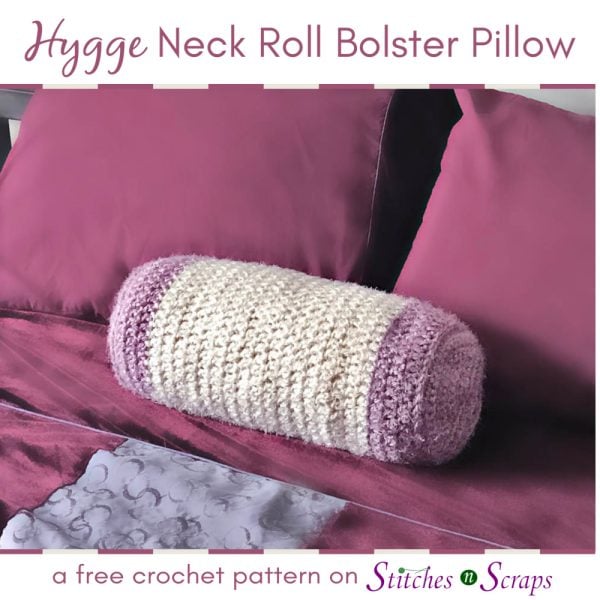
Fluffy, cozy, and oh so comfy! Give your neck the support it needs with the Hygge Neck Roll Bolster Pillow. ...More
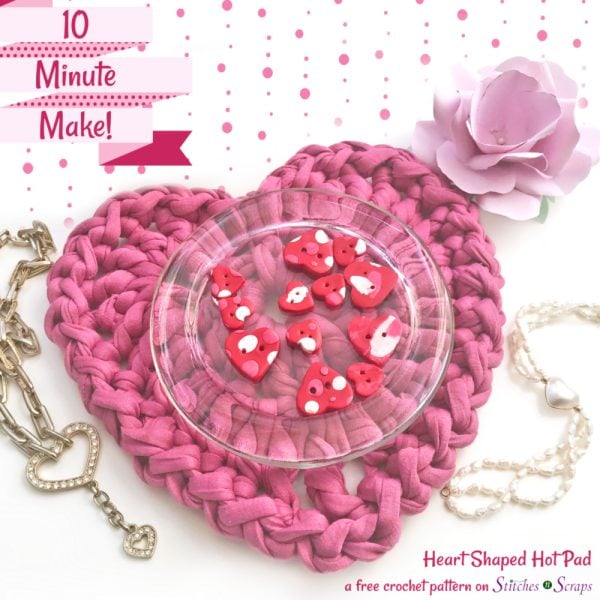
Add this heart shaped hot pad to your Valentine's Day decor. Super bulky yarn combined with a super easy pattern ...More

Show your love to someone special with this soft and squishy heart. The simple heart shapes are joined together with ...More
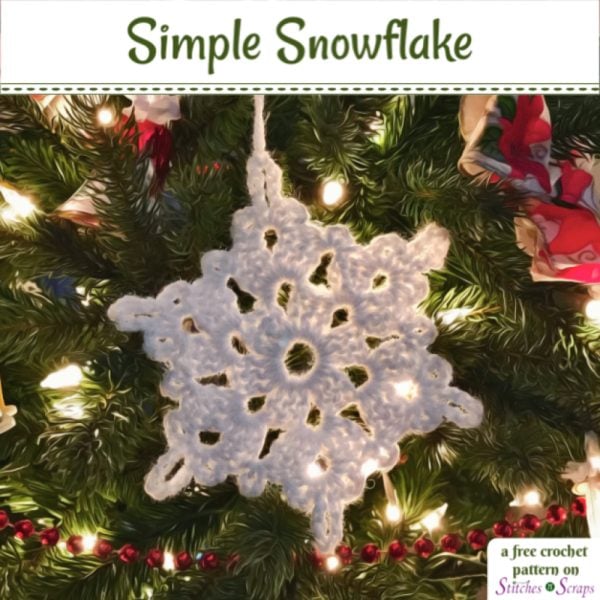
With just three rounds, this simple snowflake is easy and fast to crochet, and can be made in any size ...More

Make some for yourself, and make more for your friends. This sweet little angel works up in under an hour, ...More

Everything's better with ruffles! This Ruffled Mini Tree Skirt is only 12 inches in diameter, to fit a small, tabletop ...More