Free Crochet Patterns – Amigurumi and Softies
Find the perfect, free crochet pattern for your next project! Browse them all, or select a category from the dropdown menu. Where will your creativity take you today?

Use up your yarn scraps to make your own crochet footbag! Footbags work up quickly and are great for family ...More

Breezy the Baby Bat is a laid back kinda guy who loves hanging out with his batty friends. This Halloween ...More

Sunny the Baby Bunny is hopping your way to spread a little joy! How can you not smile when you ...More
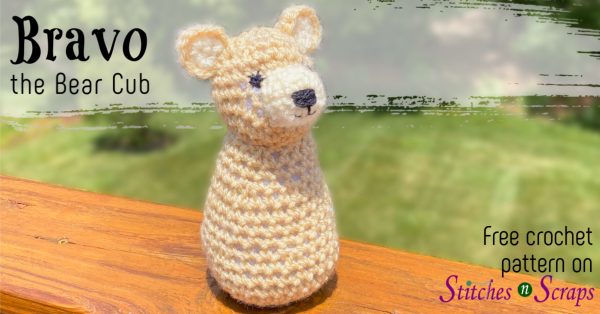
Bravo is a brave little bear cub on the hunt for some fun! He loves to play with his friends, ...More
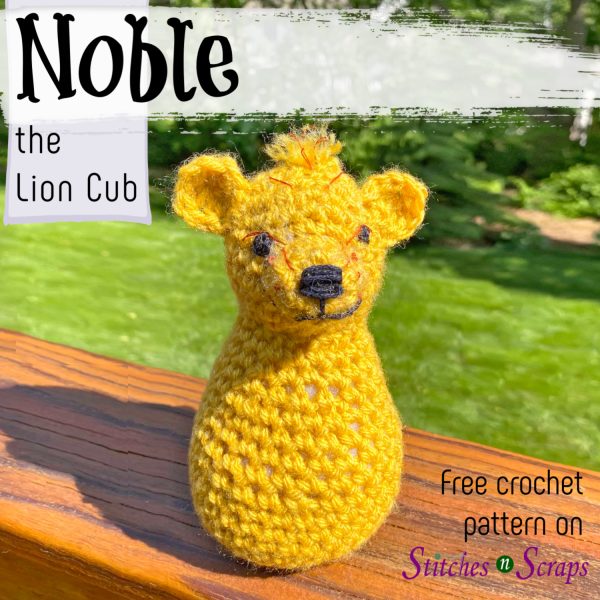
Noble is a little lion cub with a big heart, and he's ready to steal yours! This easy crochet lion ...More

Awesome the baby elephant may be small, but he is big on cuteness! This easy crochet amigurumi pattern is perfect ...More

These days it's clear that many of our real life superheroes wear a different type of mask. Do you know ...More

Tulip the bunny rabbit has come for a visit, just in time for Easter! With a sweet smile and big ...More
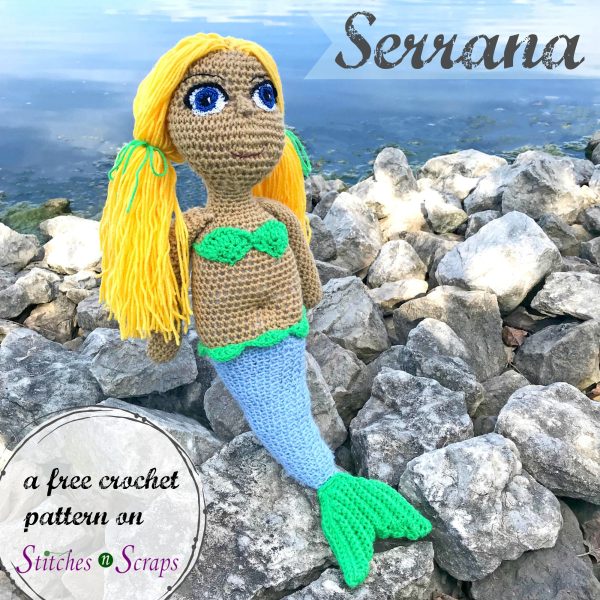
Meet my new friend Serrana! This sweet, 19-inch doll is sure to delight mermaid fans and amigurumi enthusiasts alike. She's ...More

Let's make some cookies! The other day, I wanted some cookies for a photo prop, and there were no actual ...More