Crochet Snowman Post Topper
At the top of my stairs, there is a post with a ball-shaped cap. Do you have one like that? Dress it up for the holiday season with a crochet Snowman Post Topper!

This content is protected by copyright. See this Terms of Use / Copyright page for more information.
This post contains sponsored content and/or affiliate links. If you click an affiliate link and make a purchase, I may get a commission.
A Friend’s Suggestion
My first post-topper pattern was a Pumpkin Post Topper for fall.

I shared this pattern on social media just before Halloween, and a friend said I should make a snowman for Christmas. So I did. Thanks for the idea, Melissa!
Holiday Stashdown Crochet Along
This crochet snowman post topper is my design for the 2024 Holiday Stashdown CAL, hosted by CAL Central Crochet. This is our 10th annual holiday stashdown, and it’s always our most popular CAL of the year.

See the full schedule in the main CAL post. While you’re there, be sure to enter the giveaway for a chance at some fabulous prizes! Then crochet along and join in the fun on the CAL Central Facebook group.
A Newel Post Finial?
If you didn’t know, these staircase posts are called “newel posts” and the caps are called “finials.” Don’t have a ball-shaped finial or similar object? This adorable snowman is just as happy to sit on the edge of a ledge or shelf!
Since the gauge is quite tight, it should be able to sit nicely without any stuffing. If you do want to stuff it, you can do that too and then add a base. Crochet a small circle for the base following the instructions for Rnds 1-4 of the Hat and matching the color of the Scarf. After attaching the Scarf, stuff your Snowman and sew the Base in place around the bottom edge of the scarf.
Button Safety
In general, the tops of newel posts should be too high up for little fingers to reach. Also, since we don’t have small children, it was safe enough for me to glue buttons to the face for the eyes and mouth. For added security you can sew the buttons in place instead.
If there is any chance of a small child (or pet) playing with the Snowman, I recommend skipping buttons altogether and embroidering the entire face.
Materials
- Yarn: Worsted weight yarn
- 40 yds color A (shown in red)
- 40 yds color B (shown in off-white)
- 2 yds orange (for nose)
- Hook: Size H / 5 mm crochet hook or size needed to match gauge
- Notions:
- Scissors
- Tapestry Needle
- 1/2 inch / 12.5 mm buttons – 2 (for eyes)
- 3/8 inch / 9 mm buttons – 5 (for mouth)
- 1″ / 2.5 cm pom pom
- Hot glue and hot glue gun OR needle and thread in matching colors (for attaching buttons and pom pom)
Project Level
Intermediate: Continuous rounds, front and back post double crochet, some seaming and embroidery.
Sizes
3.5 inches / 8.8 cm diameter at widest point. Designed to fit a 3.5″ / 8.8 cm ball-shaped newel post finial.
Gauge
13 sc x 14 rnds = 4 inches / 10 cm
Abbreviations used
This pattern uses US terms.
- ch = chain
- dec = decrease (see Special Stitches)
- inc = increase (see Special Stitches)
- rem = remain(s/ing)
- rep = repeat
- rnd = round
- RS = right side(s)
- sc = single crochet
- sl st = slip stitch
- sp = space
- st(s) = stitch(es)
- yo = yarn over
Special Stitches
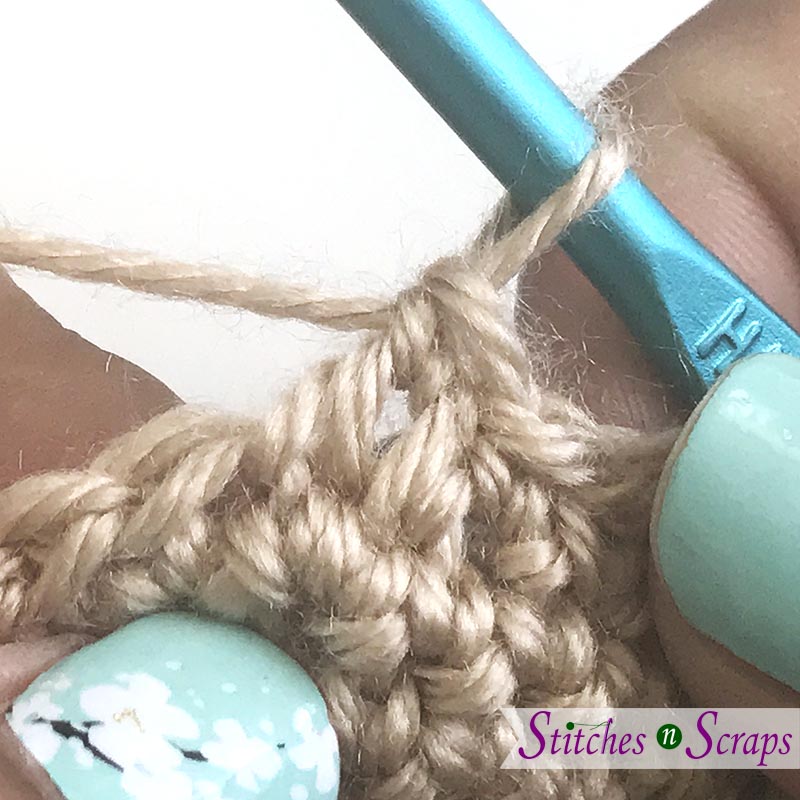
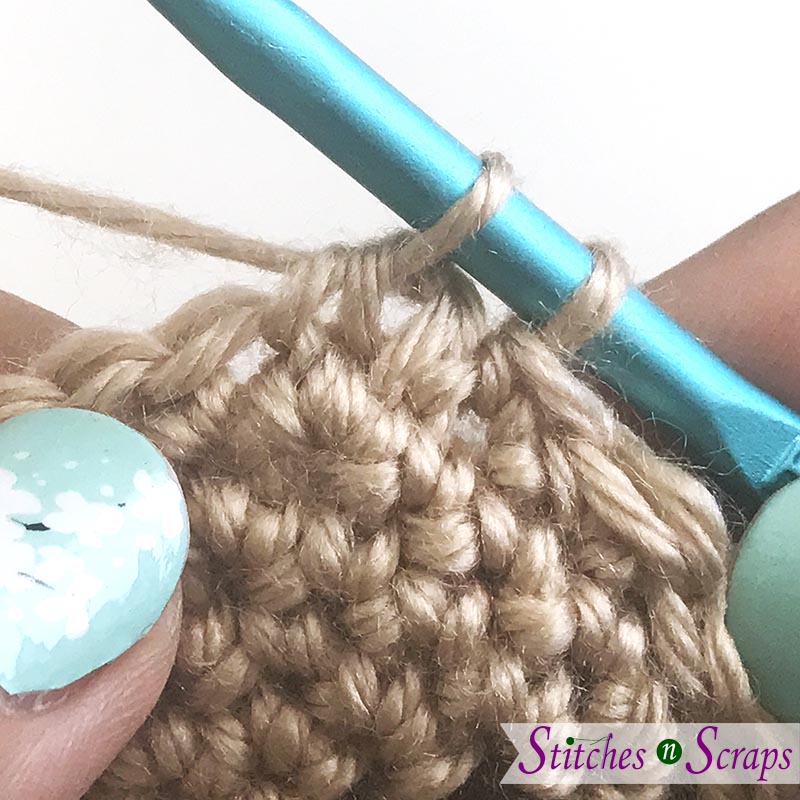
Increase (inc): Sc in back loop only of indicated st, sc in both loops (like normal) of same st. (See increase tutorial here)
Decrease (dec): Insert hook into front loop only of both indicated sts, yo and draw up a loop, yo and draw through both loops on hook.
This is an alternative to a single crochet 2-together (sc2tog) stitch. If you prefer, you can use the standard sc2tog instead.


Instructions
Hat
Hat is worked in continuous rnds. Do not join or turn unless indicated. Mark first st of each rnd.
With A, ch 2.
Rnd 1 (RS): 6 sc in 2nd ch from hook. (6 sts)
Rnd 2: Inc in each st around. (12 sts)
Rnd 3: [Sc in next st, inc in next st] around. (18 sts)
Rnd 4: Sc in next st, inc in next st, [sc in each of next 2 sts, inc in next st] around to last st, sc in last st. (24 sts)
Rnd 5: [Inc in next st, sc in each of next 3 sts] around to last st, sc in last st. (30 sts)
Rnd 6: Sc in each of next 2 sts, inc in next st, [sc in each of next 4 sts, inc in next st] around to last 2 sts, sc in each of last 2 sts. (36 sts)
Rnd 7: Sc in each st around, join with sl st to first st.
Rnd 8: Ch 1, hdc in each st around, join with sl st to first st.
Rnd 9: Ch 1, [fpdc around next st, bpdc around next st] around, join with sl st to first st.
Fasten off.
Head
Head is worked in continuous rnds. Do not join or turn unless indicated. Mark first st of each rnd.
With RS facing and working into unused tops of sts of Rnd 12 behind fpdc of rnd 13, join white with sl st in st behind any fpdc

Rnd 10 (RS): Inc in same st, sk st in front of next bpdc, [inc in st behind next fpdc, sk st in front of next bpdc] around. (36 sts)
Rnds 11-14: Sc in each st around.
Rnd 15: Sc in next 2 sts, dec, [sc in next 4 sts, dec] around to last 2 sts, sc in last 2 sts. (30 sts)
Rnd 16: [Dec, sc in next 3 sts] around. (24 sts)
Rnd 17: Sc in each st around, join with sl st in first st.
Fasten off.

Scarf
Scarf is reversible. Either side can be RS or WS.
With C, ch 8.
Row 1: Sc in 2nd ch from hook and each ch across. (7 sts)
Rows 2-49: Ch 1, turn, sc in blo of each st across.
Work more rows if desired for a longer scarf. Make a note of how many rows extra you worked.
Fasten off.
Fringe
Cut 14 lengths of C, 6 in / 15 cm long each.
For each strand of fringe, fold 1 length in half. Insert hook through desired st and pull folded end of strand about halfway through, forming a loop. Pull cut ends of strand through loop and pull ends to tighten.
Place 1 strand of fringe in each st along both short edges of Scarf. Trim fringe ends as desired.

Assembly
Weave in all ends prior to assembly.
Scarf
Scarf has 49 rows. 12 rows on one end and 13 rows on other end become tails of Scarf, leaving 24 rows in the center to sew to Head. If you added extra rows to make Scarf longer, add 1/2 of number of added rows to each tail of Scarf.
Sk first 12 rows from either short end of Scarf, plus 1/2 of any added rows (rounded up). Decide where you would like the center front of Head to be.
Beginning with next row of scarf and at center front of head, sew long edge of scarf to RS of bottom of head, matching 1 stitch on head for every row of scarf. This will stretch scarf slightly so that after sewing, it will stretch and contract over the post, drawing the bottom of the head in and holding it in place. After sewing all the way around head, there should be 13 rows (plus half of any extra rows) remaining.

Fold one end of scarf back on itself at an angle so that tail hangs nearly straight downwards but not quite completely straight. Sew fold in place.

Lay other end of scarf on top of first tail and fold at a similar angle. Sew fold in place.

Face
Using image as guide, embroider a triangle-shaped nose with orange in center of face, directly above scarf tails.
Glue or sew buttons in place for eyes and mouth, being careful not to glue layers of head together. You may find it helpful to arrange buttons first without gluing, and then mark location of each button with a marker. Be careful doing this as it will stain the fabric.

Pom Pom
Glue or sew pom pom to top of hat.
Finishing
Weave in any remaining ends.
Share this crochet Snowman Post Topper pattern on Pinterest!
Here’s an image perfect for pinning.

Rate this crochet Snowman Post Topper pattern!
I hope you enjoyed this crochet baby sweater pattern! A downloadable pdf of this pattern is available on Ravelry for a small fee.
Do you want the best of Stitches n Scraps delivered right to your inbox? Don’t miss a stitch – Subscribe now!


