Tutorial – Herringbone Double Crochet (HBdc)
The herringbone double crochet stitch creates a zig-zag texture, with stitches leaning in alternate directions on each row. If you’ve already learned the herringbone half double crochet stitch, this is almost the same thing but with one extra step in the middle.

This post contains affiliate advertisements (click for more info). If you click one of these links and then make a purchase, I may be compensated. You get the same great prices, and you will be helping to support this site!
Herringbone Double Crochet (HBdc) Photo Tutorial
(scroll down for video tutorial)
The herringbone double crochet starts out just like a normal double crochet (dc). Yarn over, insert hook in next stitch, yarn over and draw up a loop. You should now have 3 loops on your hook.

Now take the loop you just pulled up, and pull that through the next loop on the hook (the one from the yarn over). This step is what makes the stitch lean.

So far, everything has been the same as the herringbone half double crochet, but this is where it gets different. Yarn over and pull through 1 loop on the hook, basically making a chain. This extra chain is what gives the stitch the height of a dc stitch.

Now yarn over and pull through both remaining loops on your hook to complete the stitch.

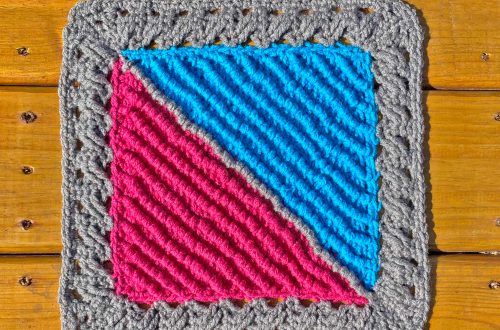
Because this stitch leans, when you turn your work the next row will lean in the opposite direction. This is what creates the zig-zag effect. It also creates similar angles at the start and end of the rows. For normal dc stitches, it’s common to start the row with a chain 3, which counts as a stitch. You can do the same for HBdc, but if you really want to accentuate the angle at the edges, try this alternate method instead. Start with a chain 2, and do not count it as a stitch – work a normal HBdc stitch in the first stitch. This gives you more bulk at the edge and makes the angle really stand out. In the image below, this alternate method was used for all the rows except for the one marked.

You can see that the marked row is looser at the edge, without as sharp of an angle. Either way is fine, depending on the pattern instructions and/or your desired effect.
[the_ad_group id=”1380″]
Herringbone Double Crochet (HBdc) Video Tutorial:

You May Also Like

Scrappy Stitchers Link Party #41

Shells and Cables Market Bag Crochet Pattern