Tutorial – Adding Hair to an Amigurumi Doll
Adding hair is often one of the last steps of an amigurumi project. For me, this is when the doll really takes on a personality of its own.
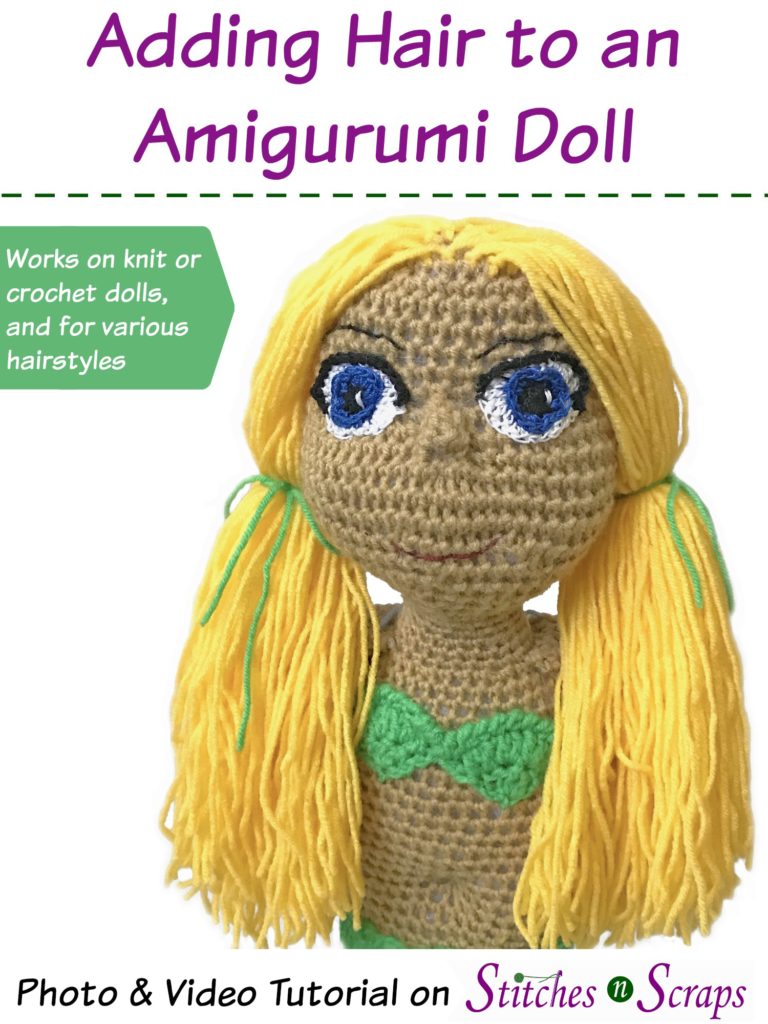
Just like styling human hair, doll hair can be a great way to express your creativity. In this tutorial, I’m using a crocheted doll and adding long hair with a center part and side ponytails. The same techniques can be used for a wide variety of hairstyles, and for knit amigurumi projects too.
Amigurumi Doll Hair Photo Tutorial:
(scroll down for video tutorial)
The head I used in this tutorial is from my Serrana the Mermaid pattern.
Step 1 – Sew in a Guideline:
This first step is not absolutely necessary, but taking the time to do it will make the rest of the process easier. Using a scrap piece of contrasting yarn, sew a guideline to mark the hairline.
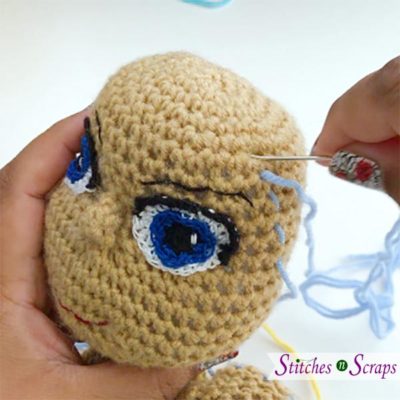
Sew across the front (forehead), down the sides, and across the back. Finally, sew a part line up the middle.
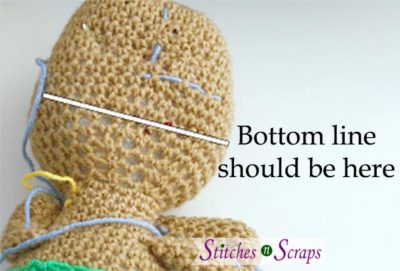
Your hairline can be adjusted later if desired, which I did myself in this case. After I had finished adding most of the hair, I felt I wanted to go further down the back of the head, so I went about an inch lower, to the line marked on the above image.
Step 2 – Make Hair:
Find a hardcover book (or another sturdy object) that is the desired length for your hair. In this case, I used an 11 inch book, which gave me hair just below my doll’s waist. A little too big is always better than a little too small.
Wrap your hair colored yarn around the book. Each full wrap will create 1 long strand of hair that gets folded in half. For this project, I ended up needing between 175 and 200 pieces of hair. To avoid wasting yarn, start with less, and cut more hair later as needed.

Once you’re done wrapping, cut all the way across one end. This is why I like using a hardcover book – the recessed pages in the middle create a nice groove for scissors!

Step 3 – Attach hair:
To attach a strand of hair: First fold it in half, forming a loop. Insert hook into the desired stitch and pull up that loop. Yarn over with both ends of the hair strand and pull all the way through.
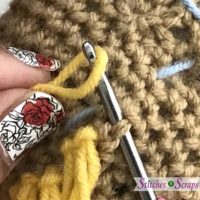

Start with the head facing sideways as shown below, so the part line is on top.

Add 2 or 3 rows of hair along the side of the part closest to you. In this example, I used about 40 strands on each side. Stop about 1/4 inch from the front hairline, so you can add some hair along that edge later.
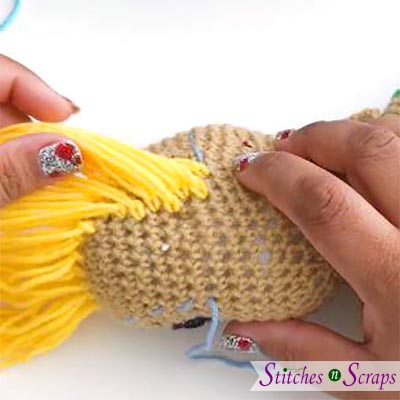
Turn head around and repeat the process along the other side of the part.

With back of head facing you and front (forehead) guideline on top, fill in a few rows of hair along the forehead. Then add some hairs along the center of the part line. If you find it easier, you can take out the center part guideline before doing this.

Add a row or two of hair along the side and bottom guidelines, rotating the head as you go so that the guideline is always on top.

Shake out the hair and move it into a rough approximation of the style you want (just to check it for now). Fill in any bare spots until it looks good to you.
Step 4 – Trim Hair :
Stand doll up using a doll stand, or lay it flat on it’s face, and brush hair back until it’s all smooth. Trim the hair just to make the bottom even. Ignore any shorter layers further up – these will add body and a more natural feel.

Step 5 – Style hair as desired:
In this case, I pulled the hair into two side ponytails and tied them with green yarn. It’s ok to trim a little bit more at this point if you feel you need to.

Video Tutorial:
Ready to try it out? The head I used in this tutorial is from my Serrana the Mermaid pattern.


You May Also Like

Almost Invisible Single Crochet Increase

Deluxe Bonbon Love Project Kits – Review & Giveaway