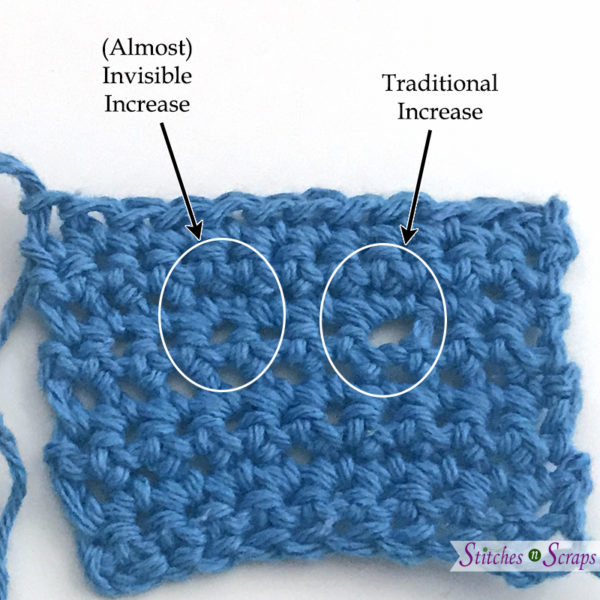
Almost Invisible Single Crochet Increase
A traditional crochet increase is done by simply working 2 stitches into the same stitch. Sometimes though, this can be too visible, or can open up that stitch too much. For those situations, this (almost) invisible single crochet increase may be a better option.

When to choose a traditional single crochet increase
As a design element
Traditional increases make visible bumps and holes. This isn’t always a bad thing! Sometimes the extra stitches can form a pretty pattern and work as a design element. One example of this is spiraling increases at the top of a hat.
In chains and chain spaces
While you CAN technically do the invisible increase technique into a chain, you can’t do it in a chain space. In either case, it would be fiddly and there’s just no reason to. There’s already a hole, and the increase won’t really look any different.
Check out this Lunchtime Live episode for the difference between working into chains and working into chain spaces.
Alternative placements
Sometimes your pattern will call for working into the front loop only, or around a post, or something else other than the traditional placement in the top of the stitch. In these cases you should work the increase the way the pattern specifies, because there is usually a reason for it.
When to choose an invisible single crochet increase
Less visible
Traditional increases can sometimes be too noticeable when you don’t want them to be. For example, you may not want visible lines for the bust shaping on a sweater.
Smaller hole
Sometimes the wider holes from traditional increases can be the issue. Putting 2 stitches into the same spot can “open up” that stitch, creating a small hole. This can be a problem when you need a more solid fabric, like for amigurumi projects. These holes can be enough to make the stuffing visible or even allow some of it to fall out.

Right side and wrong side
An invisible increase can be used any time you are putting 2 sc in the same stitch. The difference is more noticeable from the front, so it works best on right side rows or rounds. Here’s what it looks like from the right side.

And here’s what it looks like from the back. If you work an invisible increase on a wrong side row, this is what you will see on the right side.

How to crochet the almost invisible increase
(scroll down for video tutorial)
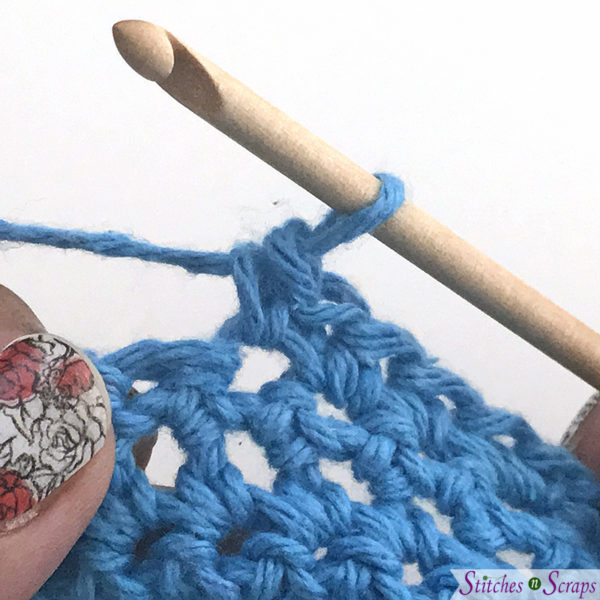
First work a single crochet into the back loop of the indicated stitch.

Then work another single crochet into both loops of the same stitch.

This pushes your first single crochet slightly to the back. In this way, the two stitches rest on top of one another rather than side by side, making them look more like 1 stitch. Since they are worked into 2 different places, they also don’t create any more of a hole than a normal single crochet would.
That’s all there is to it! Now you can use this increase in place of a traditional one any time you like. When you see “2 sc in next stitch,” try using this increase method instead.
(Almost) Invisible, Single Crochet Increase – Video Tutorial:
Ready to try it out? I use this increase in most of my amigurumi patterns, as well as in all the magnets in the 2021 Fridgies CAL!


11 Comments
Judy
Brilliant! Thank you for a valuable–and easy–tip!
Pia Thadani
yay! glad you like it 🙂
Tonia Deakin
Wow! That’s Great! Thank You!
Pia Thadani
Glad you like it! 🙂
Marianne Kiss
Oh, what a simple and witty method!
Thank you very much and congratulation!
Marianne Kiss
Pia Thadani
thanks! 🙂
Jan Fields
Thanks for the tip! I do amigurumi and invariably seems to fight that bigger hole! =)
Verna
How have I never seen this from anyone before? And I’m just now seeing this from you!! You mentioned this method of the invisible increase in your super cute Breezy Baby Bat pattern that you just released today. I have done all sorts of amigurumi, new and older patterns, and it’s never been mentioned. WOW. This is a game-changer. I also like the invisible decrease method similar to this as well.
Pia Thadani
LOL that’s kinda how I felt the first time I did it too 🙂
Angie
What a tip!!! Love love love it!! I sell at stores so this will definitely make my items more professionally looking!!
Pia Thadani
Yay! You’re welcome and I’m so glad you found it helpful 🙂