How to Crochet Star Stitch Chevrons – Photo and Video Tutorial
If you like the rich texture of crochet star stitches and the bold, zig-zag lines of chevrons, bring them together with this striking star stitch chevron stitch pattern!
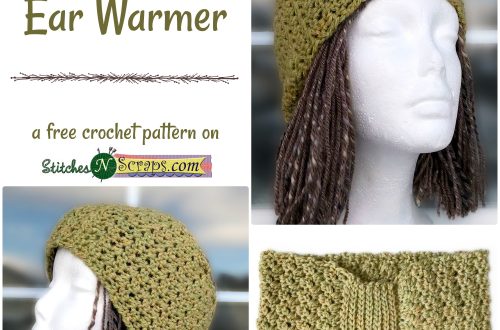
Try this stitch out with the Star Stitch Chevron Spa Washcloth pattern!
Abbreviations used
This tutorial uses the following abbreviations (in US terms).
ch = chain
sc = single crochet
hdc = half double crochet
sc2tog = single crochet 2 stitches together
sc3tog = single crochet 3 stitches together
hdc2tog = half double crochet 2 stitches together
star = star stitch
beg star = beginning star stitch
dec = star decrease
st(s) = stitch(es)
sl st = slip stitch
Crochet Star Stitch Tutorial
This is a more advanced stitch and the tutorial assumes you already know how to do the star stitch. If you don’t, you may want to read this Crochet Star Stitch tutorial first. Here’s a basic refresher:
Star Stitch (Star):
Pick up one loop each in eye, last leg, and base of next star, pick up one loop in each of next 2 stitches, yarn over and pull through all 6 loops on hook, ch-1 to close.

Crochet Chevron Basics
All the magic of chevrons happens in the “peaks” and “valleys.” Increases at the top peaks and decreases at the bottom valleys are what give the stitch it’s zig-zag shape.
Increase at the top, Decrease at the bottom
Increasing forces the stitches to curve outwards, forming the peak at the top. Decreasing at the bottom pulls the stitches in towards each other, creating the valleys.
The decrease at the bottom should match the increase at the top. Typically, this is a 2 stitch increase at the top matched by a 2 stitch decrease at the bottom. This way, the stitch count will stay the same. For every peak, there needs to be an equal and opposite valley, taking into account the edge stitches as well.

A little different at the edges
To get nice, straight edges, increase and decrease only half as many stitches as normal at the edges. For our example, there should be one increase edge and one matching decrease edge, to keep the stitch counts the same. I like to add one extra stitch at the decrease end as well, just to get a straighter looking edge.
It is also common to have both edges the same, either both increases or both decreases. Since the edges only use half as many stitches for the increases and decreases, they can be offset by one extra peak or valley in the middle. So you can have an extra peak in the middle and a valley at each end, or an extra valley in the middle and a peak at each end. For this tutorial, I wanted to show you both edge options, so we’re doing one of each.
What’s in the middle?
Now that we know the basic structure, let’s have some fun in the middle! The stitches between the peaks and valleys can be any stitches you want, as long as the stitch count remains the same in each section. This is where the star stitches come in.
How to crochet star stitch chevrons
Stitch Counts
For our chevrons, we will be using a multiple of 18 stitches plus 11. The foundation chain will need 1 extra turning chain as well, so the foundation chain is a multiple of 18 plus 12. In the video below, I have used a swatch with just one repeat, so I chained 30 to start.
Set up row
Ch 30
Row 1: Sc in the 2nd ch from hook, sc2tog (valley edge), [sc in next 7 chs, 3 sc in next ch (peak), sc in next 7 chs, sc3tog (valley)], Repeat between [ ] until you reach the last 8 chs, sc in next 7 chs, 2 sc in last ch (peak edge).
This basic single crochet chevron row gives us a foundation for our star stitches.
Star Stitch Row
This row starts at a peak, so ch 1, 2 hdc in the first st.
Now we can start our repeat section, with star stitches. But star stitches normally start with chains at the edge, which we can’t do here. We need something else to work the first star into. Let’s use an hdc.
*Hdc in the next stitch, then work a beginning star:
Beginning star (beg star)
For a normal star we pick up 5 loops – in the eye, leg, and base of the previous star, and then 1 in each of the next 2 stitches. Our hdc has no eye, so instead, do a yo for that first loop.
The hdc does have a leg and a base, so we can pick up the next 4 loops just like normal. Yarn over and pull through all 6 loops, and our beginning star is complete!
Work 2 more normal star stitches, and that takes you to the first valley.

Star decrease (dec)
We could decrease using an hdc3tog, but those can be bulky. Eliminating the first yarn over decreases the bulk and makes it look more like a star stitch.
Insert hook into next stitch and draw up a loop, (yo, insert hook into next stitch and draw up a loop) twice. You should now have 6 loops on your hook. Yarn over and raw through all 6 loops.

3 more stars will take us up to the peak: Beg star, star twice, 3 hdc in next st.
Repeat from * until you have 10 stitches left. 3 more stars (beg star, star twice) takes you to the final valley. Hdc2tog, hdc in the last stitch.
Row 2: Ch 1, turn, 2 hdc in first st, [hdc in next st, beg star, star twice, dec, hdc in next st, beg star, star twice, 3 hdc in next st] repeat between [ ] to last 10 sts, hdc in next st, beg star, star twice, hdc2tog, hdc in last st.
Single Crochet Chevron Row
This row is almost the same as our first, set up row, except now we’re working into the star stitches we made. The only tricky part of this row is knowing where the stitches are.
Each star counts as 2 stitches – one in the eye, and one in the top. When you get to the valleys in this row, you will be working your sc3tog decreases into an hdc, the star decrease, and the eye of the next star.

Row 3: Ch 1, turn, sc in first st, sc2tog, [sc in next 7 sts, 3 sc in next st, sc in next 7 sts, sc3tog], Repeat between [ ] until you reach the last 8 sts, sc in next 7 sts, 2 sc in last st.
Repeat rows 2 and 3 until you reach your desired size.
Edging:
Rows 1 and 3 are wrong side rows, so you will most likely want to do some sort of edging. A round of single crochet makes a good base for any edging you plan to do.
For the top edge, Ch 1, turn, and work an sc chevron row across. This time, you’ll be starting at a peak:
Top edge: Ch 1, turn, 2 sc in first st, [sc in next 7 sts, sc3tog, sc in next 7 sts, 3 sc in next st], repeat between [ ] until you reach the last 10 sts, sc in next 7 sts, sc2tog, sc in last st.
For the side edge, ch 1 and sc evenly across. The rows have been alternating between hdc and sc rows, so working 1 sc in each row should give you a nice, even edge.

The bottom edge is another sc chevron row. Because we’ve turned our work upside down, we’re again starting with a peak. Work this edge the same way you worked the top edge.
For the other side edge, ch 1 and sc evenly across, using the same number of stitches you did for the other side. Join with a sl st to complete the edging round.
Video Tutorial
Ready to give it a try? Check out the Star Stitch Chevron Spa Washcloth pattern!
What did you think of this tutorial?


2 Comments
Vashti Braha
This is so great Pia!
Pia Thadani
thanks!