Free Pattern – Hygge Neck Roll Bolster Pillow
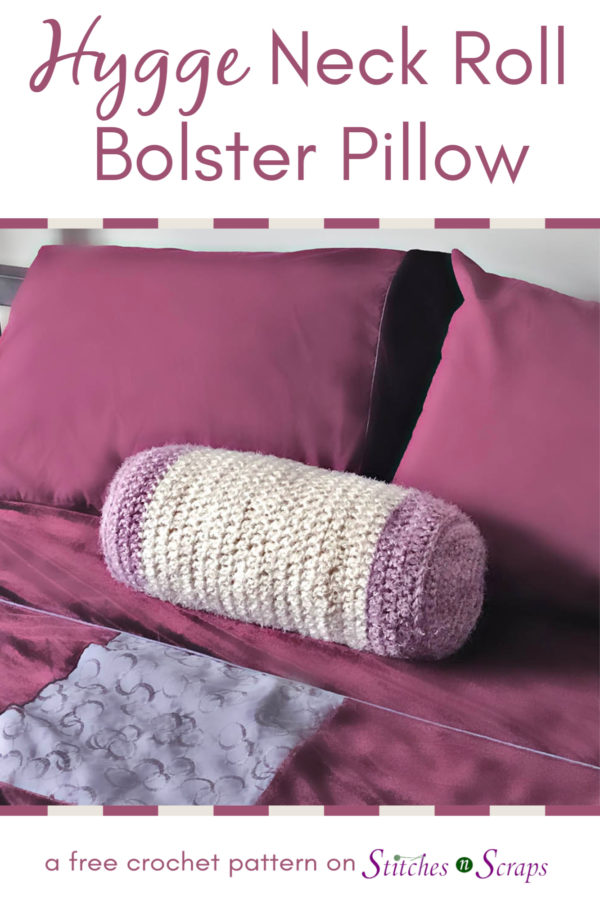
Fluffy, cozy, and oh so comfy! Give your neck the support it needs with the Hygge Neck Roll Bolster Pillow. With 2 options for the end cap, you can either make a solid pillow, or a pillow cover that can be slipped on and off.

This post contains affiliate advertisements (click for more info). If you click one of these advertisements and then make a purchase, I may be compensated. You get the same great prices, and you will be helping to support this site!
What is Hygge?
Hygge is a danish word that has become a lifestyle trend. Roughly translated, it means cozy and content. Read more about the concept here.
Hygge Home CAL
I designed this pattern for the Hygge Home CAL. Through mid-March, we’ll be sharing comfy, cozy, home decor projects like this one. Red Heart and Darn Good Yarn have both provided giveaway prizes to make the event even more fun! See all the details, including the giveaway entry information and links to the other patterns, in the main CAL post on Underground Crafter.
Red Heart Hygge Yarn
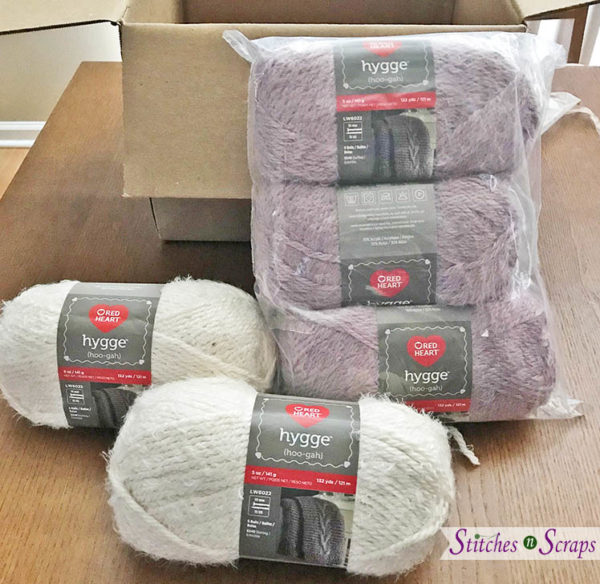
Red Heart also sent me some of their Hygge yarn for free, to make this design. This chunky yarn is fuzzy and unbelievably soft, exactly what you would expect from the name. I love the soft, muted shades, but if that’s not for you, Red Heart has recently widened the color range to include some richer colors too.

At the time, I didn’t yet know what I was going to make, so I got more than I needed. I have quite a bit left over, so you can expect another pattern in this yarn later in the year.
The pillow form
To stuff the pillow, I used a Poly Fil Premier Neckroll from Fairfield. This neckroll pillow form has an overlapping, envelope style opening at one end. I love this because it means you can add and remove stuffing to change the pillow firmness. This opening is where I got the idea for the optional opening on the pillow too.
This pattern is protected by copyright. Please do not distribute or share this pattern in any way other than by sharing a link to this page or to the pattern page on Ravelry. Click here for copyright information.
Hygge Neck Roll Bolster Pillow


Add this to your Ravelry Queue
Materials
- Red Heart Hygge yarn
- 110 yds #8579 Lavender
- 110 yds #8406 Pearl
- Poly-Fill Neck Roll pillow form
- Size K / 6.5 mm crochet hook, or size needed to match gauge
- Tapestry Needle
Skill Level
Intermediate: Worked in the round with simple color changes, some back post single crochets. Optional, alternate closure is somewhat more advanced.
Size
Fits a 5 x 14 inch neck roll pillow form.
Gauge
Use pattern as gauge swatch – Starting circle (either version) should measure approximately 6 inches in diameter.
Abbreviations used
(Pattern is written in US terms)
ch = chain
sc = single crochet
bpsc = back post single crochet
dc = double crochet
ch-sp = chain space
st(s) = stitch(es)
sl st = slip stitch
rnd = round
Recommended Resources
Instructions
(Scroll down for video tutorial)
Starting circle (Easier / solid version)
The easy version creates a solid end piece that will match the other end of the pillow. This is less bulky, but will not open and the pillow form will not be removable. Choose either this version or the optional advanced version.

Rnd 1 (RS): With lavender, ch 2, 6 sc in 2nd ch from hook, join with sl st to first st. (6 sc)
Rnd 2: Ch 1, 2 sc in each st around, join with sl st to first st. (12 sc)
Rnd 3: Ch 1, (2 sc in next st, sc in next st) around, join with sl st to first st. (18 sc)
Rnd 4: Ch 1, (2 sc in next st, sc in next 2 sts) around, join with sl st to first st. (24 sc)
Rnd 5: Ch 1, (2 sc in next st, sc in next 3 sts) around, join with sl st to first st. (30 sc)
Rnd 6: Ch 1, (2 sc in next st, sc in next 4 sts) around, join with sl st to first st. (36 sc)
Rnd 7: Ch 1, (2 sc in next st, sc in next 5 sts) around, join with sl st to first st. (42 sc)
Rnd 8: Ch 1, (2 sc in next st, sc in next 6 sts) around, join with sl st to first st. (48 sc)
Rnd 9: Ch 1, sc in each st around, join with sl st to first st. (48 sc)
Do not fasten off. Skip ahead to Body.
Starting circle (Advanced / open version)
The advanced version creates an end piece with overlapping halves. This is bulkier, but opens so that the pillow form can be removed. Scroll down for a video tutorial of the joining in this section.

Partial Circle (make 2)
Row 1: With lavender, ch 2, 3 sc in 2nd ch from hook. (3 sc)
Row 2 (RS): Ch 1, turn, 2 sc in each st across. (6 sc)
Row 3: Ch 1, turn, 2 sc in first st, sc in next st, (2 sc in next st, sc in next st) across. (9 sc)
Row 4: Ch 1, turn, 2 sc in first st, sc in next 2 sts, (2 sc in next st, sc in next 2 sts) across. (12 sc)
Row 5: Ch 1, turn, 2 sc in first st, sc in next 3 sts, (2 sc in next st, sc in next 3 sts) across. (15 sc)
Row 6: Ch 1, turn, 2 sc in first st, sc in next 4 sts, (2 sc in next st, sc in next 4 sts) across. (18 sc)
Row 7: Ch 1, turn, 2 sc in first st, sc in next 5 sts, (2 sc in next st, sc in next 5 sts) across. (21 sc)
Row 8: Ch 1, turn, 2 sc in first st, sc in next 6 sts, (2 sc in next st, sc in next 6 sts) across. Place marker in 21st st (4th st from end). (24 sts)
Ch 3 at the beginning of a row counts as a dc in the first st throughout. For a less visible seam, try using a chainless starting double crochets instead!
Row 9: Ch 3 turn, working in sides of rows, work 15 dc evenly spaced across straight edge. (16 dc)
Row 10: Ch 3, turn, dc in next 3 sts, (dc2tog, dc in next 4 sts) twice (14 dc)
Fasten off first partial circle, do not fasten off 2nd partial circle.
Assembly
Line up the two partial circles, with right sides up, so that the two pieces overlap to form a circle. Partial circle #2, with the working yarn still attached, should be on top. The straight edges of the circles should line up with the markers.

Rnd 11 (RS): Do not turn. Ch 1.
The sides of rows 9 & 10 on the top piece line up with the last 4 sts of row 8 on the bottom piece. Working through both layers, sc in each of those 4 sts. (4 sc)
The next 4 sts on the top piece line up with the sides of rows 9 & 10 on the bottom piece. Working through both layers, sc in each of those 4 sts. (4 sc).
Now your piece is joined at one side where it overlaps.

Working into the top layer only, sc in each st around to next marker (16 sc)
The next 4 sts on the top piece line up with the sides of rows 9 & 10 on the bottom piece. Working through both layers, sc in each of those 4 sts. (4 sc).
The sides of rows 9 & 10 on the top piece line up with the next 4 sts on the bottom piece. Working through both layers, sc in each of those 4 sts. (4 sc)
Now both overlapping edges are joined.
Sc in each remaining st on bottom layer. (16 sc)
Join with sl st to first st of round. (Total of 48 sts in round)
You should now have a full circle, with an opening in the middle where the two layers overlap. Continue with Body.

Body
Ch 3 at the beginning of a row counts as a dc in the first st throughout. For a less visible seam, try using a chainless starting double crochets instead!
Rnd 1: Ch 1, bpsc in each st around, join with sl st to first st. (48 sc)
Rnds 2-4: Ch 3, dc in next st and in each st around, join with sl st to first st, changing to pearl at the end of Rnd 6. (48 dc)
Rnds 5-21: With pearl, ch 3, dc in next st and in each st around, join with sl st to first st, changing to lavender at the end of rnd 20. (48 dc)
Insert pillow form to check length. The remaining uncovered length of the pillow form should be the same as the length of rounds 1-4. If it is not, add or remove pearl colored rows as needed.

Rnds 22-24: With lavender, ch 3, dc in next st and in each st around, join with sl st to first st. (48 dc)
Ending Circle
Rnd 1: Ch 1, bpsc in each st around, join with sl st to first st. (48 sc)
Rnd 2: Ch 1, sc in each st around, join with sl st to first st. (48 sc)
If you used the solid starting circle, insert pillow form and weave in all tails before continuing.
Rnd 3: Ch 1, (sc in next 6 sts, sc2tog) around, join with sl st to first st. (42 sts)
Rnd 4: Ch 1, (sc in next 5 sts, sc2tog) around, join with sl st to first st. (36 sts)
Rnd 5: Ch 1, (sc in next 4 sts, sc2tog) around, join with sl st to first st. (30 sts)
Rnd 6: Ch 1, (sc in next 3 sts, sc2tog) around, join with sl st to first st. (24 sts)
Rnd 7: Ch 1, (sc in next 2 sts, sc2tog) around, join with sl st to first st. (18 sts)
Rnd 8: Ch 1, (sc in next st, sc2tog) around, join with sl st to first st. (12 sts)
Rnd 9: Ch 1, sc2tog in each st around, join with sl st to first st. (6 sts)
Fasten off leaving a 6 inch tail.
Use tail to sew hole closed.
Weave in ends.
If you use the open starting circle, pull the overlapping ends apart and insert pillow form.
Hygge Neck Roll Optional Closure – Video Tutorial:
I hope you enjoy making this pattern. A downloadable pdf of this pattern is also available on Ravelry, for a small fee. The fee for the pdf format is to offset the advertising revenue lost when you print or download the pattern rather than viewing it online.
Do you want the best of Stitches n Scraps delivered right to your inbox? The Stitches n Scraps email newsletter includes highlights from the blog as well as special features not available elsewhere. Don’t miss a stitch – Subscribe now!


5 Comments
Melissa
What does “with pearl” mean? I haventbhward that term and it isn’t in your abbreviations at the top?
Pia Thadani
Pearl is one of the two colors – Lavender and Pearl 🙂
shula
Very nice
Harry Trent
How easy is it to take the cushion in/out of the finished cover?
Pia Thadani
If you make the overlapping end, it comes out super easy through the opening. If you make the solid end, it does not come out at all.