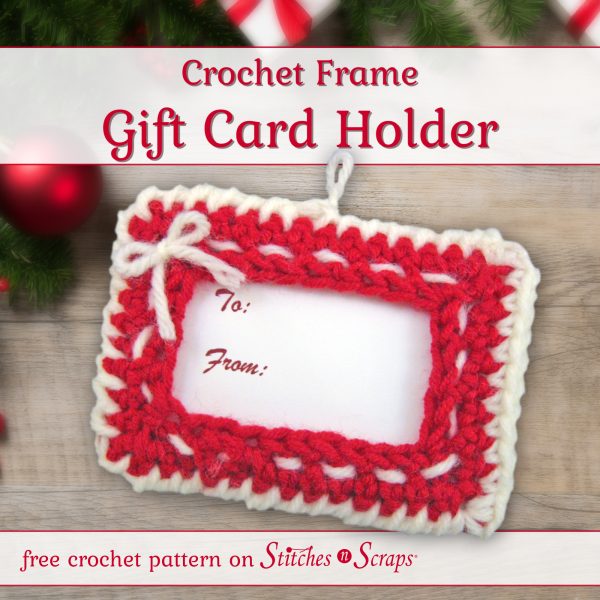
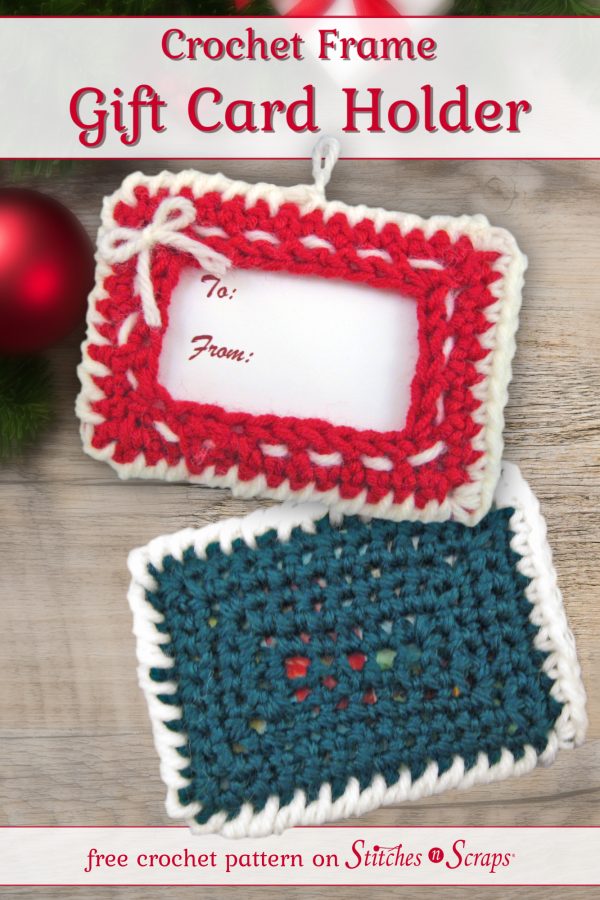
Crochet Frame Gift Card Holder
Frame your gift in a Crochet Frame Gift Card Holder! Add a personal touch to your gift cards with this quick and easy frame. You can also hang it as an ornament, use the bonus printable inserts for gift tags, or make a solid front for a more traditional holder.
This content is protected by copyright. See this Terms of Use / Copyright page for more information.
This post contains sponsored content and/or affiliate links. If you click an affiliate link and make a purchase, I may get a commission.
Make it Your Way
If you prefer, you can use this pattern to crochet a solid gift card holder without the frame. Simply make 2 of the solid back pieces, and use one for the front!
You can also decorate your gift card holder as you choose. Skip the lacing and bow, add beads, buttons, or other embellishments, or leave it plain for classic simplicity. The choice is yours!
Reverse Single Crochet / Crab Stitch
The reverse single crochet / crab stitch around this crochet frame gift card holder does double duty as an edging and a seam. Learn more about this fun technique in this Crab Stitch / Reverse Single Crochet Tutorial


Materials
- Yarn: Worsted-weight yarn
- 20 yds main color (A)
- 5 yds accent color (B)
- Hook: Size H / 5 mm crochet hook or size needed to match gauge
- Notions:
- Optional embellishments (felt shapes, buttons, etc)
- Scissors
- Tapestry Needle
Project Level
Intermediate – Worked in the round, foundation single crochet, reverse single crochet / crab stitch
Size
4″ x 2.75″ / 10 cm x 7 cm (fits standard gift card)
Gauge
Back measures 3.5″ x 2.25″ / 9 cm x 5.5 cm
Abbreviations used
This pattern uses US terms.
| ch | chain |
| fsc | foundation single crochet (See Special Stitches) |
| rep | repeat |
| rsc | reverse single crochet (see Special Stitches) |
| rnd | round |
| RS | right side |
| sc | single crochet |
| sk | skip |
| sl st | slip stitch |
| sp(s) | space(s) |
| st(s) | stitch(es) |
| WS | wrong side |
Notes
- On the last row, both the solid and window pieces should have 13 sc across each long side, 9 sc across each short side, and ch 2 spaces in each corner.
- When joining, I like to clip the pieces together in the corners with locking stitch markers, safety pins, or other clips. That holds them in place and makes the joining easier.
Recommended Resources
Instructions
Back
With A, ch 6.
Rnd 1 (RS): ([Sc, ch 2] twice, sc) in 2nd ch from hook, sc in next 3 chs, ([sc, ch 2] twice, sc) in next ch, working in bottom of chs, sc in next 3 chs, join with sl st to first sc. (5 sc across each long edge, 1 sc across each short edge; 12 sc in total, 4 corner ch-2 sps)
Rnds 2-5: Ch 1, [sc in each st across to next corner ch-2 sp, (sc, ch 2, sc) in sp] 4 times, sc in each rem st around, join with sl st to first st, fasten off. (13 sc across each long edge, 9 sc across each short edge; 44 sc in total, 4 corner ch-2 sps)
Front
Optional: For a solid Gift Card Holder without the framed opening, skip this section and instead repeat Back.
With MC, ch 35.
Rnd 1 (RS): Working in back bumps of chs, sc in 2nd ch from hook and in next 8 chs, (sc, ch 2, sc) in next ch, sc in next 5 chs, (sc, ch 2, sc) in next ch, sc in next 9 chs, (sc, ch 2, sc) in next ch, sc in next 5 chs, (sc, ch 2, sc) in last ch, join with sl st to first sc. (11 sc across each long edge, 7 sc across each short edge; 36 sc in total, 4 corner ch-2 sps)
Rnd 2: Ch 1, [sc in each st across to next corner ch-2 sp, (sc, ch 2, sc) in sp] 4 times, sc in last st, join with sl st to first st, fasten off. (13 sc across each long edge, 9 sc across each short edge; 44 sc in total, 4 corner ch-2 sps)
Edging:
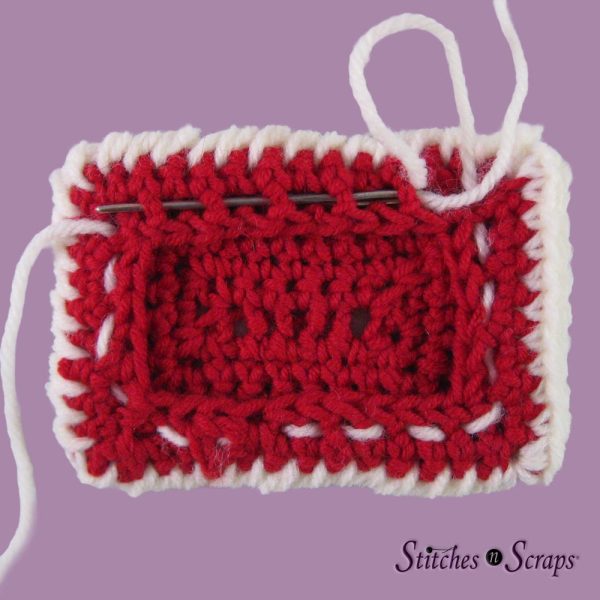
Place Front on top of Back with WS together so that either long edge is on top. Working through both layers, join B with sl st in top left corner ch-2 sp, ready to work reverse sc across long edge.
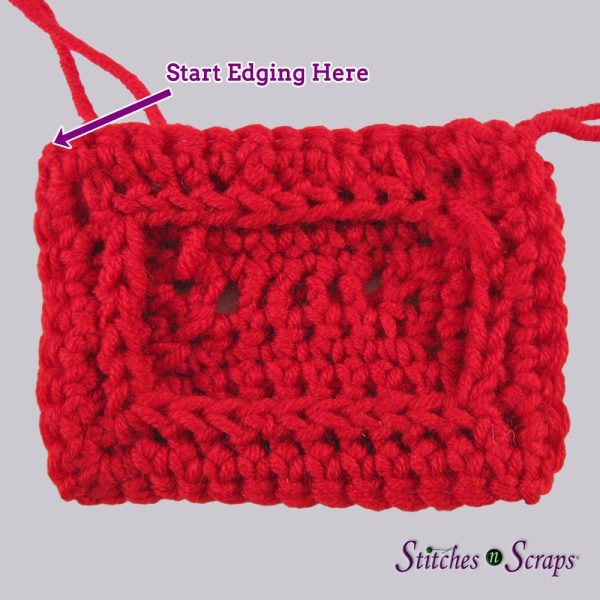
Closed Sides Edging/Seam: Working through both layers and beginning with long edge, sc in same sp as join, [reverse sc in each st across to next corner ch-2 sp, reverse sc in sp] 3 times, do not fasten off. (39 reverse sc)
Open Side Edging: Turn work so Back is facing and short, open edge is on top. Working around open edge, 11 sc evenly spaced across Back, 11 sc evenly spaced across Front, join with sl st in first sc, fasten off. (22 sc)
Finishing
Weave in all ends before continuing.
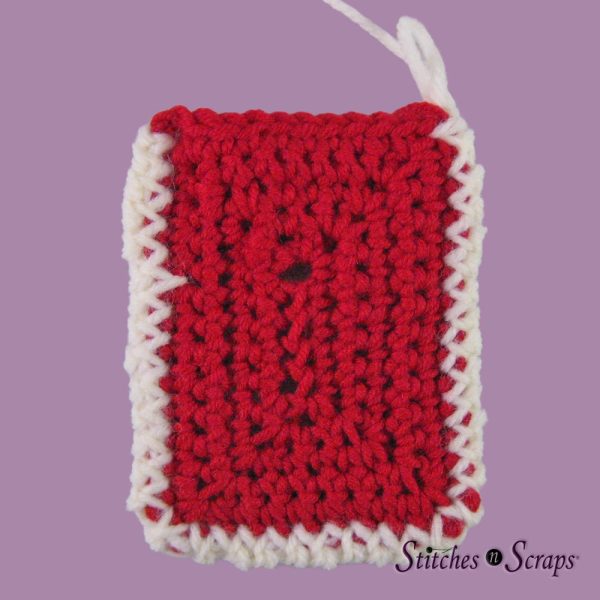
Hanging Loop
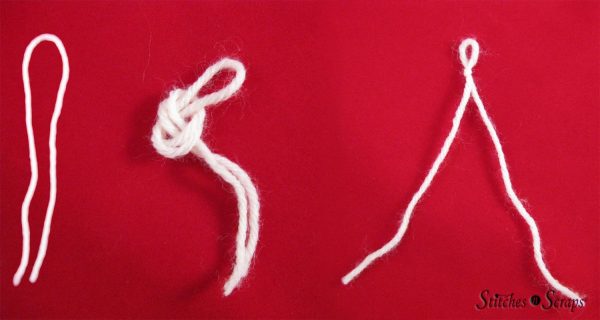
Cut a 12″ / 30 cm piece of B and fold in half. Tie a secure knot 1/2″ / 1.5 cm below folded end, leaving a small loop above the knot. Place knot at center of either long edge and weave in ends to secure.
Lacing and Bow
Cut a 12″ / 30 cm piece of B. Beginning at desired corner for bow, use tapestry needle to weave yarn in and out of sts of Rnd 1 around entire opening. Tie ends in a bow and trim as desired.
If you worked a solid Front, weave lacing through Rnd 4 of Front.
Share this Crochet Frame Gift Card Holder Pattern on Pinterest!
Here’s an image perfect for pinning.
Rate this Crochet Frame Gift Card Holder Pattern!
I hope you enjoy this Crochet Frame Gift Card Holder pattern. A downloadable pdf of this pattern is available on Ravelry for a small fee.
Do you want the best of Stitches n Scraps delivered right to your inbox? Don’t miss a stitch – Subscribe now!


You May Also Like

Free Pattern – Non-stop slippers- Child sizes

Crochet Amigurumi Lion – Noble the Lion Cub
