Free Pattern – Angel Ornament
Make some for yourself, and make more for your friends. This sweet little Angel Ornament works up in under an hour, and makes a great gift. The open, granny stitch pattern lets the tree lights shine through, making her seem to light up inside. A video tutorial is included below!

This pattern contains affiliate advertisements (click for more info). If you click one of these advertisements and then make a purchase, I may be compensated. You get the same great prices, and you will be helping to support this site!
This pattern is protected by copyright. Please do not distribute or share this pattern in any way other than by sharing a link to this page or to the pattern page on Ravelry. Click here for copyright information.

Materials:
- 40-50 yds Worsted weight yarn
- Size H / 5 mm hook, or size needed to obtain gauge
- Yarn needle
- Stitch marker or scrap of yarn
- Fiber fill (enough to stuff the head as desired)
Skill Level:
Intermediate – increases, decreases, picots.
Size:
About 6 inches tall not counting loop. You can use a different size yarn or thread for a larger or smaller angel, but the yardage needed will vary accordingly.
Gauge:
Use head as gauge swatch. Before stuffing, head should measure about 2 inches tall and 2.5 inches wide. Exact gauge is not critical but stitches should be tight enough for the head so that the stuffing won’t fall out.
Abbreviations used:
(Pattern is written in US terms)
- ch = chain
- sc = single crochet
- dc = double crochet
- inc = invisible increase (see Special Stitches)
- dec = invisible decrease (see Special Stitches)
- sp = space
- ch-sp = chain space
- st(s) = stitch(es)
- rnd = round
- RS = right side
Recommended Resources:
Special Stitches:
Invisible increase (inc): Sc in back loop only of indicated st, then sc in both loops of same stitch.
Invisible decrease (dec): Insert hook into front loop only of both of next 2 stitches, yarn over and draw up a loop, yarn over and draw through both loops on hook.


This is an alternative to a single crochet 2 together (sc2tog) stitch. If you prefer, you can use the standard sc2tog instead.
Picot: Ch 3, sl st in top of the previous stitch you made. (See Recommended Resources section for a picot tutorial)
Instructions:
(Scroll down for video tutorial)
Leave an 8 inch starting tail.
Loop (for hanging):
Ch 6, join with sl st to form a circle.
Head:
Entire angel is worked on the right side, do not turn your work. Head is worked in continuous rounds. Mark the first stitch of each round, and do not join at the end of the round.
Rnd 1 (RS): Ch 1, 6 sc in same ch where you joined loop. (6 sc)
Fold loop forward so you can continue to work around it.

Rnd 2: Inc in each st around. (12 sc)
Rnd 3: (Inc in next st, sc in next st) around. (18 sc)

Rnds 4-7: Sc in each st around.
Rnd 8: (Dec, sc in next st) around. (12 sts)
Rnd 9: Dec in each st around, sl st in first st of round. (6 sts)
Remove stitch marker if desired.
Body:
Ch 3 at the beginning of a rnd counts as a dc.
Rnd 10: Ch 3, (2 dc, ch 2, 3 dc) in first st, ch 1, (3 dc, ch 2, 3 dc) in next st, ch 1, 3 dc in next st, [ch 1, (3 dc, ch 2, 3 dc) in next st] twice, ch 1, 3 dc in next st, ch 1, join with sl st to first st. (30 dc, 4 ch-2 sps, 6 ch-1 sps)
For remainder of body, work only into ch-sps, skipping sts unless otherwise indicated.
Rnd 11: Sl st in next 2 sts and in first ch-2 sp, ch 3, (2 dc, ch 2, 3 dc) in same ch-2 sp, *ch 1, 3 dc in next ch-1 sp, ch 1, (3 dc, ch 2, 3 dc) in next ch-2 sp, [ch 1, 3 dc in next ch-1 sp] twice,** ch 1, (3 dc, ch 2, 3 dc) in next ch-2 sp, repeat from * to **, ch 1, join with sl st to first st. Place marker in last ch-1 sp made. (42 dc, 4 ch-2 sps, 10 ch-1 sps)
Stuff head. Make sure starting tail sticks out through the stuffing at the neck. Using starting tail, sew neck closed.
Rnd 12: Sk next 4 ch sps, (sl st, ch 3, 2 dc) in next ch-1 sp, (ch 1, 3 dc in next ch 1 sp) twice, sk next 4 ch sps, ch 2, (3 dc in next ch-1 sp, ch 1) twice, 3 dc in last ch-1 sp, ch 2, join with sl st to first st. (18 dc, 2 ch-2 sps, 4 ch-1 sps)


Rnd 13: Ch 3, 2 dc in same ch-2 sp (the last one before the join), (ch 1, 3 dc in next ch-1 sp) twice, (3 dc, ch 2, 3 dc) in next ch-2 sp, (ch 1, 3 dc in next ch-1 sp) twice, ch 1, 3 dc in beginning ch-2 sp, ch 2, join with sl st to first st. (24 dc, 2 ch-2 sps, 6 ch-1 sps)

Rnd 14: Ch 3, 2 dc in same ch-2 sp, (ch 1, 3 dc in next ch-1 sp) 3 times, (3 dc, ch 2, 3 dc) in next ch-2 sp, (ch 1, 3 dc in next ch-1 sp) 3 times, 3 dc in beginning ch-2 sp, ch 2, join with sl st to first st. (30 dc, 2 ch-2 sps, 8 ch-1 sps)
Bottom Edging:
Rnd 15: Ch 3, dc in same ch-2 sp, (3 dc, picot, 2 dc) in each ch sp around, (3 dc, picot) in beginning ch sp, join with sl st to first st, fasten off. (50 dc, 10 picots)
Wing Edging:
Fold wings so skipped sts and ch-sps from rnd 11 match up. There will be one stitch at the top of each wing that is by itself.

First wing: With RS facing, join yarn with sl st in marked sp (at the underarm). Working through both layers, sc in next 3 sts, 3 sc in next ch-2 sp, sc in next 3 sts, sc in next ch-1 sp, sc in next st, sl st in remaining single st at top of wing. Fasten off. (11 sc)
Second Wing: With RS facing, join yarn with sl st in the single st at the top of wing. Working through both layers, sc in next st, sc in next ch-1 sp, sc in next 3 sts, 3 sc in next ch-2 sp, sc in next 3 sts, sl st in next ch-1 sp, fasten off.
Weave in all ends.
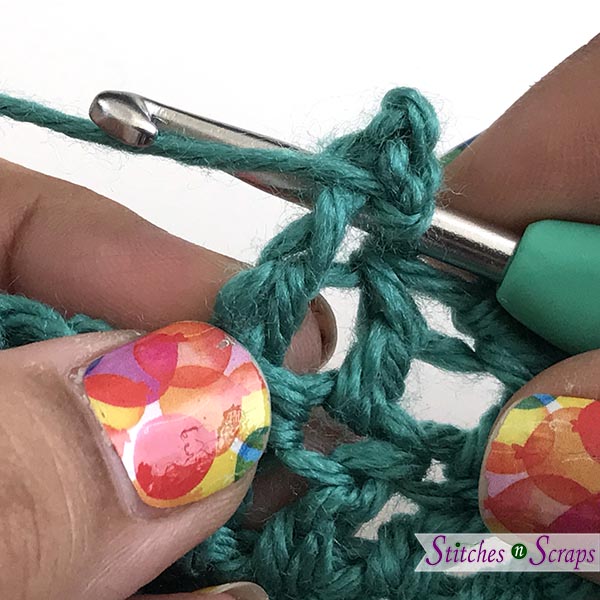
Angel Ornament – Video Tutorial:
I’ve split this video into 3 parts here, due to the file size. It’s also available as one video on YouTube.
Part 1:
Part 2:
Part 3:
I hope you enjoy making this pattern. A downloadable pdf of this pattern is also available in my Craftsy store or on Ravelry, for a small fee. The fee for the pdf format is to offset the advertising revenue lost when you print or download the pattern rather than viewing it online.
Do you want the best of Stitches n Scraps delivered right to your inbox? The Stitches n Scraps email newsletter includes highlights from the blog as well as special features not available elsewhere. Don’t miss a stitch – Subscribe now!


27 Comments
Anne
Thank you so much for this delightful crochet angel pattern. Your videos and instructions are excellent. I have really enjoyed making the Angel while following your videos. Lovely, thanks again, Anne B.
Pia Thadani
I’m so glad you enjoyed it! 🙂 If you’re on the Scrappy Stitchers Facebook group, please do share pictures of your angels, I’m sure everyone would love to see them!
Diane
Thank you so much for this adorable angel. Your video and clear instructions are wonderful to follow. I will be making 8 of these to share as decorations for each place setting at my table for an upcoming women’s CHRISTmas tea. Thank you so very much!
Pia Thadani
I’m so glad you like them! The Christmas Tea sounds like fun 🙂
Sarah Diane Taylor
I actually struggled with the written instructions, BUT the video saved me. Thank you so much for this pattern. NOW that I have made the first one, I will make a few more for gifts this year.
Pia Thadani
Yay! That’s why I did both for this one – some people prefer one or the other 🙂
Sharon
Thank you for the video and pattern but your videos you go too fast lol, I had to keep rewinding
Pia Thadani
You’re welcome! I hope you were able to make it in the end. If you get stuck or have any questions, let me know 🙂
Sandy O'Neal
Do you have a version of pattern that has less pages, take crochet to doctor appointments and this is a lot of pages to print and refer to. The angel is adorable and would like to crochet for gifts.
Thanks and Marry Christmas, Sandy
Pia Thadani
Hi Sandy 🙂
The PDF version available on Ravelry is formatted for printing and is only 4 pages, with all the instructions on just the last 2 pages. The first page is the cover sheet and the 2nd page has all the introductory info (materials, gauge, etc). So with that version you could print and carry just the last 2 pages. You can find that here: https://www.ravelry.com/patterns/library/angel-ornament-16
Brenda s
The video is way too fast in section 2 and hard to follow. I went to the video because the written instructions did not make sense. Your hands are so fast and without good visual it’s really hard to tell how it is supposed to look in between.
Pia Thadani
I’m sorry to hear you’re having trouble with this section of the pattern! The parts where I sped up are just double crochets, if that helps.
You can also see the video on YouTube, and using the “settings” icon, you can change the speed to watch it in half speed or even slower. The YouTube video is here: https://www.youtube.com/watch?v=CVUrgFzpLkc
Is there a specific part of the instructions you are not clear on? Maybe I can help to clarify.
Kathie
I love your video. You are a great teacher. Can the angel stand up or is it just for hanging on a tree. Thx
Pia Thadani
It probably could, depending on the yarn, and particularly if you stiffen it with a stiffening agent. I’ll dig mine out tomorrow and try it 🙂
Pia Thadani
Ok, I pulled mine out. If you let the last round of the skirt fold out and lay flat, that sort of holds it up and it stands up ok. But honestly it would be better with some glue or fabric stiffener.
Linda
As a beginner, the videos saved me too! Most helpful. I have one question: does the first chain make the hanging loop? Can’t wait to finish these and give them away!
Pia Thadani
Yes, that is exactly right. The chain six at the beginning is the hanging loop 🙂
Linda
Thank you for your prompt response! I made sort of a “test” one with big yarn, since these were new techniques for me. Once I got going with the video, it only took me a couple of hours to do. So very fun and pretty.
Pia Thadani
Yay! I’m glad you liked it 🙂
Lynda
Your angel is beautiful, I’ve just followed your excellent tutorial Pia, and made my first one. I’m making a lot more to hang from the rood screen in my church for Christmas. An angel visited me earlier this year, it was white and gold (but didn’t have wings). X
Pia Thadani
aww thanks! I’m glad you like it and that sounds like a fun display 🙂
Nancy
I absolutely love your little angels. Would love to have a book with all the instructions for all the Angels. Any chance of helping me out with this?
Pia Thadani
Hi Nancy, and thanks! 🙂
I only have 2 angel patterns, this one, and the peg doll angels here: https://stitchesnscraps.com/peg-doll-angel-crochet-angel-pattern/
You can get printable pdf versions of both on Ravelry if you like 🙂 https://www.ravelry.com/patterns/library/angel-ornament-16 and https://www.ravelry.com/patterns/library/peg-doll-angel
Nancy
Thank you so very much for your very sweet patterns. I will now get busy no see how many I can have ready for December. Looking forward to working your beautiful patterns. Thank you, Nancy
Pia Thadani
Awesome! Have fun 🙂
Denise
Thank you for the pattern! I love it. I’m making them to put in with my Christmas Cards this year!
Pia Thadani
Awesome! I’m glad you like it 🙂