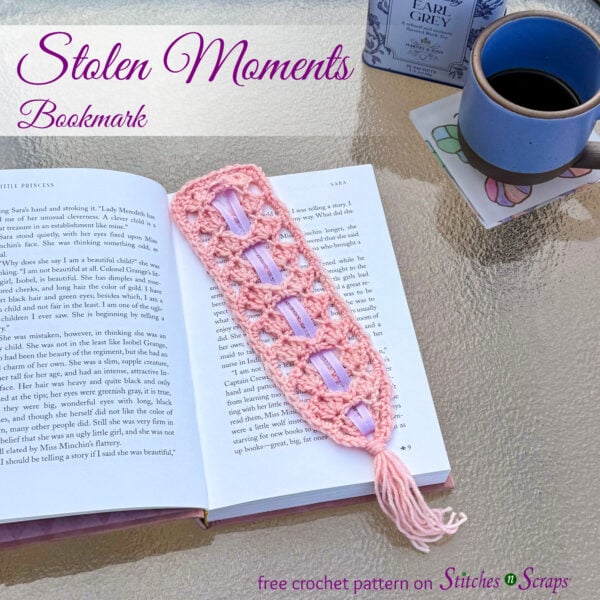
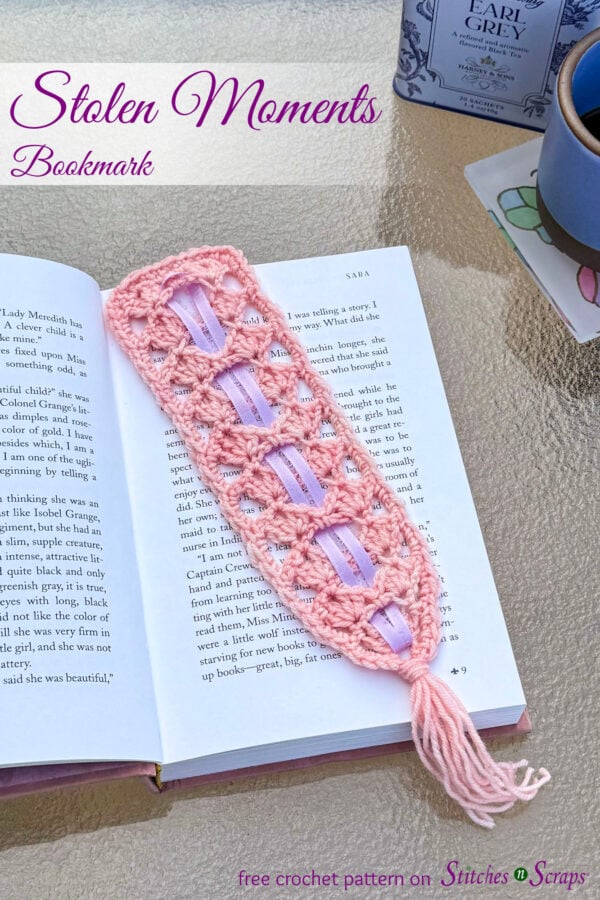
Stolen Moments Lace Crochet Bookmark
Cherish those stolen moments of solitude, with a good book and a favorite beverage. When the world creeps back in, the Stolen Moments bookmark will hold your place! This elegant, lace crochet bookmark makes a lovely gift too. Pair it with a beloved book for a personal touch any reader will treasure.
This content is protected by copyright. See this Terms of Use / Copyright page for more information.
This post contains sponsored content and/or affiliate links. If you click an affiliate link and make a purchase, I may get a commission.
Sock Yarn Stashbuster
Made in fingering-weight yarn, this lace crochet bookmark is a great way to use up your sock yarn stash. Each bookmark only takes a few yards. Put all those little odds and ends to good use and turn your sock scraps into a stash of last-minute gifts!
Chainless Starting Double Crochet
Throughout the pattern, when a row starts with a chain-3, that chain-3 counts as a double crochet. For a neater finish, try replacing the chain-3 with a chainless starting double crochet. This intermediate technique creates a stitch that looks much more like a regular double crochet than the starting chain-3. This is not required, but is a great way to level up your crochet bookmark! See this Chainless Starting Double Crochet tutorial for details.
Adjusting Length
Make your bookmark longer or shorter as desired, by working more or fewer repeats of the lace design. To ensure the ribbon can be woven in the same way as the sample, be sure to add or remove repeats in groups of 2.


Materials
- Yarn: 25 yds fingering-weight yarn.
Sample shows Global Backyard Hand-Dyed Sock – 85% Merino, 15% Nylon; (812 yds / 16 oz / 454 g per skein) in Cherry Blossom - Hook: Size E / 3.5 mm crochet hook or size needed to match gauge
- Notions:
- Glue (glue dots, hot glue, or fabric glue)
- Ribbon – 3/16″ (5mm) wide x 18″ long
- Scissors
- Tapestry needle
Project Level
Easy: Repeating lace pattern with single and double crochet. Some increases. Working into ends of rows.
Size
Approximately 2.5″ wide x 8″ long, excluding tassel
Gauge
In pattern: 10 rows (5 reps) = 1.75″ wide x 4″ long after blocking. Exact gauge is not critical but will affect finished size and yardage needed.
Abbreviations used
This pattern uses US terms.
| ch | chain |
| dc | double crochet |
| rep | repeat |
| rnd | round |
| RS | right side(s) |
| sc | single crochet |
| sk | skip |
| sl st | slip stitch |
| sp | space |
| st(s) | stitch(es) |
| WS | wrong side(s) |
Recommended Resources
Instructions
Scroll down for chart.
Center Strip
Ch 3 join with sl st in 3rd ch from hook to form a ring. This is referred to later as “starting ring.”
Row 1 (RS): Ch 3 (counts as dc), (dc, sc, 2 dc) in ring. (4 dc, 1 sc)
Row 2: Ch 1, turn, sc in first st, ch 3, sk next 3 sts, sc in last st. (2 sc, 1 ch-3 sp)
Row 3: Ch 3 (counts as dc) turn, (dc, ch 1, 2 dc) in first sc, ch 1, sc in ch-3 sp, ch 1, (2 dc, ch 1, 2 dc) in last sc. (1 sc, 8 dc, 4 ch-1 sps)
Row 4: Ch 1, turn, sk first st, sl st in next st, sl st in next ch-1 sp, ch 1, sc in same sp, ch 4, sk next 2 ch-1 sps, sc in last ch-1 sp. (2 sc, 1 ch-3 sp)
Row 5: Ch 3 (counts as dc) turn, (dc, ch 1, 2 dc) in first sc, ch 1, sc in ch-4 sp, ch 1, (2 dc, ch 1, 2 dc) in last sc. (1 sc, 8 dc, 4 ch-1 sps)
Rows 6-19: [Rep Rows 4-5] 7 times.
To adjust length, add or subtract repeats in groups of 2. I.e., repeat Rows 4-5 any odd number of times to achieve desired length. You will also need to work more/fewer repeats in the edging.
Edging
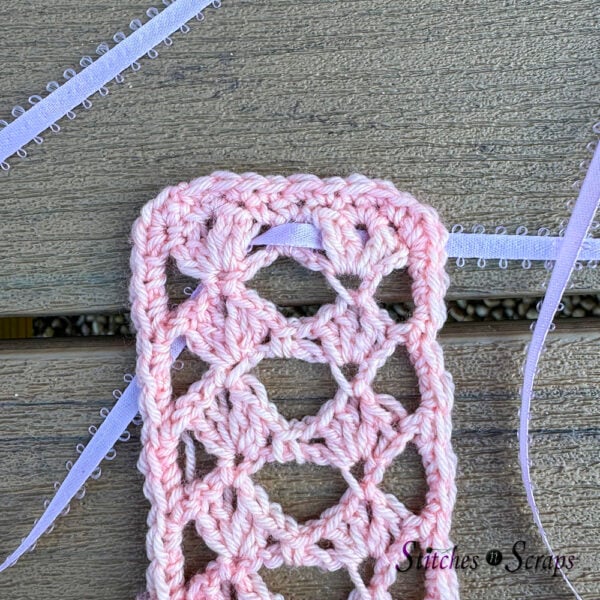
Edging Rnd 1 (RS): Ch 1, rotate to work in sides of rows, sc in top of dc at edge of Row 19, [ch 3, sc in top of dc at edge of next RS row] 9 times, (sc, ch 2, sc) in beginning ring, working across opposite side edge, [ch 3, sc in top of dc at edge of next RS row] 10 times, working across top of Row 19, sk next dc, 3 sc in next ch-1 sp, sk next 2 dc, sc in next ch-1 sp, sc in next sc, sc in next ch-1 sp, sk next 2 dc, 3 sc in next ch-1 sp, sk next dc, join with sl st in first sc of rnd. (31 sc, 1 ch-2 sp, 20 ch-3 sps)
Edging Rnd 2 (RS): Ch 1, 3 sc in first sc, [3 sc in next ch-3 sp, sk next sc] 10 times, (2 sc, ch 1, 2 sc) in next ch-2 sp, [sk next sc, 3 sc in next ch-3 sp] 10 times, 3 sc in next sc, sc in each of last 9 sc, join with sl st in first sc of rnd.
Fasten off.
Chart
Finishing
Weave in ending tail.
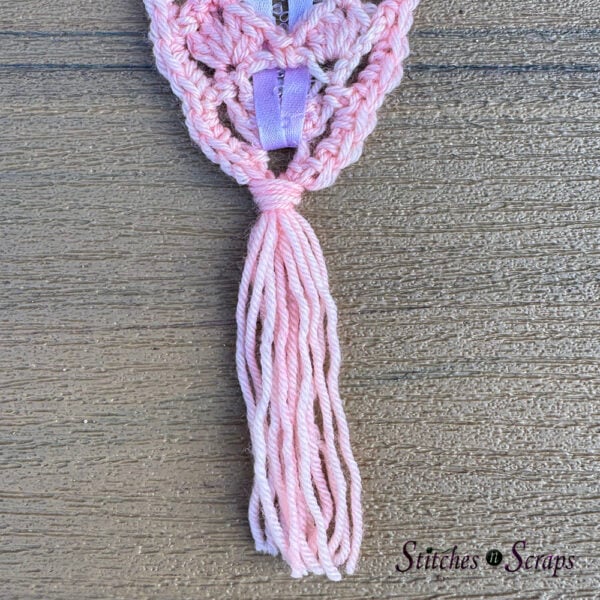
Sew starting tail down to bottom point so that it can be included in tassel.
Wash and block to open up lace.
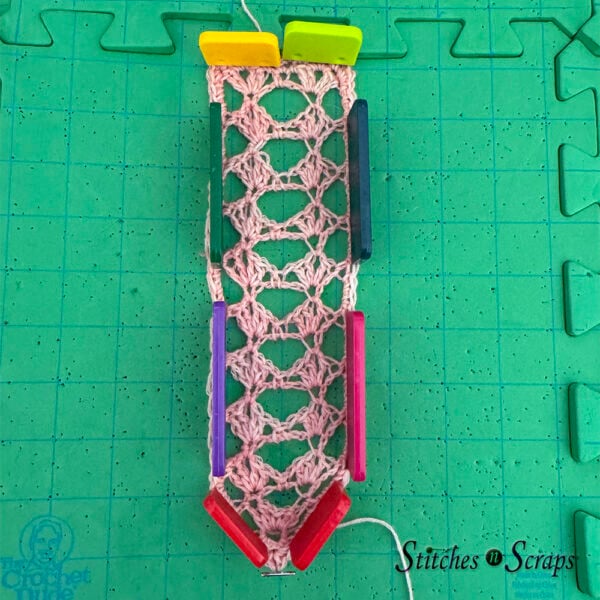
Ribbon
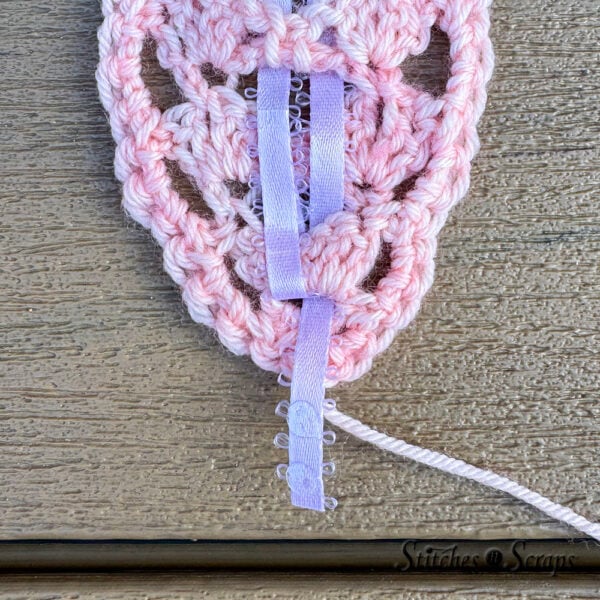
With RS facing, pass ribbon over and around center sc of Row 19, so that both ends come out to WS of work. Adjust to make ends even.
Weave both ends of ribbon in and out of center column of ch-4 sps, bring them out to RS in ch-3 sp of Row 2, then back to WS through starting ring. Ensure ribbon is flat and even, with both strands side by side, and that bookmark is flat with no ruffles or puckers.
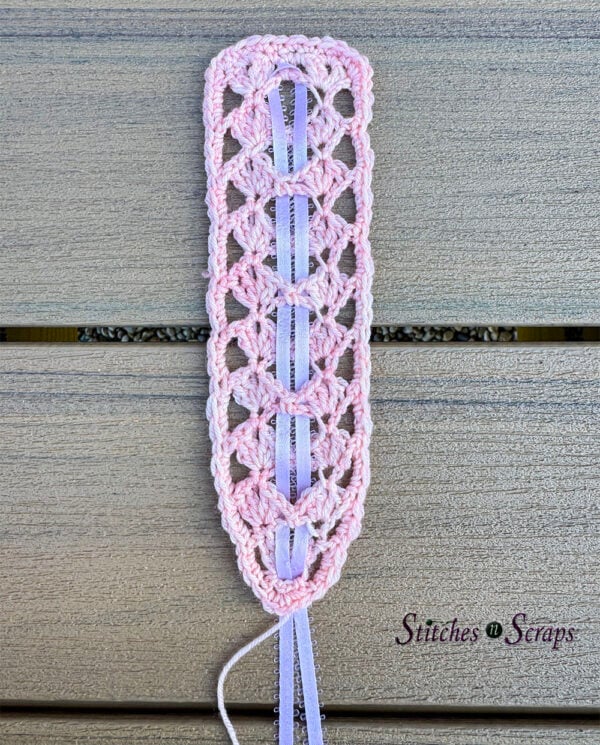
Turn work to WS. Trim ribbon ends to about 1″ / 2.5 cm past starting ring. Fold each ribbon end up and glue along back of ribbon to secure.
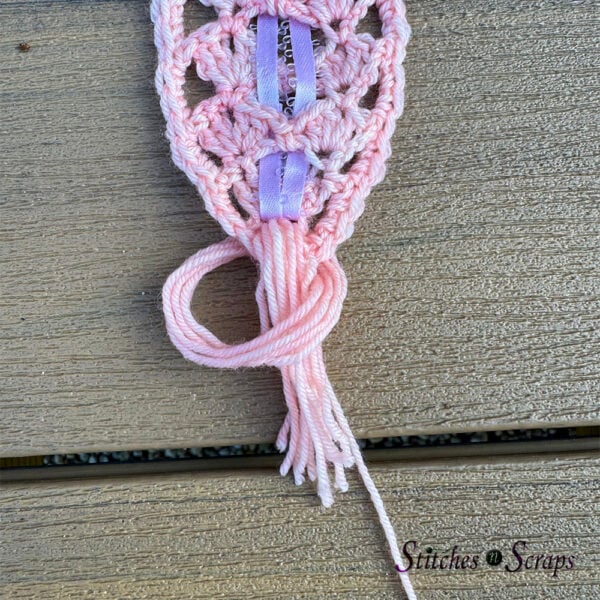
Tassel
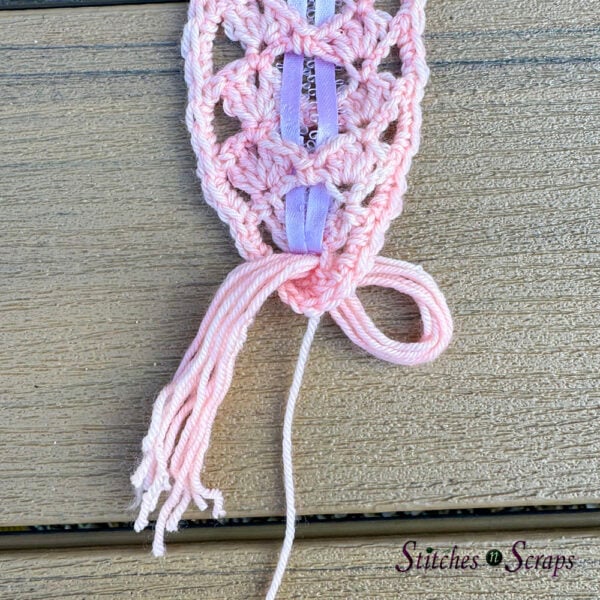
Cut 6 strands of yarn, 8″ / 20 cm long each.
Turn bookmark back to RS. Holding all strands together in one bundle, fold bundle in half to form a loop. Use crochet hook to pull loop from RS to WS about halfway through starting ring. Pull all fringe tails and starting tail of bookmark through loop. Pull tails to tighten, then trim to 3″ / 15 cm or desired length.
Share this Lace Crochet Bookmark on Pinterest!
Here’s an image perfect for pinning:
Rate this Lace Crochet Bookmark!
I hope you enjoy this lace crochet bookmark pattern. A downloadable pdf of this pattern is available on Ravelry for a fee.
Interested in using this pattern for a class or workshop? Check out my Terms of Use for usage details.
Do you want the best of Stitches n Scraps delivered right to your inbox? The Stitches n Scraps email newsletter includes highlights from the blog as well as special features not available elsewhere. Don’t miss a stitch – Subscribe now!

You May Also Like

Knit and Crochet Hat Size Chart
Crochet Triangle Pouch Pattern