Free Crochet Patterns – Home Décor
Find the perfect, free crochet pattern for your next project! Browse them all, or select a category from the dropdown menu. Where will your creativity take you today?

Funky, fun, and festive, everything about this towel is just a little bit off kilter. The uneven stripes have raised ...More

Add a ghostly greeting to your Halloween decor with these Boo Blocks! Display them on a shelf, or hang them ...More

Brighten up your holidays with this cute little stocking ornament. Hang it on your tree, tie it on a present, ...More

Spooky, or cute? Whichever your Halloween decorating style, these little ghosts will fit right in! Make this Ghostly Garland in ...More
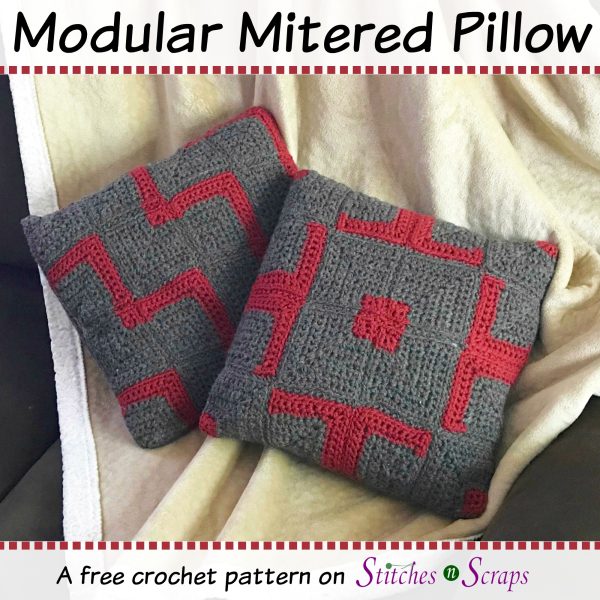
Mitered squares in 2 different color patterns offer a kaleidoscope of possible combinations. Use one of the provided layouts, or ...More
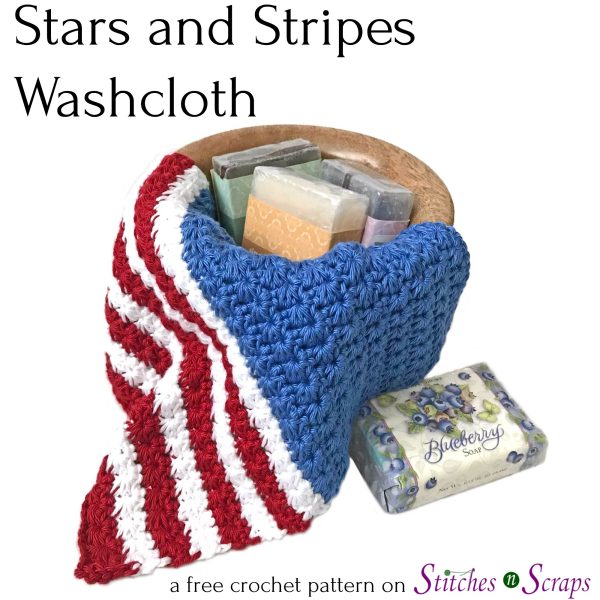
Celebrate this summer with the Stars & Stripes Washcloth! This design works well for team or school colors too. The star stitch ...More

Fall in love with the delicate, lacy texture of the Tryst crochet pillow! Tiny triangles inside of triangles give the ...More
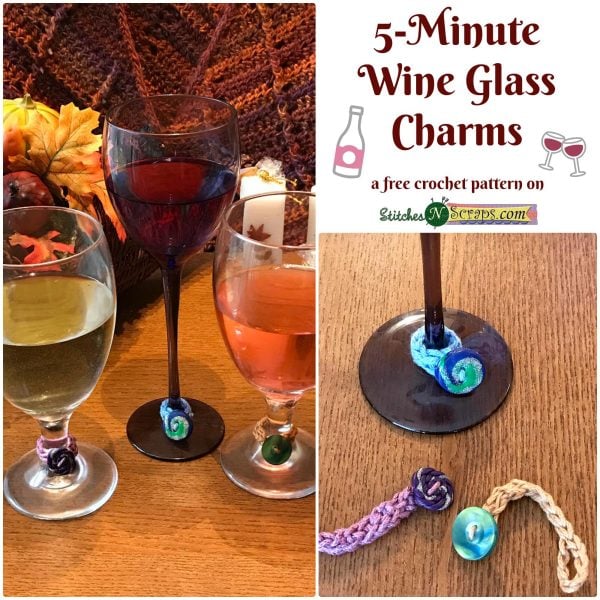
Grab your box of buttons - you know the one. In just 5 minutes, take your mismatched favorites and turn ...More

Linked double crochet stitches give this pattern a dense, but still flexible texture. It works well as either a trivet ...More
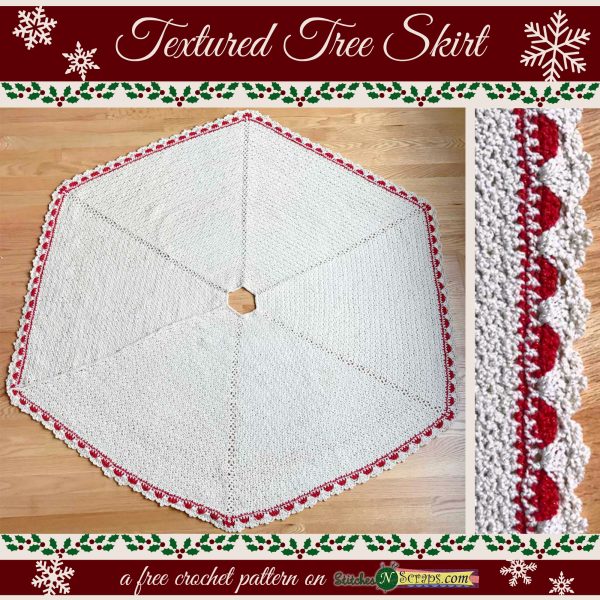
Wrap your holiday tree in the simple elegance of this textured tree skirt. It's made in Red Heart Holiday yarn, ...More