Crochet Ruana Pattern – Chevron Stripes
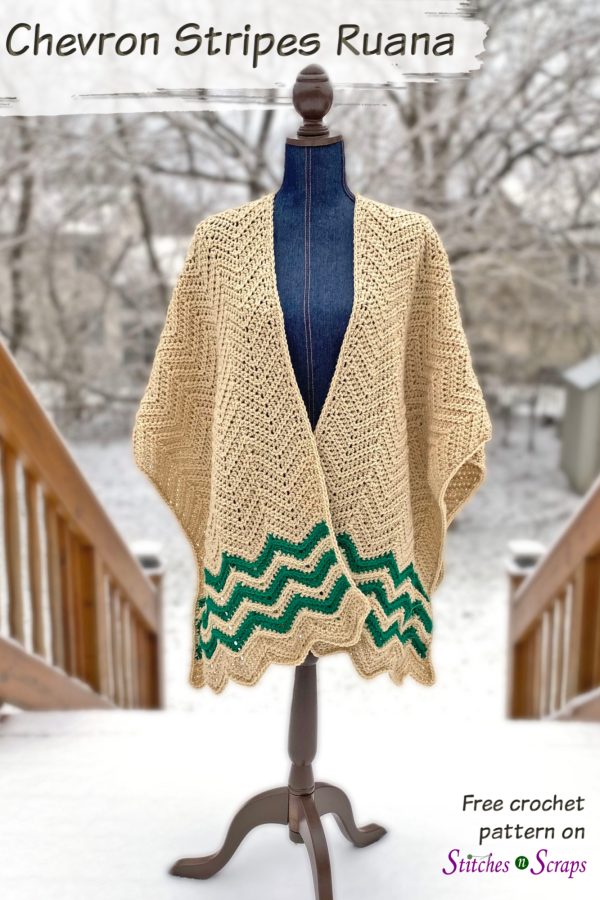
Wrap yourself in warmth with the fast and easy, Chevron Stripes Ruana! Through Spring and Fall, and even milder winter days, this crochet ruana will keep you cozy in style.

This post contains sponsored content and/or affiliate links. If you click an affiliate link and make a purchase, I may get a commission.
Make It for Me Crochet Along
The Chevron Stripes Ruana was designed for the Make It for Me Crochet Along hosted by ELK Studio.
I tend to run warm. So much so that I rarely wear my winter coat until temps dip well below freezing. This year, the cold weather has been slow in coming, and I wanted something a little lighter to wear. With a rectangular shape and easy, repeating pattern, this crochet ruana worked up remarkably quickly, and I’ll be wearing it for the rest of the season!
What exactly is a ruana?
A ruana is a type of poncho. It’s basically a large rectangle with a slit that goes halfway up. It can be work as shown in the pictures, or you can throw one of the front panels over your shoulder.
Working into the 3rd loop
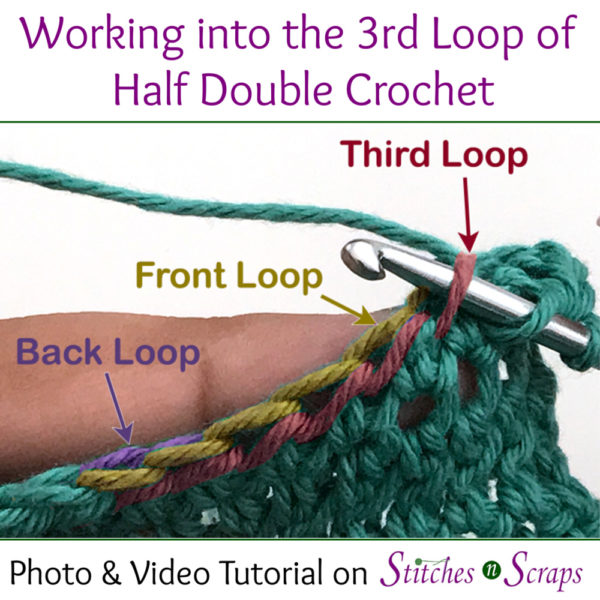
The striping pattern of this ruana has a slightly raised texture, created by working into the third loop of half double crochet stitches. Because we are working in rows, the third loop is in the front and just below the front and back loops that we normally work into.
For a more detailed look at working into the third loop of hdc, see this tutorial
Materials
- Yarn: Paintbox Simply Aran yarn (100% acrylic, worsted weight)
- 1500 yds #207 Vanilla Cream (A)
- 190 yds #229 Grass Green (B)
- Hook: Size I/9 5.5 mm crochet hook or size needed to match gauge.
- Notions:
- Stitch Marker
- Yarn Needle
Project Level
Easy: Increases, decreases, working into 3rd loop.
Size
40 x 61 inches. Length is measured along either straight, side edge – not point to point.

Gauge
11 hdc x 7.5 rows = 4 inches. Each complete chevron is 4 inches wide.
Abbreviations used
(Pattern is written in US terms)
ch = chain
hdc = half double crochet
dec = decrease (see Special Stitch)
st(s) = stitch(es)
sl st = slip stitch
yo = yarn over
RS = Right Side
WS = Wrong Side
Recommended Resources
- Long Starting Chains – Crochet Tips and Tricks
- Working into the 3rd Loop of Half Double Crochet
- Edging – Working Evenly Across/Around
Special Stitch
Decrease (dec): [Yo, insert hook in next st, yo and pull up a loop], sk next st or ch, repeat [ ], yo and pull through all 5 loops on hook.

This is a double decrease, worked over 3 stitches. It’s basically a hdc2tog with a skipped stitch in the middle. This results in a less bulky decrease than an hdc3tog would be.
Instructions
Back
With A, ch 143
Bottom
Row 1 (WS): 2 hdc in third ch from hook, hdc in next 5 chs, dec, hdc in next 5 chs, [3 hdc in next ch, hdc in next 5 chs, dec, hdc in next 5 chs] 9 times, 2 hdc in last ch. (141 sts)
Row 2: Ch 2, turn, 2 hdc in first st, hdc in next 5 sts, dec, hdc in next 5 sts, [3 hdc in next st, hdc in next 5 sts, dec, hdc in next 5 sts] 9 times, 2 hdc in last st. (141 sts)
Rows 3-4: Repeat row 2 twice, changing to B at end of row 4.
We will be adding an edging, so it’s ok to carry unused colors up the side edge for the striped sections. However, it will look better if you cut the yarn after every stripe instead.
Stripes
Row 5: With B, and working in 3rd loops only, repeat row 2.

Row 6: Repeat row 2, changing to A at end of row.
Row 7: With A, and working in 3rd loops only, repeat row 2.
Row 8: Repeat row 2, changing to B at end of row.
Rows 9-15: Repeat rows 5-8, then repeat rows 5-7 once more.
Main section
Rows 16 – 54: Repeat row 2.
Work should now measure about 40″ x 29″

Left Front
Slip stitches are not included in the stitch counts at the end of the row.
Shoulder
Row 1 (WS): Ch 2, turn, 2 hdc in first st, [hdc in next 5 sts, dec, hdc in next 5 sts, 3 hdc in next st] 4 times, hdc in next 5 sts, dec, hdc in next 4 sts, sl st in next st, leaving remaining sts unworked. Place marker in next st (center of back). (68 sts)
Row 2: Ch 2, turn, sk sl st, sk first hdc, hdc in next 2 sts, dec, hdc in next 5 sts, [3 hdc in next st, hdc in next 5 sts, dec, hdc in next 5 sts] 4 times, 2 hdc in last st. (66 sts)
Row 3: Ch 2, turn, 2 hdc in first st, [hdc in next 5 sts, dec, hdc in next 5 sts, 3 hdc in next st] 4 times, hdc in next 5 sts, sk next st, hdc in next 2 sts. (65 sts)
Row 4: Ch 2, turn, hdc in first 2 sts, sk next st, hdc in next 5 sts, [3 hdc in next st, hdc in next 5 sts, dec, hdc in next 5 sts] 4 times, 2 hdc in last st. (65 sts)
Rows 5-6: Repeat rows 3-4 once more.

Main section
Rows 7-46: Repeat rows 3-4 20 times. Change to B at end of row 44.
Stripes
Row 47: With B, repeat row 3.
Row 48: Working in third loops only, repeat row 4. Change to A at end of row.
Row 49: With A, repeat row 3
Row 50: Working in third loops only, repeat row 4. Change to B at end of row.
Rows 51-57: Repeat rows 47-50, then repeat rows 47-49 once more.
Row 58: Working in third loops only, repeat row 4.
Bottom
Rows 59-60: Repeat rows 3-4.
Fasten off.
Right Front
With WS facing, and continuing with the unworked sts from row 54 of back, sk marked st, join A with sl st in next st.
Shoulder
Row 1 (WS): Ch 2, sk the st you joined in, hdc in next 4 sts, dec, hdc in next 5 sts, [3 hdc in next st, hdc in next 5 sts, dec, hdc in next 5 sts] 4 times, 2 hdc in last st. (68 sts)
Row 2: Ch 2, turn, 2 hdc in first st, [hdc in next 5 sts, dec, hdc in next 5 sts, 3 hdc in next st] 4 times, hdc in next 5 sts, dec, hdc in next 2 sts, sl st in next st, leave last st unworked. (66 sts)
Row 3: Ch 2, turn, hdc in first 2 hdc, sk next st, hdc in next 5 sts, [3 hdc in next st, hdc in next 5 sts, dec, hdc in next 5 sts] 4 times, 2 hdc in last st. (65 sts)
Row 4: Ch 2, turn, 2 hdc in first st, [hdc in next 5 sts, dec, hdc in next 5 sts, 3 hdc in next st] 4 times, hdc in next 5 sts, sk next st, hdc in next 2 sts. (65 sts)
Rows 5-6: Repeat rows 3-4 once more.
Main section
Rows 7-46: Repeat rows 3-4 20 times. Change to B at end of row 44.
Stripes
Row 47: With B, repeat row 3.
Row 48: Working in third loops only, repeat row 4. Change to A at end of row.
Row 49: With A, repeat row 3
Row 50: Working in third loops only, repeat row 4. Change to B at end of row.
Rows 51-57: Repeat rows 47-50, then repeat rows 47-49 once more.
Row 58: Working in third loops only, repeat row 4.
Bottom
Rows 59-60: Repeat rows 3-4. Do not fasten off.
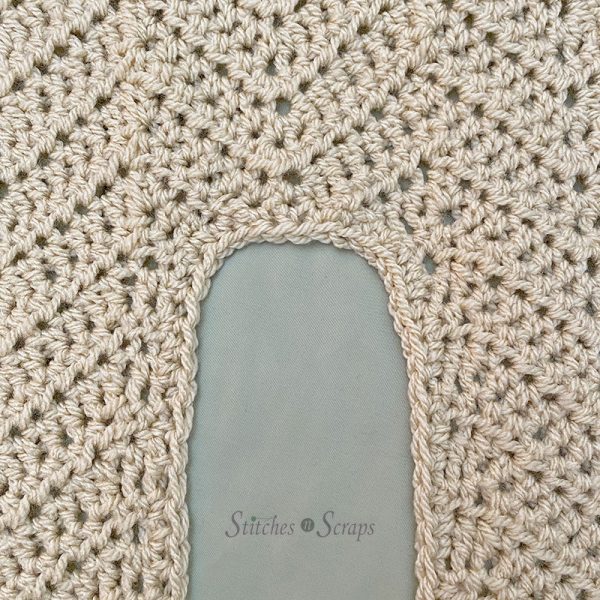
Edging
The edging is worked as one continuous, RS round, and has a total of 794 sts. When working into sides of rows, the stitch counts are equal to working 3 stitches into every 2 rows.
Right front bottom edge: Ch 2, turn, hdc in first 2 hdc, sk next st, hdc in next 5 sts, [3 hdc in next st, hdc in next 5 sts, dec, hdc in next 5 sts] 4 times, 2 hdc in last st. (65 sts)
Front opening: Working in sides of rows: 90 hdc evenly spaced to marked st, hdc in marked st, 90 hdc evenly spaced to bottom of left front. (181 sts)
Left front bottom edge: 2 hdc in first st, [hdc in next 5 sts, dec, hdc in next 5 sts, 3 hdc in next st] 4 times, hdc in next 5 sts, sk next st, hdc in next 2 sts. (65 sts)
Left edge: Work 171 hdc evenly spaced to bottom of back. (171 sts)
Back bottom edge: Ch 2, turn, 2 hdc in first st, hdc in next 5 sts, dec, hdc in next 5 sts, [3 hdc in next st, hdc in next 5 sts, dec, hdc in next 5 sts] 9 times, 2 hdc in last st. (141 sts)
Right edge: Work 171 hdc evenly spaced to start of edging rnd, join with sl st to first st, fasten off. (171 sts)

Rate this Crochet Ruana Pattern!
I hope you enjoyed this Crochet Ruana pattern. A downloadable pdf of this pattern is available on Ravelry for a small fee. The fee for the pdf format is to offset the advertising revenue lost when you print or download the pattern rather than viewing it online.
Do you want the best of Stitches n Scraps delivered right to your inbox? The Stitches n Scraps email newsletter includes highlights from the blog as well as special features not available elsewhere. Don’t miss a stitch – Subscribe now!


6 Comments
Mireille Hatchell
I love this pattern! Will let you know when I complete it and send a photo. Thank you for sharing the tutorial. I will be purchasing the PDF format so I can print instructions.
Pia Thadani
Yay! I can’t wait to see yours when it’s done 🙂
Lisa Bourque
Hi! Yes I love this pattern too! I can’t figure out if I want to make it wider how many stitches I need to add to repeat each chevron . Thank you Lisa
Pia Thadani
You would have to increase one full chevron on each side of the split, so 28. It’s a big jump in width.
Lisa Bourque
So you are saying add 28 to the original pattern 143 equals 171 for my starting foundation chain correct? Thanks Lisa
Pia Thadani
Yes, exactly. And then when it comes time to split for the neck, make sure you’re splitting directly in the middle. You will have one extra chevron repeat on each side.