Crochet Dog Bed with Fairfield Project Foam
This post contains sponsored content and/or affiliate links. If you click an affiliate link and make a purchase, I may get a commission.
Give your dog a cozy, supportive place to sleep! This crochet dog bed has 5 inches of foam inside and a soft, fur top. It’s the ultimate in comfort for your fur baby. The cover is removable, to make cleaning easier!

This content is protected by copyright. See this Terms of Use / Copyright page for more information.
Fairfield Project Foam
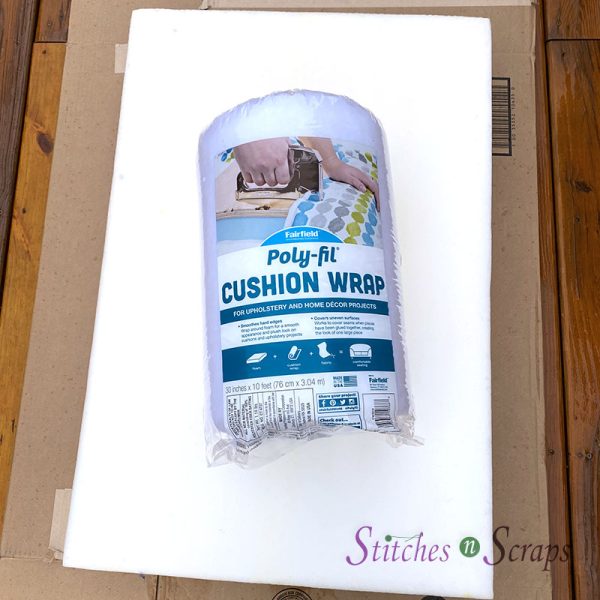
I asked the folks at Fairfield for some of their 5 inch project foam for my pet stairs design. They’re so generous, that they sent me 2 pieces of foam, plus a roll of Poly-Fil Cushion Wrap and a whole bunch of other goodies too!
The project foam is soft enough that I can squish it by pressing hard on it. But it’s also firm enough that it doesn’t compress when my dog, Millie walks on it. I know she thinks it’s comfy because she sometimes just lays on the stairs instead of climbing up into the bed!

For the bed I decided to add a layer of the cushion wrap. This helps to fill out the cover, and adds a luxurious, pillowy feel to the top.
Red Heart Yarns
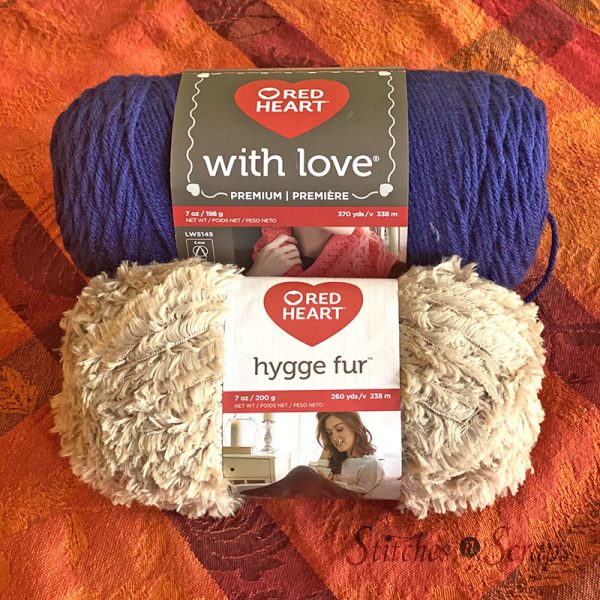
Red Heart provided the yarn for the removable, crochet cover on this pet bed. The sides and bottom are made with With Love, while the top is made with Hygge Fur. The snuggly fur is warm and can be calming for dogs. The label says it’s machine washable, but I will likely hand wash this cover just to make sure it lasts longer.
Gluing Batting to Foam
Foam is tricky to glue because it’s a porous surface. Most glues tend to sink in rather than stick to the top. Spray glue is generally the best bet. There are several on the market specifically made for furniture foam and upholstery projects. Some of the stronger multi-purpose spray glues will do the job as well.
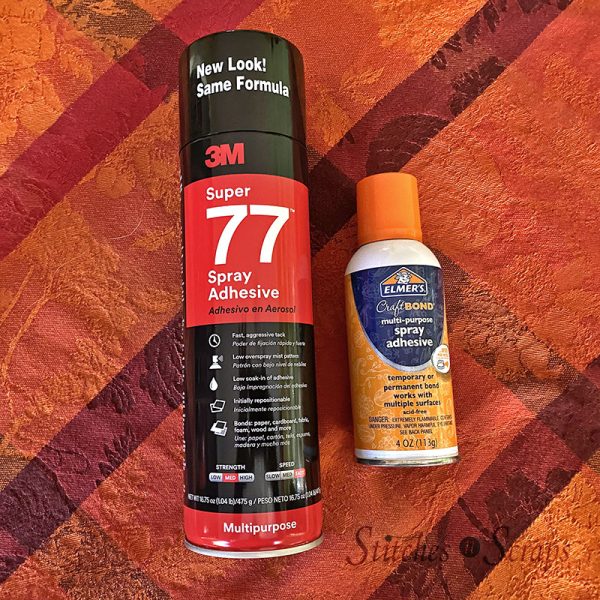
On the pet stairs, I used some Elmer’s Craft Bond Spray Adhesive that I got in a goodie bag at a conference. That bottle was nearly empty, so I bought some 3M Super 77 to finish the job.
I found the two adhesives pretty comparable, though I didn’t need quite as much of the 3M Super 77. I think they both work well, but would likely choose the 3M glue if I had to pick.
Materials
- Yarn:
- Red Heart With Love Yarn 800 yds #1801 Navy (3 skeins)
- Red Heart Hygge Fur Yarn 1000 yds Soft Taupe (4 skeins)
- Hook: Size K / 6.5 mm crochet hook or size needed to match gauge.
- Notions:
- Fairfield 5″ Project Foam (24 x 36 x 5 inches)
- Fairfield Poly-Fil Cushion Wrap (30 inches x 10 ft)
- Spray Glue for foam
- Yarn Needle
- 5 stitch markers
Project Level
Intermediate: Some post stitches, working with fur yarn, join as you go.
Size
24 inches wide x 36 inches long x 5 inches tall.
Gauge
10 dc x 6.5 rows = 4 inches.
Abbreviations used
(Pattern is written in US terms)
ch = chain
sc = single crochet
dc = double crochet
bpdc = back post double crochet
st(s) = stitch(es)
sl st = slip stitch
sk = skip
rnd = round
Recommended Resources
Instructions
Wrap the Foam
Do this outdoors or in a well ventilated location. Follow any safety guidelines per your glue bottle.
Lay the Cushion Wrap down, and place the Project foam on top of it, so that there’s a 2-3 inch overlap on the front and sides. Wrap the Cushion Wrap up and over the foam as shown. It should now go around the top, bottom, and back side.

Trim the front so there is a 2-3 inch overlap.

Fold back the cushion wrap and spray the top of the foam with adhesive, then slowly replace the wrap, stretching it into place. Turn the cushion over and do the same on the back side and the bottom.

Now fold the side edges down and glue them into place as well. Trim away any overlap, particularly in the corners. It’s ok if there are some gaps here, but do not let the wrap overlap.

Set fully wrapped foam aside to dry while you make the cover. Allow it to dry for at least the full time shown on your glue label before trying to insert it into the cover.

Bottom
Long piece:
With A, Ch 62
Ch 3 at the beginning of a row counts as a dc throughout.
Row 1 (WS): Dc in 4th ch from hook and in each ch across. (60 dc)
Row 2: Ch 3, turn, dc in next st and in each st across. (60 dc)
Place markers at the beginning and end of row 2.
Rows 3-55: Repeat row 2.
Fasten off.
Short Piece:
With A, Ch 62
Rows 1-9: Work as for rows 1-9 of long piece, including placing the markers. Do not fasten off. Secure working loop with a stitch marker or scrap of yarn and remove hook.
Join Bottom:
With right sides up, place short piece on top of long piece so that the bottom edges of each piece line up with the markers on the other piece. They should overlap by 7 rows.
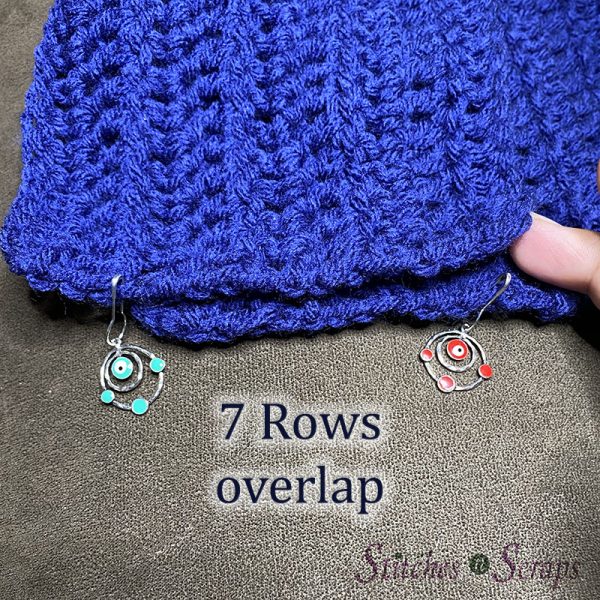
Sew the two pieces together where they overlap, along the side edges only. This creates an open flap across the back, which will be used later to insert the foam.

Sides:
Rnd 1 (RS): Place working loop back onto hook. Continuing from back,
- Ch 1, turn, bpdc around each st across (60 bpdc)
- Working in sides of rows, 90 dc evenly spaced across to corner. (90 dc)
- Working around sts of row 1, bpdc around each st across. (60 bpdc)
- Working in sides of rows, 90 dc evenly spaced across to corner, join with sl st to first st of round. (90 dc)
Rnds 2-8: Ch 3, turn, dc in next st and each st around, join with sl st to first st, changing to 2 strands of B held together. Fasten off A. Do not turn. (300 dc)

Top
Entire top is worked with 2 strands of B held together, for added fullness. Row 1 should be worked across a short edge (60 sts).
Instead of chaining to start each new row, you will work slip stitches into the stitches from the side rounds. These slip stitches act as turning chains, while also joining the top to the sides. These slip stitches are not included in the stitch counts at the ends of the rows.
With 2 strands of B held together,

Row 1 (RS): Sl st in next st, turn, sk sl st, (2 sc in next st, ch 1, sk next st) 30 times, sl st in next 2 sts. (60 sc, 20 ch-1 sps)

Rows 2-89: Turn, (2 sc in next ch-1 sp, ch 1, sk next 2 sc) across, sl st in next 2 unworked sts on side. (60 sc, 20 ch-1 sps)

Row 90: Turn, (2 sc in next ch-1 sp, ch 1, sk next 2 sc) across, sl st in next unworked st on side, changing to A, Fasten off B. (60 sc, 20 ch-1 sps)
There should now be 60 unworked sts left from rnd 8 of side.
Row 91: With A, ch 1, turn, 2 sc in first ch-1 sp, sk next 2 sc, (2 sc in next ch-1 sp, sk next 2 sc) across to last ch-1 sp, sc in last ch-1 sp, sk next st, sc in last st, fasten off leaving a 36 inch tail for sewing. (60 sc)
Joining Top
With tail, sew row 91 of top to remaining unworked sts of side.
Finishing:
- Weave in all ends.
- Insert wrapped foam into cover through back opening. I’ve found this is easiest to do like you would put on a stocking – crumple the cover up so you’re only dealing with the last few inches, insert the bottom of the foam, and then shimmy the cover up over the top. Finally, fold the top flap down over the edge.

The flap should be enough to keep the cover closed on its own, and you don’t want buttons or a zipper rubbing against the floor. If you want to hold it firmly shut, you can sew in an optional tie closure. This rough seam is tied closed with a bow so it can easily be removed when needed.
- Optional tie closure: Cut a 30 inch piece of A. Sew it through both layers across the middle of the opening, in a very large running stitch. Go over at least 3 to 4 stitches at a time so it’s easy to pull out later. Pull this yarn until the ends are roughly even. Then, sew each end back in towards the middle in a similar running stitch. When they meet at the middle, tie a bow.
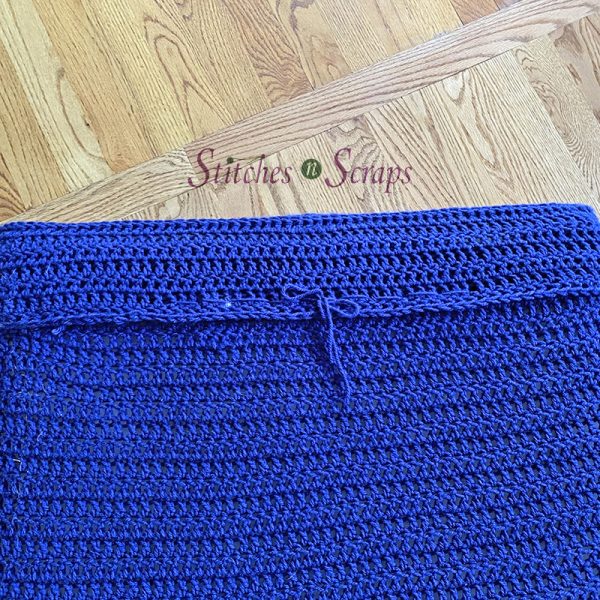
To remove cover for cleaning, undo tie and slide foam out from opening.

Rate this Crochet Dog Bed Pattern!
I hope you enjoyed this crochet dog bed pattern. A downloadable pdf of this pattern is available on Ravelry for a small fee. The fee for the pdf format is to offset the advertising revenue lost when you print or download the pattern rather than viewing it online.
Do you want the best of Stitches n Scraps delivered right to your inbox? The Stitches n Scraps email newsletter includes highlights from the blog as well as special features not available elsewhere. Don’t miss a stitch – Subscribe now!




5 Comments
Alexandra
Great tutorial, Pia! I see Millie approves too!
Pia Thadani
thanks!
Jan
This looks like fun. I need to make mine smaller, can I just divide the count in half? The pictures are helpful, but do you have a tutorial? Thank you for the pattern.
Pia Thadani
You need an even number of stitches, so yes, 30 stitches instead of 60 would work. You’re starting chain would have to be 32. You will have to figure out placement of the flap, how much overlap you want, etc.
Pia Thadani
You should also have an even number of stitches on the sides, so instead of 90, do 44 or 46, but not 45.