Free Pattern – Contours Square
There’s very little that’s square about this unique square! It’s made in 4 separate, half-circle pieces that are then joined with an edging and sewn together in the middle. It looks complicated, but the actual crochet is very easy. This square is shown here in 3 colors, but can be made all in 1 color, or in as many as 5 or even 6 (see Notes section for details).
 This pattern was designed for the Moogly 2016 afghan CAL. If this is the first you’ve heard about it, go check it out! The CAL is nearing the end, but there’s still time to catch up. Also be sure to take a look at the block 22 post to see how Moogly’s version of this square turned out. I love her color combination! All the squares so far this year have been fun and interesting, and I can’t wait to see the last few.
Télécharger la traduction française par Véronique HoRaive ici
This pattern is protected by copyright. Please do not distribute or share this pattern in any way other than by sharing a link to this page or to the pattern page on Ravelry. Click here for copyright information.
This pattern contains affiliate links (click for more info). If you click one of these links and then make a purchase, I may be compensated. You get the same great prices, and you will be helping to support this site!
Contours Square

![]()
Add this to your Ravelry Queue
Materials:
- Worsted weight yarn: 150-200 yds total. Pictured square was made with:
- Lion Brand Vanna’s Choice in “Mustard” (yellow)
- Lion Brand Heartland in “Olympic” (blue)
- Lion Brand Heartland in “Great Smoky Mountains” (grey)
- Size I / 9 (5.5 mm) hook or size needed to match gauge.
- Yarn or tapestry needle
Difficulty:
Intermediate – The crochet part is easy, mostly double crochet. However the assembly requires some embroidery/sewing and can be a bit trickier, so I’m calling it Intermediate.
Sizes:
12 inches square
Gauge:
12.5 dc x 6.5 rows = 4 inches square.
Abbreviations used:
- ch = chain
- sc = single crochet
- dc = double crochet
- csdc = chainless starting double crochet (optional)
- sl st = slip stitch
- st(s) = stitch(es)
- sp(s) = space(s)
- rnd = round
- RS = right side
- WS = wrong side
Notes:
- Chainless starting double crochet stitches are recommended because it results in a cleaner looking edge. However, if you prefer, you can replace “turn, csdc” with “ch 3 (counts as first dc), turn” anywhere it appears in the pattern.
- The pattern indicates the colors I used in my 3-color version; however there are lots of options for color. There are 5 distinct sections of this square – the 4 semi-circles, and a 2-row border. The whole square can be worked all in one color, or each section can be worked in a different color. You can even do each row of the border in a separate color to incorporate as many as 6 colors!
Recommended Resources:
- Foundation Single Crochet by Moogly
- Joining Foundation Stitches to Work in the Round by Moogly
- Chainless Starting Double Crochet by Moogly
Instructions:
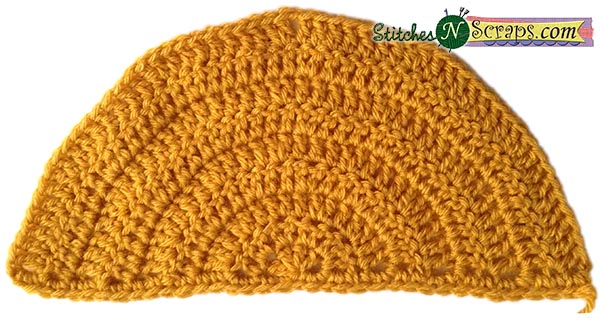
Semi-circle 1:
(yellow)
Row 1 (RS): Make magic circle, ch 3 (counts as dc), 5 dc in circle, pull circle closed. Do not join. (6 dc)
OR
Alternative Row 1 (RS): Ch 4 (counts as dc and ch 1), 5 dc in 4th ch from hook. Do not join. (6 dc)
Row 2: Turn, csdc, dc in same st, 2 dc in each st across. (12 dc)
Row 3: Turn, csdc, dc in same st, (dc in next st, 2 dc in next st) 5 times, dc in last st. (18 dc)
Row 4: Turn, csdc, dc in same st, (dc in next 2 sts, 2 dc in next st) 5 times, dc in last 2 sts (24 dc)
Row 5: Turn, csdc, dc in same st, (dc in next 3 sts, 2 dc in next st) 5 times, dc in last 3 sts (30 dc)
Row 6: Turn, csdc, dc in same st, (dc in next 4 sts, 2 dc in next st) 5 times, dc in last 4 sts (36 dc)
Row 7: Turn, csdc, dc in same st, (dc in next 5 sts, 2 dc in next st) 5 times, dc in last 5 sts (42 dc)
Row 8: Turn, csdc, dc in same st, (dc in next 6 sts, 2 dc in next st) 5 times, dc in last 6 sts (48 dc)
Row 9: Turn, csdc, dc in same st, dc in next 7 sts, (2 dc in next st, dc in next 7 sts) twice, ch 1, (2 dc in next st, dc in next 7 sts) 3 times.(54 dc)
Edging: Do not turn, ch 1, working across straight edge at bottom of semi-circle, 2 sc in side of each row across, fasten off. (36 sc)
Note: Your semi-circle should measure 11 inches wide across the bottom, and 5.5 inches tall.
Semi-circle 2:
(yellow)
Rows 1-8: Repeat as for rows 1-8 of semi-circle 1.
Row 9: Turn, csdc, dc in same st, dc in next 7 sts, (2 dc in next st, dc in next 7 sts) twice. With right side facing, sl st in ch 1 sp from semi-circle 1. Now continuing on semi-circle 2, (2 dc in next st, dc in next 7 sts) 3 times.(54 dc, 1 sl st)
Note: The pictures here show this in 2 different colors just so you could see the join more clearly. In the finished piece, I actually used yellow for both semi-circles.

Edging: Repeat as for edging on semi-circle 1.

Semi-circles 3 & 4:
(blue)
Repeat instructions for Semi-circles 1 & 2. On the 4th semi-circle, do not fasten off after the edging. Instead, change to the color you want to use for the border.
Border:
(grey)
Rnd 1 (WS):
1st edge: Ch 1, turn, sl st in first st, sc in each st across straight side to last edging row st.
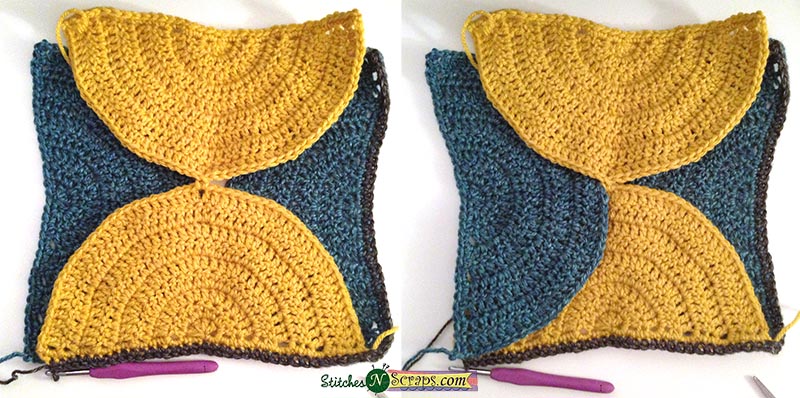
1st Corner: You’re going to join semi-cirlce 4 to semicircle 1. To do this and make sure everything is all lined up, first lay semi-circles 3 & 4, RS up (so your current working rnd will be upside down) on a table. Now place semi-circles 1 & 2 on top, with RS up as shown here.

Now, holding both pieces together, fold up the corner where your working yarn is, so you are again working on the wrong side of the fabric. Working through last st from edging row on semi-circle 4, and first stitch on the edging row from semi-circle 1, (sc, ch 1, sc) to join the two pieces together.

2nd edge: Continuing on semi-circle 1, sc in each st across to last st.
2nd Corner: Lay the piece flat on the table again, RS up. Pull up the edge of the next semi-circle so that it lies on top of the current one as shown. I like to think of this like the way you fold the flaps of a cardboard box to keep it closed.
Fold up working corner as before, and again working through both pieces, (sc, ch 1, sc) in corner st.
3rd edge: Continuing on next semi-circle, sc in each st across to last st.
3rd corner: Repeat as for 2nd corner
4th edge: Repeat as for 3rd edge
4th corner: Repeat as for 2nd corner, join with sl st to first st. (152 sc [38 on each side], 4 corner ch sps)
Rnd 2: Turn, sl st in ch sp, ch 1, {(sc, ch 1, sc) in sp, sc in each st across to next sp} 4 times, join with sl st to first st, fasten off.
Seaming:
Stretch your square out, RS up, so it’s nice and square and flat. make sure you like how the edges of the semicircles are laying. Pin the edges in place as shown.

You’re going to sew along the visible edge of each semicircle to hold it in place, using a backstitch just under the top edge of the stitches. To make this seam invisible on the opposite side, use whatever color is below the section you’re doing. So for instance, when I sew down the first yellow edge, I am using blue.
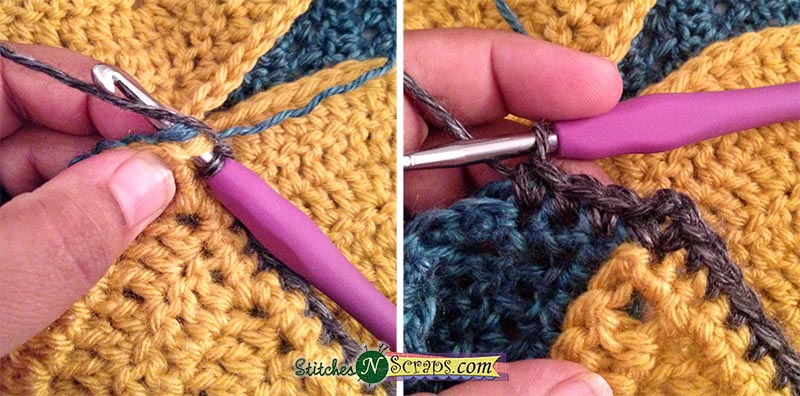
Cut a piece of yarn about 1 yd long (or as long as you can manage without knotting), and thread it on your yarn needle. Sew the end in on the wrong side of the work to secure it, just like you would when weaving in a tail. Now pull the needle up through the corner of the piece, just inside the edging, as shown.

Working just underneath the top “V” edge of your stitches, insert needle in the first st, and bring it back out again where you started. Be sure to work through both pieces to sew them together.

Now insert the needle in the 2nd st and pull it out again in the first stitch (the same spot you went into last time).

As you work, be sure to keep the working yarn on the same side of the needle each time. It doesn’t matter which side you choose, as long as you are consistent. I chose to always keep my working yarn towards the edge, and my needle towards the middle.

For the next stitch, you insert your needle into the 3rd stitch and pull it back out of the 2nd. You’re always going forward another stitch and then back out through the stitch you went into last time. Continue stitching in this manner to create a nice rope like effect around the edge:

Now because I used only 2 colors, I have the same color combination on the diagonal end, so rather than break the yarn, I just went across the center and continued on the other side. I went under the center stitch, back over the top, and under again, to create a decorative little line in the center, then I continued the seam on the other side.

If you were using different colors, you might need to break the yarn for each section instead, leaving an end to weave in. In this case, just leave the center unworked. Remember to always use whatever color is on the bottom of the work, to keep the seam invisible on that side.
Continue to work each of the 4 sections in the same manner. When finished, your piece should look like the main pattern image, but will be floppy on the back.
Flip it over, and sew down the edges on the wrong side in exactly the same manner. You may find you don’t need the pins this time.
Weave in all ends. You can also add a decorative flower or applique in the center of the square if desired.
I hope you enjoy the pattern. Big thanks to Karen Walker (check out her square) and Tamara Kelly for testing the pattern, and to Véronique HoRaive for translating it into French:
A downloadable pdf of this pattern is also available on Ravelry, for a fee. The fee for the pdf format is to offset the advertising revenue lost when you print or download the pattern rather than viewing it online.
If you would like to receive notifications of new posts and patterns as they become available, please follow this blog. You can follow by e-mail (look at the sidebar on the right for the follow by email option), or via RSS feed, or via your WordPress.com reader: Follow Stitches ‘N’ Scraps on WordPress.com


You May Also Like

Tutorial – Front & back post single crochet (fpsc, bpsc)

Wild Jasmine Crochet Square Pattern
