Learning to Weave – 3×1 Twill Weave Scarf
For about the last 2 years or so, on and off, I’ve been learning to weave. My latest project is this 3×1 twill weave scarf. This post is not so much a pattern, but rather my detailed project notes. If you’re new to weaving like I am, follow along and see how it all came together!

Learning to Weave
It all started with an easel loom that Schact Spindle Company gave me to review. Ben, the person who gave it to me, warned me that I would get hooked on weaving, and he was right!
My first table loom
One of the members of the spinning guild I am in passed away last year, and her husband was selling some of her equipment. I was able to pick up this Kessenich table loom for a great price. It’s a very old loom, but it’s in wonderful condition and even came with a stand!
Thas has been a great starter loom so far, though it’s fairly small. It has 4 shafts, and a weaving width of about 14 inches. One day I’d love to have a larger, floor loom so I can weave wider pieces, but this one is perfect for now.
My weft yarn
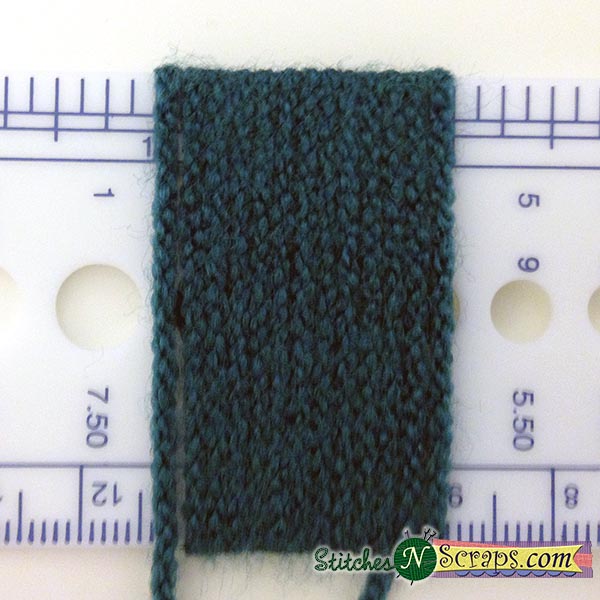
For the weft, I used a yarn that I got in a goodie bag at a conference. It’s 4 strands of very fine threads, combined to make a sport weight yarn.

The threads aren’t spun together at all, but are simply wrapped together in the skein. The gradual color shifts are created by switching out one of the 4 threads at a time. It’s very much the same concept as the color shifts in these Scrappy Nesting Bowls
My warp yarn
For my warp, I used a cone of weaving cotton that I had found in a clearance bin. It wasn’t labelled with a size, but I measured it at 40 wraps per inch. Here’s a tutorial for how to measure yarn in wraps per inch.
This thread was very thin compared to the yarn I wanted to use for my weft. So I decided to double up on it, holding 2 threads together as one for each warp end.Since the threads twist on each other a bit as they run together, the wpi does not quite get cut in half when you do this. It’s more like 1.5 times. With 2 threads held together, my wpi would be closer to 30.
Sett and Reed
A reed is a frame with evenly spaced slots that helps to space out the warp threads. Each slot is called a “dent”, and the reeds are measured in the number of dents per inch.
The sett is a measurement of how far apart the warp threads are, and is written as epi, or ends per inch. A sett of half the wpi of the yarn creates a balanced weave, because the warp threads take up as much space (horizontally) as the weft threads.

In this case, that would have been 15ish. But that would have made for a fairly stiff and dense fabric. I wanted a lighter feel with more drape, so I opted for a sett of 12.
Or at least that’s the fancy reasoning. The other reason is that my 12 dent reed was already in the beater and I figured it would work fine.
3 x 1 twill draft
Threading pattern
With 4 shafts, I can divide the yarn into 4 separate groups. For this twill I used a straight draw, meaning that I threaded the heddles in a 1-2-3-4 pattern. The first warp thread is threaded onto heddle 1, the 2nd onto 2, and so on, and then the pattern is repeated.
Lifting pattern
Lifting each shaft one at a time raises every 4th warp end. So the weft yarn goes under 1 warp end, then floats over 3, then under 1, and so on. Lift the shafts in order, in a 1-2-3-4 pattern, creates a diagonal design with the long floats.
On the front side, we see 3 weft ends for every warp end, or a 3×1 twill. Interestingly, the reverse of the fabric shows 3 warp ends for every 1 weft end, which is a 1×3 twill.

Draft chart
Putting it all together, we get this charted draft. The top shows the threading pattern, the right shows the lifting pattern, and the middle shows the “draw down” – an illustration of which threads are lifted with each pick.

Floating selvedges
Because only one warp thread is lifted at a time, the very end thread on each end would only be lifted every 4 picks. That would leave a floppy warp thread at the edge for the other 3 picks. To solve this issue, I used floating selvedges.
Watch this floating selvedge tutorial video on YouTube
The last warp end on each side is not threaded through a heddle at all. On every pick, I went under the end when entering the shed, and over the end when exiting the shed. For stiffer edges, I also doubled up the yarn again (to 4 strands) in the first 3 dents at each edge, including both of the floating selvedges.
Weaving the scarf
After plugging my numbers into this calculator, I came up with a warp length of just over 3 yards. I used about 150 dents for a width of about 12.5 inches in the loom. With the thread doubled plus extra for the edges, that was a little under 1000 yds of warp thread.
Waste yarn header
I wove a few rows with waste yarn in the 3×1 twill pattern to test if my warp was correct. There were 2 mistakes but I left them because they didn’t seem to be that noticeable.
Tabby weave starting edge and hemstitching
First, I left a very long tail – about 1 yd long, or 3 times the width of my work. Then, by lifting shafts 1 and 3 together, and then shafts 2 and 4 together, I wove 8 rows (picks) of plain/tabby weave.
Before continuing, I used the tail to sew a hemstitch into my starting edge. This secures the edge and creates the base for the fringe. I used bundles of 2 warp ends (4 threads), and sewed 2 rows up to secure them.

3×1 twill and color changes
Next, I wove the 3×1 twill pattern. To keep the color changes intact, I filled my shuttle with one color section at a time. When winding the shuttle, as soon as I came across a color change, I cut the yarn and stopped winding. It’s easy to feel the color changes in this yarn because they are secured with tiny knots.

Measuring the length
I use brown paper to separate my layers on the rollers. When cutting it to fit, I was left with long thin strips. I marked these strips in 1 inch sections, and pinned them to my work as I went along.

Every time I advanced the warp, I moved the pins up or attached the next strip as needed. I started measuring after the tabby weave edge, so was only measuring the twill portion.
Tabby weave and hemstitch
After weaving 80 inches of 3×1 twill, I ended with another 8 rows of tabby weave and then finished with a hemstitch.

I still had some warp left on the loom, so I left a gap and wove a swatch of plain / tabby weave. Someday I’ll use it for a pocket or something.

Finishing
I washed it and hung it to dry on a rack. To keep from making a crease, I first rolled a towel around the bar on the rack, and then hung the scarf on the towel.
Finally I ironed it and trimmed the fringe to 3 inches on both ends. That would have been SO much easier with a rotary cutter, but I only had scissors available.

The finished scarf
I’m still learning to weave, so I know it’s not perfect, but I’m thrilled with the results! It’s light, soft, and drapes beautifully.
On the back side, where the warp is more prominent, you can see where I made a few mistakes in warping the loom. But they’re not very noticeable, and you can’t see them at all from the front.

My edges are also not as even as I would like, but I know that will come with time and practice. I love the way the colors transition, and how it looks when the scarf folds so both sides are showing. This is going to be my favorite, lightweight scarf for fall!

Rate this 3×1 Twill Scarf Project


3 Comments
Alexandra
What a great scarf, Pia! I love the woven texture, and the colors are perfect.
cindy tripp
Hi is there any help for people that haven’t learned to read graffs.yet..i would like to be able to do a diamond pattern,But not knowing how.Stops me.Is there a place to go that gives you the tre ddle numbers for a four shaft floor loom.If i get hooked again,there will be inspiration,Thanksfor your time
Pia Thadani
There might be, but if there is I haven’t found it 🙁 I’m a chart/graph person myself, so I haven’t really looked. I did find some great tutorials on reading drafts along the way though. If you’re interested in those I can try to find them again.