How a Pattern Happens – Testing
Have you ever wondered what goes into designing and writing a crochet pattern? It’s different for everyone, but I thought it would be fun to share my process with all of you. This is part 6 of a series of behind-the-scenes posts, where you can join me as I work through a new design.
This post contains affiliate links (click for more info). If you click one of these links and then make a purchase, I may be compensated. You get the same great prices, and you will be helping to support this site!
The sample is done, the pattern instructions are written, and now it’s time to have it tested. Testing is basically when someone works up the pattern, and tells the designer if they have any problems or suggestions. With the holidays coming, it’s unlikely that I’ll find a tester soon, so this part may take some time. Then again, maybe I’ll get lucky and find someone who has a lot of time off for the holidays.
Where to find a tester
I’ve been working on developing a pool of testers that I have enjoyed working with before. For now that’s a pretty small group, and they’re often too busy. Also it’s good to get a variety of opinions and not always rely on the same few people. So where do I find testers? Ravelry! Specifically, there is a forum on Ravelry called The Testing Pool, which is specifically set up for testing. Designers post requests, and available testers comment if they’re interested. There are other similar groups as well, but I’ve had good results with this one.
The testing request
It’s not always easy to find testers for free patterns, and posting a good request can make a big difference. It needs to be succinct so people will actually read it, but it also needs to have all the information a tester needs in order to know if they are interested.
A picture: this can be a WIP picture, but it does have to be appealing. If the project doesn’t look like much, no one will be interested. Timing is often an issue, but when I can, I try to post finished and nicely staged photos.

Materials: Before committing, testers usually want to know if they need to go shopping or if they can make the item from their stash. Yardage is important, particularly for larger projects. To determine the yardage, I weigh the yarn I have left over, and subtract that from what I started with. The yardage and weight per skein are both written on the label, so if I know the weight of yarn I used, I can calculate how many yards I used.
Deadline & Requirements: Knowing up front what is expected avoids a lot of confusion and frustration later. If I’m thinking 1 week, and the tester is thinking 1 month, that’s going to be a problem. If something is a concern, we can discuss it before starting the process.
Offer: What will the tester get in return for testing? Since these are free patterns, I offer a link in the pattern and a free copy of the pdf download version (normally available for a nominal fee).
Contact instructions: What should the tester do if they’re interested in testing? In my case I just need to know so I can send them a link in a private message.
Put it all together, and here’s the testing request I posted on Ravelry for this pattern.

For smaller or less demanding projects, some of these details can be skipped. My favorite testing request that I ever posted was for my Little Frogs pattern. I was in a silly mood at the time, and decided a poem would be fun:
Any yarn, any hook….
if you’ve got a minute to take a look,
let me know and I’ll send you a link
(these really are faster than you think).I’ll add your name, if you do
And I’ll even link it back to you.
I would also be happy
to send you the pdf for free!
The testing process
Every designer approaches this differently, and sometimes it’s different with different testers. If you work with someone frequently, you get to know each other’s styles and develop a bit of a shorthand.
Gauge: If gauge is important for the pattern, as with a fitted garment, then it’s very important that the tester does a gauge swatch. All their feedback on the rest of the pattern could be skewed if their gauge is off. If it’s someone new or if sizing issues come up, I may ask to see a picture of the swatch. I also want to know what hook the testers used – if they’re all using a larger hook to match the gauge, then I may just recommend a larger hook in the pattern.
Communication is key: If it’s been more than 3 or 4 days since I’ve had an update, I like to check in. I don’t just want to know if there are mistakes, I want to know if there are difficult spots, or parts that could be explained better. Do I need to link additional resources? Add any notes? Is it clear what I’m saying?
[the_ad id=”7845″]
Pictures: The pictures say it all. Were they able to successfully complete the pattern? Does it look good? If it’s a garment, modelled pictures are very helpful in making sure the fit is right, particularly in sizes other than the one I made.
Project pages: The testers pictures and notes aren’t just helpful to me – they’re helpful to others who may want to make the pattern too. I don’t usually insist on it, but I love when testers create a Ravelry project page for the test. If they do, I will usually feature their project photos on the pattern page.
Meanwhile…
While the testing is going on, I’m finishing up the pattern post. This means the final photography, schematics, charts, descriptions, tutorial links, etc. I also will create the pdf and get everything ready to post, so that as soon as the testing is done I can post the pattern. The hardest part for me is usually coming up with the name…any ideas for this one?


You May Also Like
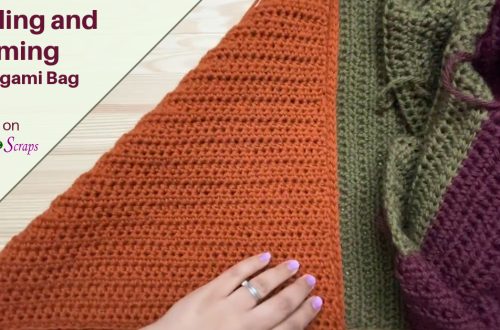
Folding and Seaming an Origami Bag

Stitch Makers Live Giveaway – Enter to win a free ticket!
