Corner to Corner Cables Crochet Pillow
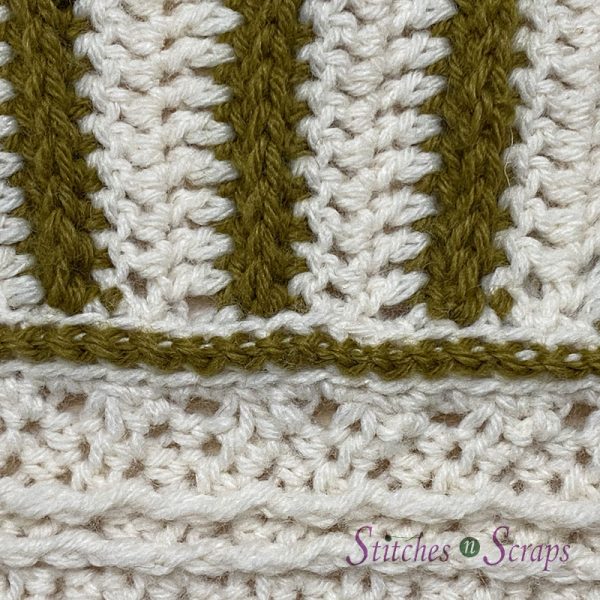
Take post stitch textures in new directions with the corner to corner cables crochet pillow! The front features a diagonal cable, while the back has raised, horizontal stripes. With an overlapping closure, the cover comes off easily for washing.

This content is protected by copyright. See this Terms of Use / Copyright page for more information.
This post contains sponsored content and/or affiliate links. If you click an affiliate link and make a purchase, I may get a commission.
CAL Central Cozy at Home CAL
I designed this Corner to Corner Cables crochet pillow for the CAL Central Cozy at Home CAL. Follow along on the CAL Central Crochet Facebook group for more cozy home decor patterns. Share your CAL pictures (we love to see all the projects) and don’t forget to enter the giveaway!

New to Cables?
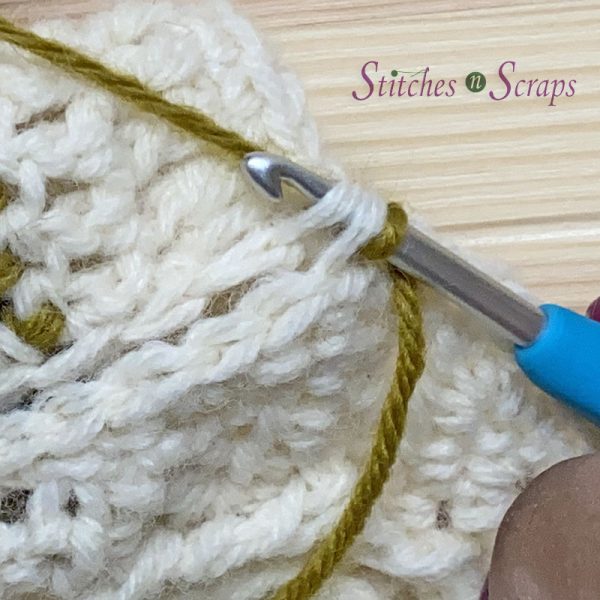
If you’re new to working post stitch cables, don’t be intimidated! Once you understand where to put your hook, they’re not as hard as you might think. In my Lunchtime Live videos, I did a 4 part series on how to work with post stitch cables. It covers all the skills you need for this pattern, and then some!

Please note that these are not full tutorial videos. Lunchtime Live is the equivalent of a video newsletter, and the demos are just a small portion at the end of each one. You may want to scroll forward a bit on each video, if you just want to see the demos.
From Corner to Corner
Most often, when people say “corner to corner” or “c2c”, they are talking about diagonal box stitch. But there are a surprising array of stitches that can be worked from corner to corner. In this pillow, working from corner to corner creates the striking diagonal cable, while building a post stitch frame around the edge at the same time.
Yarn Choices
Plain, solid color yarns tend to show off cables the best. Cables can sometimes get lost in yarns with lots of colors or unusual textures. For my pillow, I chose some Lion Brand Wool Ease yarn from my stash. My main color is #99 – Fisherman, and the accent color is #620 Aloe. Aloe has since been discontinued, but #087 Arrowwood would be fairly close.
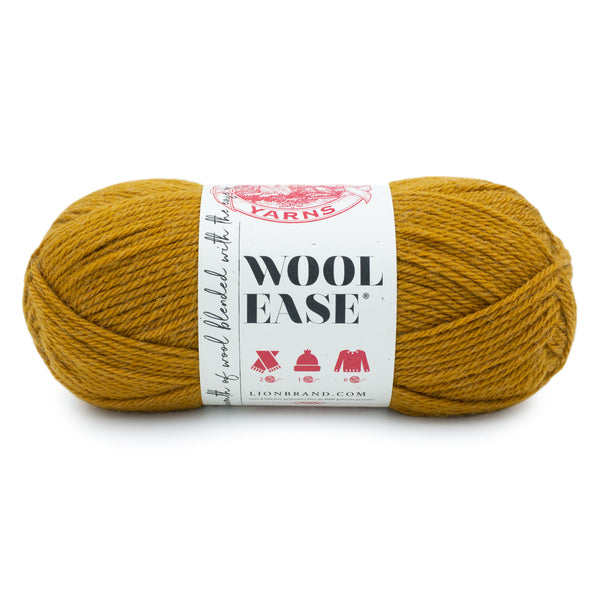
Wool-Ease® Yarn
from: Lion Brand
The only reason this pillow has an accent color at all is that I didn’t have enough yarn in the main color. Because the stripes are made with post stitches, they have added texture as well as color. You can easily make your pillow in all one color, and you’ll still get the textural striping effect on the back.


Materials
- Yarn: Worsted Weight Yarn:
- 400 yds off-white (A)
- 100 yds brown (B)
- Hook: Size H / 5 mm crochet hook or size needed to match gauge.
- Notions:
- Yarn Needle
- 4 stitch markers, safety pins, or scraps of yarn.
- 14″ square pillow form
Project Level
Intermediate: Post stitches, increases, decreases, crocheted seams.
Size
14 inches square
Gauge
13 dc x 9 rows = 4 inches after blocking.
Abbreviations used
(Pattern is written in US terms)
CB = Cable border (see Special Stitches)
ch = chain
ch-sp = chain space
dc = double crochet
fphdc = front post half double crochet
fptr = front post treble crochet
fptr 2tog = front post treble crochet 2 together (see Special Stitches)
hdc = half double crochet
LC = Left cross (see Special Stitches)
RS = right side
sc = single crochet
sl st = slip stitch
st(s) = stitch(es)
WS = wrong side
Special Stitches
Left cross (LC) – 5 sts
Sk next 2 fptrs on row below, (fptr around next fptr on row below) twice,
hdc in center st on current row,

working in front of fptrs just made, fptr around each of the skipped fptrs on row below.

Cable border (CB) – 3 sts
At beginning of row: Fptr around first fptr on row below, hdc in next st on current row, fptr around next fptr on row below.
At end of row: Fptr around next fptr on row below, hdc in next st on current row, fptr around last fptr on row below.

Front Post Treble 2 together (fptr 2tog) – 1 st
Work a fptr around both of the next 2 fptrs on the row below, as though they were one stitch, by inserting your hook under the post of both stitches together at the same time.

Instructions
Front

Increasing
When working a post stitch, remember to skip the stitch behind it. Each row will add 2 stitches to the total stitch count.
Row 1 (RS): With A, ch 2, 3 hdc in 2nd ch from hook. (3 sts)
Row 2: Ch 2, turn, 2 hdc in first st, hdc in next st, 2 hdc in last st. (5 sts)
Row 3: Ch 2, turn, 2 hdc in first st, fptr around the 2nd (center) st of row 1, hdc in next st on row 2, fptr around the same center st from row 1, 2 hdc in last st (7 sts)
After this row, all post stitches will be worked around post stitches from the row below.
All even rows from 4-30: Ch 2, turn, 2 hdc in first st, hdc in each st across to last st, 2 hdc in last st.
Row 5: Ch 2, turn, 2 hdc in first st, fptr around first fptr from row below, hdc in next st on current row, fptr in same first fptr on row below, hdc in next st on current row, fptr in last fptr on row below, hdc in next st on current row, fptr in same last fptr on row below, 2 hdc in last st on current row. (11 sts)
Row 7: Ch 2, turn, 2 hdc in first st, fptr around first fptr on row below, hdc in next st on current row, (fptr around next fptr on row below, hdc in next st on current row, fptr around same fptr on row below, hdc in next st on current row) twice, fptr around last fptr on row below, 2 hdc in last st on current row. (15 sts)
Row 9: Ch 2, turn, 2 hdc in first st, CB, hdc in each of next 2 sts on current row, fptr around next fptr on row below, fptr around same fptr on row below, hdc in next st on current row (place a stitch marker in this stitch to mark it as center), fptr around next fptr on row below, fptr around same fptr on row below, hdc around next 2 sts on current row, CB, 2 hdc in last st on current row. (19 sts)
Move the stitch marker up with every row, when you work into the marked stitch.
Row 11: Ch 2, turn, 2 hdc in first st, CB, hdc in each st on current row across to 2 sts before marked center st, LC, hdc in each st on current row across to last 4 sts, CB, 2 hdc in last st on current row. (23 sts)
Row 13: Ch 2, turn, 2 hdc in first st, CB, hdc in each st on current row to 2 sts before marked center st, (fptr around next fptr on row below) twice, hdc in center st on current row, (fptr around next fptr on row below) twice, hdc in each st on current row across to last 4 sts, CB, 2 hdc in last st on current row. (27 sts)
Row 15: Ch 2, turn, 2 hdc in first st, CB, hdc in each st on current row to 3 sts before marked center st, (fptr around next fptr on row below) twice, hdc in next st on current row, hdc in center st on current row, hdc in next st on current row, (fptr around next fptr on row below) twice, hdc in each st on current row across to last 4 sts, CB, 2 hdc in last st on current row. (31 sts)
Row 17: Repeat row 13. (35 sts)
Rows 19-26: Repeat rows 11-18 (53 sts)
Rows 27-31: Repeat rows 11-15 (63 sts)
Decreasing
All even rows from 32-64: Ch 2, turn, sk first st, hdc in each st across to last 2 sts, hdc2tog.
Row 33: Ch 2, turn, sk first st, hdc in each of next 2 sts, CB, hdc in each st on current row to 2 sts before marked center st, (fptr around next fptr on row below) twice, hdc in center st on current row, (fptr around next fptr on row below) twice, hdc in each st on current row across to last 6 sts, CB, hdc in next st on current row, hdc2tog in last 2 sts on current row. (59 sts)
Row 35: Ch 2, turn, sk first st, hdc in each of next 2 sts, CB, hdc in each st on current row across to 2 sts before marked center st, LC, hdc in each st on current row across to last 6 sts, CB, hdc in next st on current row, hdc2tog in last 2 sts on current row. (55 sts)
Row 37: Repeat row 33. (51 sts)
Row 39: Ch 2, turn, sk first st, hdc in each of next 2 sts, CB, hdc in each st on current row to 3 sts before marked center st, (fptr around next fptr on row below) twice, hdc in next st on current row, hdc in center st on current row, hdc in next st on current row, (fptr around next fptr on row below) twice, hdc in each st on current row across to last 6 sts, CB, hdc in next st on current row, hdc2tog in last 2 sts on current row. (47 sts)
Rows 41-47: Repeat row 33-39 (31 sts)
Rows 49-53: Repeat rows 33-37 (19 sts)
You can now remove the center stitch marker.
Row 55: Ch 2, turn, sk first st, hdc in each of next 2 sts, CB, fptr 2tog, hdc in each of next 3 sts on current row, fptr 2tog, CB, hdc in next st on current row, hdc2tog in last 2 sts on current row. (15 sts)
Row 57: Ch 2, turn, sk first st, hdc in each of next 2 sts, fptr around first fptr on row below, fptr 2tog, hdc in next st on current row, fptr 2tog, fptr around last fptr on row below, hdc in next st on current row, hdc2tog in last 2 sts on current row. (11 sts)
Row 59: Ch 2, turn, sk first st, hdc in each of next 2 sts, fptr 2tog, hdc in next st on current row, fptr 2tog, hdc in next st on current row, hdc2tog in last 2 sts on current row. (7 sts)
Row 61: Ch 2, turn, sk first st, hdc in next st, fptr 2tog, hdc2tog in last 2 sts on current row. (3 sts)
Row 62: Ch 2, turn, sk first st, hdc2tog in last 2 sts. Do not fasten off. (1 st)
Edging
With right side facing and working in sides of rows around edge: (ch 1, work 47 sc evenly spaced across to next corner) 4 times, join with sl st to starting ch 1. (188 sc, 4 ch-1 sps)
47 stitches per side works out to approximately 2 stitches every 3 rows.
Fasten off and weave in all ends.

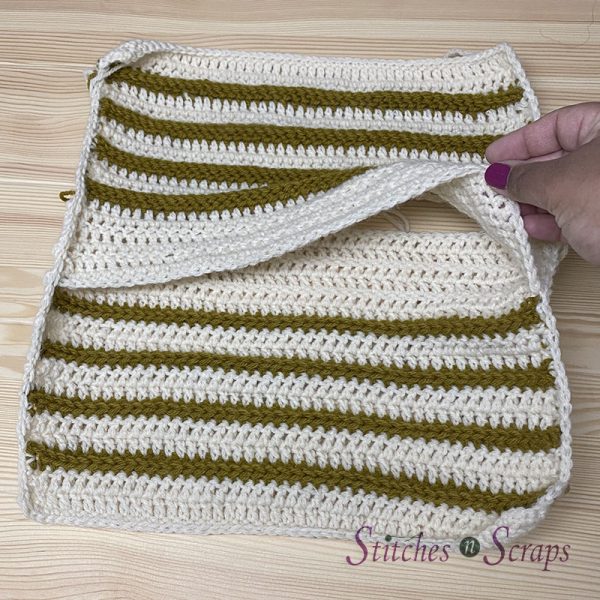
Back
Panel (make 2)
Each row has 45 sts. Starting ch 3 counts as dc throughout, including on first row. For a cleaner edge, try a chainless starting dc (csdc) instead of the ch-3. Do not fasten off when changing colors, you can carry the unused color up the side edge.
With A, ch 47.
Row 1 (RS): Dc in 4th ch from hook and in each ch across.
Row 2: Ch 3, turn, dc in each st across, changing to B at end of row.
Row 3: With B, ch 2, turn, hdc in each st across.
Row 4: Ch 2, turn, fphdc around each st across, changing to A at the end of the row.
Rows 5-6: Repeat row 2
Rows 7-16: Repeat rows 3-6 twice, then repeat rows 3-4 once more.
Place a marker at each end of row 16. Fasten off B.
Rows 17-22: Repeat row 2. Fasten off A.

Edging:
Place the two panels together with right sides up so that they form a square with the 6 rows of A overlapping in the center. The ends of row 22 on each piece should line up with the markers on the other piece. Pin in place if desired.

For Edging rnd, when working over the areas where the two panels overlap, work through both layers.
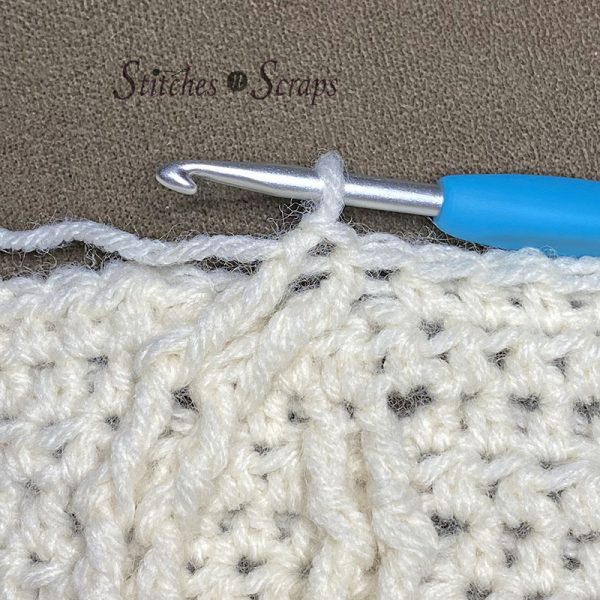
Edging Rnd (RS): Join A with a sl st in any corner of the square. (Ch 1, work 47 sts evenly spaced to next corner.) 4 times, join with sl st to starting ch-1. (188 sc, 4 ch-1 sps)
Fasten off and weave in all ends.
Seaming
Hold front and back with WRONG sides together.

Seam is worked on the RS of the fabric, through the wrong side loops only. This means the back loop of the piece facing you, and the front loop of the other piece. This will leave the unused loops visible on the RS of the fabric to form the decorative seam.
Working through both layers, Join B with sl st in any corner ch-1 sp. [(Ch 1, sl st in WS loops only of next st) across to next ch-1 sp, ch 1, sl st in ch-1 sp] 3 times, (ch 1, sl st in WS loops only of next st) across to starting ch-1 sp, join with sl st to first st.
Finishing:
Fasten off.
Remove any remaining markers.
Weave in remaining ends.
Insert pillow form through opening in back.

Rate this Corner to Corner Cables Pillow Pattern!
I hope you enjoyed this pillow pattern. A downloadable pdf of this pattern is available on Ravelry for a small fee. The fee for the pdf format is to offset the advertising revenue lost when you print or download the pattern rather than viewing it online.
Do you want the best of Stitches n Scraps delivered right to your inbox? Don’t miss a stitch – Subscribe now!


You May Also Like

Free Pattern – Stars and Stripes Washcloth

Halloween Crochet Pattern – Eyeball Earrings