Circular Weaving on a Wood Basket Base
Have you ever worked with a basket base? They’re meant for baskets, but you can use them in other ways too! Learn how to use one as a loom to create your own circular weaving design. It’s a great way to use up scraps of pretty yarns, ribbons, and more. Keep reading for a coupon code you can use on the basket bases!

This post contains sponsored content and/or affiliate links. If you click an affiliate link and make a purchase, I may get a commission.
Hooked For Life Coupon Code!
Hooked for Life gave me this wood basket base for free to review. She also gave me a special coupon code to share with you! Use the code stitchesnscraps for 10% off your total purchase at Hooked for Life. This discount code expires at 11:59 pm Eastern time on October 31st, 2019. As always, please make sure the discount shows in your cart before you complete your purchase.
Use this code for the basket bases in this project, or for any of the other wonderful items from the Hooked for Life shop!
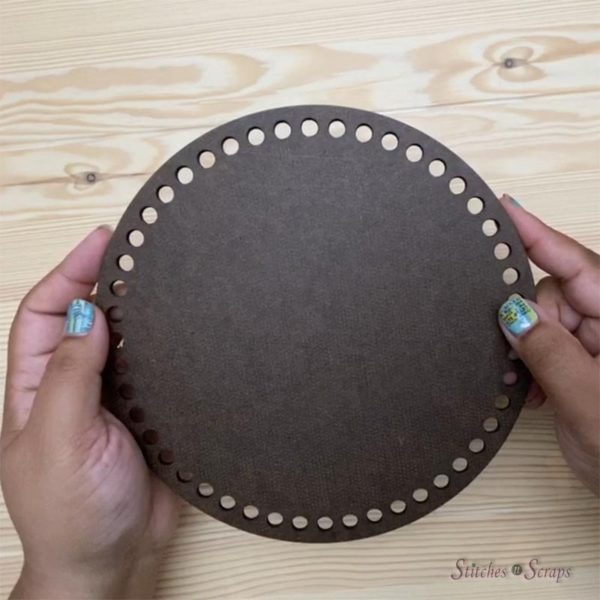
Basket Bases
These basket bases come in a metal finish or a wood finish and both are paintable. The dark brown color of the wood one is pretty though, so I left it unpainted. Both base options are sturdy and a little bit heavy. They are 8 inches in diameter, with 48 holes punched around the edge. The holes on mine were very smooth and didn’t snag on the yarn at all.
I knew a few others who were reviewing it would be using it as intended – as the base of a basket. As much as I love baskets, I wanted to do something different. The area where I record video has a bare wall that’s desperately in need of decoration, so I decided to make a wall hanging instead.
Circular Weaving
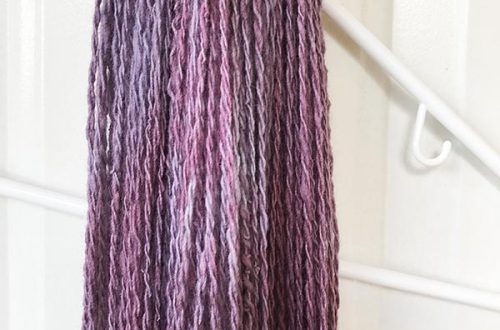
I recently learned circular weaving on an embroidery hoop and really enjoyed it. It’s a great way to show off small amounts of special yarns that you just don’t want to throw away. This base was much easier to use than the embroidery hoop, because the pre-punched holes spaced the warp yarns evenly and held them firmly in place!
As I’m fairly new to weaving myself, I only used very basic weaving techniques for this tutorial. With the same basic concept, more advanced weavers can mix in other stitches and techniques as well.
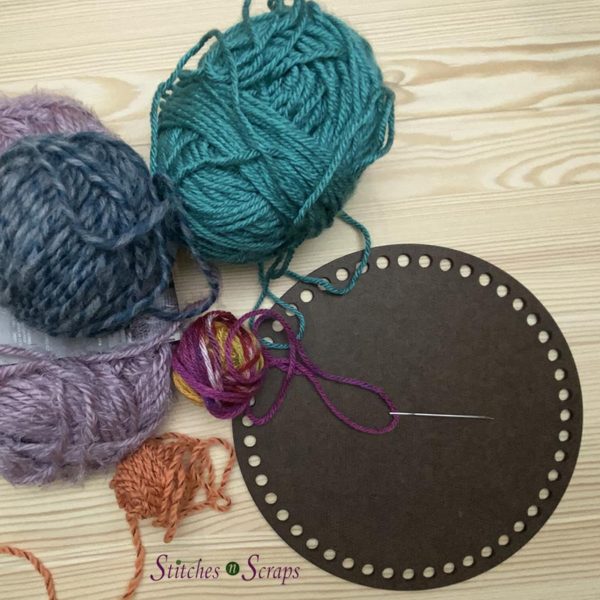
Materials:
For this project you will need:
- Circular basket base (wood or aluminum)
- 12 yds of a strong thread or yarn for the warp
- Scraps of yarn, fabric, or other soft material for the weft
- Needle that your weft material will fit into (optional for larger materials)
- Yarn for edging
- Crochet hook in a size that is comfortable for you with your chosen edging yarn.
Warping the Loom
The first step in any weaving is to warp the loom. The warp is the series of threads or yarns that you will weave into. Start by tying one end of the warp thread to any hole. Then, using a needle, bring the yarn over the opposite edge and up through the hole directly opposite where you started.

Now, skip over one hole after the starting position, and bring the yarn over and up through the next one. Cross over to the opposite edge and bring the yarn up in the opposite hole. Continue in this manner, working back and forth across the middle, until you are at the last hole.
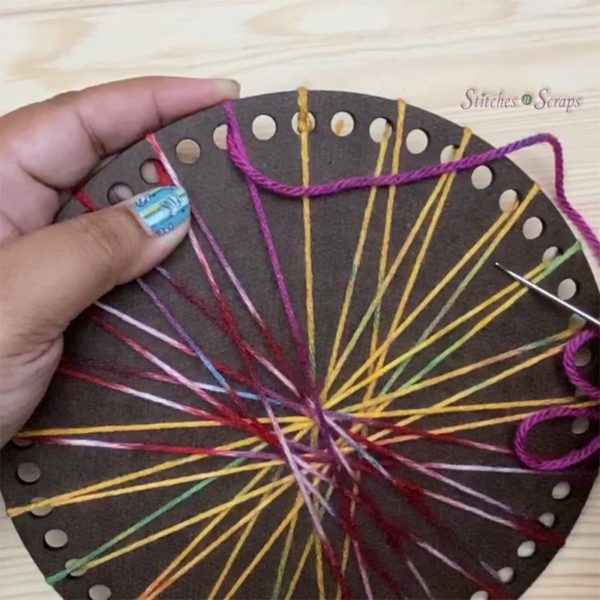
You should now have an open, diamond like shape in the center. Insert your needle under all the threads to pull them all together, then bring it back up to the starting point. You can wrap the yarn around the center an additional time if you prefer.

Bring the needle down at the starting hole, tie the two ends together, and trim any excess.
Weaving the Weft
The weft is the threads you are weaving onto the warp. There are 2 warp threads coming out of each hole, and you can use them together, or separate them.
To start a new weft yarn, weave backwards under a few threads to lock them in place, then continue weaving as normal. For a simple weave, go over one thread, under the next, over the next, and so on.

On the next round, alternate the placement of your weft thread. If you went under a warp before, go over it now. If you went over it before, go under it now. Because we have an even number of warp threads, you will need to make an adjustment at the beginning of each round to make this work. If you are using pairs of warp threads together, split one pair at the beginning. This will give you one extra thread to work with, so you will have an odd number.
If you are working the threads individually, you can go under or over 2 threads together instead, just at the start of each round. To finish a piece of yarn, weave backwards for a few stitches and/or weave it in through your work and trim it.
Lock Stitch
On the very last round, I used a decorative locking stitch. Make a loop with your working yarn, insert the needle under the next warp thread, then bring it back through the loop you made. This will create a small knot around that warp thread.

Edging
Finish the piece with a single crochet edging. Use whatever hook you are most comfortable with for the yarn you choose. With worsted weight yarn and starting in any empty hole, work 2 sc in each hole around. In the holes that have warp threads, work 1 sc on one side of the thread, and the other sc on the other side. If you want to use a chunkier or lighter yarn, you can work fewer or more stitches as needed.

Join with a slip stitch, fasten off, and tie the starting and ending tails together to make a hanging loop.
Circular Weaving Video Tutorial
Rate this Circular Weaving Tutorial!