How a Pattern Happens – Making the Sample
Have you ever wondered what goes into designing a crochet pattern? It’s different for everyone, but I thought it would be fun to share my process with all of you. This is part 4 of a series of behind-the-scenes posts, where you can join me as I work through a new design.
This post contains affiliate links (click for more info). If you click one of these links and then make a purchase, I may be compensated. You get the same great prices, and you will be helping to support this site!
Now that I have all the math worked out, it’s time to start crocheting the sample piece. I did the math on 11/19, and started crocheting that same evening. It’s a slower process, because I also have to work out some of the details as I go.
The basic structure
I could work the vest all the way across in one piece, or I can make it in 3 pieces, one back and 2 fronts, and seam them together. For most garments, I prefer seams. They add structure and help it hold it’s shape – particularly in this case where the front will be left open.The back piece is a good place to start, because the neckline is less complicated. I also want to work from bottom up, because I like the way the stitch texture looks that way.
While working on the previous steps, I doodled ideas for the details. I have decided on patch pockets, which means they can be dealt with at the end. I’ve also decided on a 5 row, sc border. This turns out to be about the same height as 4 rows of the hhdc stitch, so when counting rows to match my math from earlier, I will count the border as 4 rows.

Waist and bust shaping
I’ve learned (through mistakes) that when the front is open, it needs some overlap in order for the sides to meet nicely. If you make each side exactly half the size of the back, it won’t close well. I’m not adding buttons or a zipper, so I have decided to add about 3 inches extra on each side. I also found that, because of the row counts and number of increases, adding a couple of rows before the waist and taking one away after made the increases work out more evenly. Raising the waist by 1 or 2 rows isn’t going to negatively affect the shape, and may actually be more flattering anyway.
[the_ad id=”7845″]
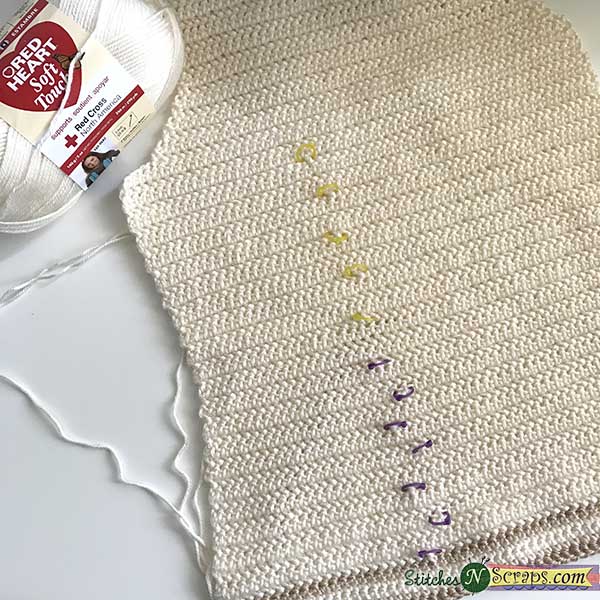
To make the back nice and smooth, I put all the increases and decreases at the side seam. If I do the same on the front though, the vest may droop at the seams. Instead, I move the front shaping in several stitches, closer to the actual bust. I’ve made a note of all these changes, sometimes just in the form of stitch and row counts, so I can remember what I did. If I forget, I can always reference the actual sample. Using color coded stitch markers to mark the increases and decreases helps too!
Armhole and neckline shaping
The amount of decrease for the armhole can be calculated (bust measurement minus cross-back measurement). How to shape it though is largely trial and error. I start by drawing what I’m thinking, then I try it out. At first I work over just 15-20 stitches at the armhole edge, to make sure I like the shape. Once I have it right, I rip it out and continue working all the way across.

I have yet to find a size chart I like that specifies how wide a neck opening should be. So I lay the piece flat on the table, place a nicely fitting shirt in an appropriate size (or as close as I can get) on top of it, and mark where the neckline falls. This gives me a general starting point, from which I use the most scientific method I know….I fudge it till it looks good. Drawing it out can help here too.

The front neckline depth is another measurement that’s hard to determine, so I like to work backwards a bit. I know how many stitches I need for the shoulders based on the back, so that tells me how many decrease I’m going to need to make. To figure out where to start the neckline, I just choose a number of rows that allows me to space those decreases the way I want. In this case, I’ve decided on decreasing every row for a simply shaped, V neck.
It’s been a busy few weeks with limited crochet time and lots of other commitments so I’ve only just finished working up all the main pieces (as of 12/11) and have them blocking now. I’ll be working on the pockets, seaming and finishing in another day or two. Meanwhile, I’ve started writing up the pattern, and I’ll tell you about that next time!


4 Comments
NOWAL
I have yet to make a sweater. Next spring, I want it to be my one and only probject. I know the style design I want, it’s just figuring out how to make it which would be my first time ever.
Pia Thadani
They’re actually not all that hard, just take it section by section and it will all come together 🙂
Rebeckah
What an excellent post! Loved all the tips and drawings. This may come in handy if ever I decide to crochet people garments too. Thank you!
Pia Thadani
Thanks! I hope it helps you 🙂