Edging – Working Evenly Across/Around
Many edgings start by working evenly across or around the edge of your project. To make this edge nice and even, you need to work the right number of stitches, and space them evenly. If your stitches are too close together, you’ll end up with a ruffled effect. If they are too far apart, it will pucker. When using a pattern, it should tell you how many stitches to work. It may even give you an idea of how to space them. If you’re doing your own thing though, or if you’ve made any adjustments to the pattern, you may need to calculate this for yourself.
Calculating the number of stitches
For squares, this is easy, because all the sides are the same length.The number of stitches you have across the last row should be the same number of stitches along each edge. For other shapes, you can calculate the number of stitches using your stitch gauge. Multiply the length of the edge by the number of stitches per inch in your gauge swatch. If you didn’t swatch, you may be able to measure your gauge from a section of your finished project. For example, if my piece has a 5 inch long edge, and my gauge is 4 stitches per inch, I would work 20 stitches along this edge.

You will need to add a couple of extra stitches in the corners to keep their shape. Using a chain space between the corner stitches will give you a sharper corner, and just using more stitches will give you a rounder corner. As a general rule of thumb, I tend to work 3 stitches in the corner if it’s single crochet, and 5 if it’s double crochet. If it’s half double, I might do 3, 4, or 5, depending on the particular yarn and project.

Spacing the stitches evenly
Now that we know how many stitches to work, we need to space them evenly. For a small number of stitches, you can probably eyeball it pretty well. But what if you’re working 400 stitches across the edge of a shawl? It’s awful to come to the end of that edge and have to start over because you’ve only worked 395 stitches. Long edges like this can easily be broken up into smaller sections, using stitch markers.
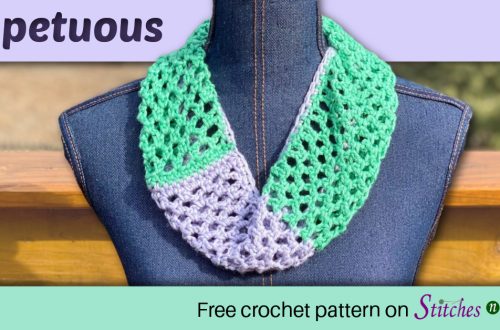
If we need to work (for example) 200 stitches over 50 inches, that’s about 20 stitches every 5 inches. Using stitch markers, we can mark off 5 inch sections. Now we can just manage 20 stitches at a time. The piece in the picture below already has an edging on it, but shows how the stitch markers could be used to divide it up into shorter sections.

More complex edges
So what if it’s not a straight edge? What if it’s a curved neckline, or armhole? Those are harder to measure accurately with a tape measure, but there’s a little trick. Find a piece of scrap yarn or string, preferably something not too stretchy. Crochet thread works well for this. Now lay your work flat, run the string along the entire edge, and cut it at the end. You now have a piece of string the same length as your edge, so you can just measure that string.

There are a few other adjustments you may need to make. As we discussed earlier, add a few extra stitches when turning a corner. Similarly, if you have a sharp, V-shaped, inside corner (like the bottom of a V neck), work a decrease or skip a stitch at the center of the V, to help keep the shape.
 Finally, be sure to consider how many stitches you will need for the rest of the edging. For example, if your calculations tell you to work 200 stitches, but the next row requires a multiple of 3 stitches, then work 201 stitches instead. No matter how simple or complicated your edging is going to be, a nice even foundation can make a big difference. Taking a little extra care at this step may save you from having to rip out a lot of work later!


7 Comments
Lucy DeLoreto
This will come in handy! Thank you for putting it together!
L DeLo
This will come in handy! Thank you for putting it together!
Carmen Cartagena
What happens when you have an odd number. You have a 35 inch edge (on each side) and you have to crochet 270 stitches on each edge. How can you do this evenly? Thank you in advance.
Pia Thadani
I would probably divide it up into roughly 3.5 inch sections – there should be 10 of those. Then I’d put 27 stitches in each section. It doesn’t have to be mathematically perfect, just as close as you can get it so the overall effect is as even as possible.
Carmen Cartagena
Thank you sooooo much. I will try it. Have a blessed day Pia.
Elise
Hi. If you have a rather low neck, how can you get the best decreases to get the neck lying flat? Thank you
Pia Thadani
That depends more on the shape of the neckline than the depth of it. So general rule of thumb – decrease where there is a curve. The shallower the curve (the curve at that spot, not the depth of the neckline), the fewer decreases you need. The deeper the curve the more decreases you need. If it curves smoothly over a wide area, spread the increases out evenly over that area. If it curves more sharply in one spot, put your decreases there. So like a square shaped neck, you only need decreases at the corner. A smooth, evenly curved, circular shaped neckline, spread some decreases evenly around. A crew neck where it drops sharply at the shoulder and then smooths out – put your decreases in the curved part, not the straight drop.
It may take some trial and error to get a shape you like. One thing you can do to get a better feel for it is sketch the curve shape on paper and then try to draw sc stitches (plus signs) evenly spaced on top of that curve, so that the bottoms of the sc touch the curve at even intervals. See where the tops of the sc bunch up – that’s where you need decreases.